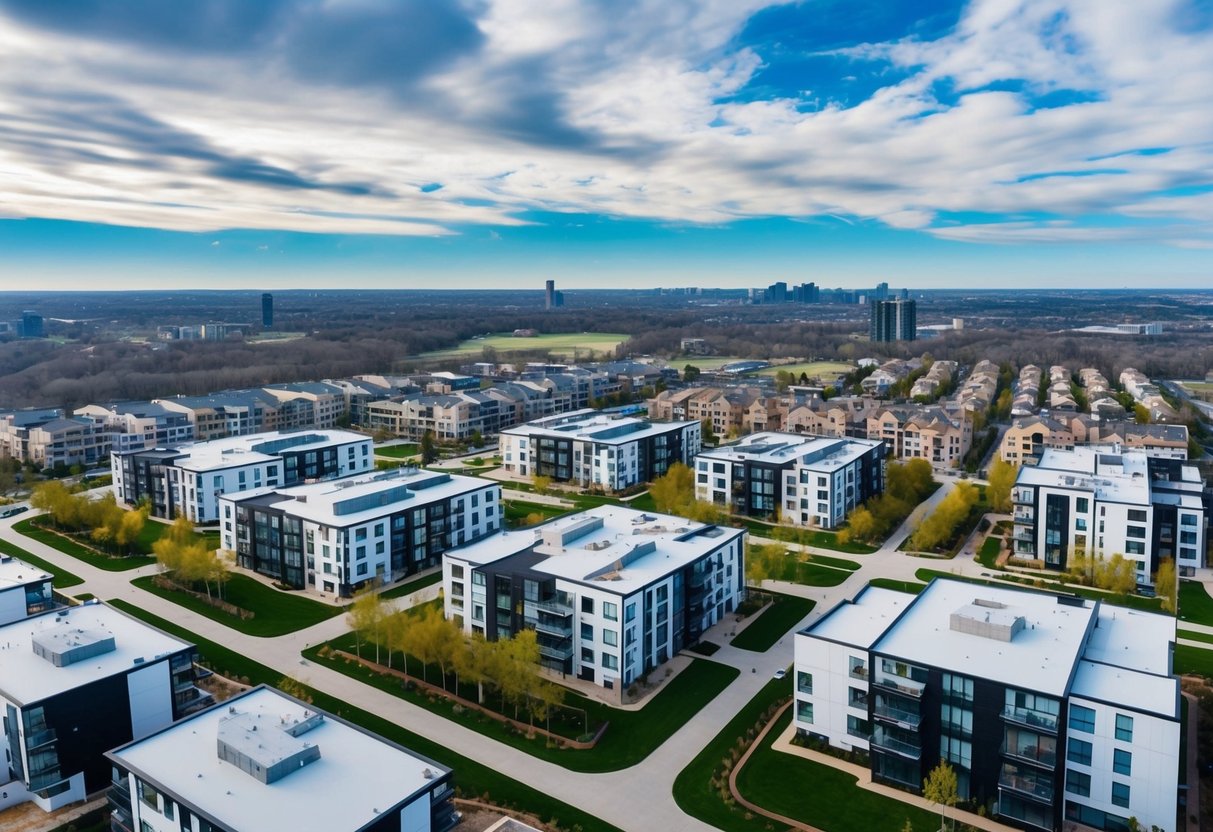
Category: Real Estate Photography

  • Checklist Before Real Estate Photographer Arrives: Pre-Shoot Preparations for a Successful Shoot

    Checklist Before Real Estate Photographer Arrives: Pre-Shoot Preparations for a Successful Shoot

    Getting your home ready for real estate photos is a crucial step in selling your property. Professional photos can make a big difference in attracting potential buyers. We’ll share some tips to help you prepare for the photographer’s arrival.

    A camera bag, tripod, and checklist lay on a table near a window. Sunlight streams in, casting shadows on the items

    A well-prepared home can lead to better photos, more interest from buyers, and potentially a quicker sale. It’s important to clean, declutter, and stage your home before the photographer shows up. This includes both the interior and exterior of your property.

    Preparing your home for real estate photography involves more than just tidying up. We’ll cover key areas to focus on, from curb appeal to room staging. By following our advice, you’ll be ready to showcase your home in its best light.

    Key Takeaways

    • Clean, declutter, and stage your home before the photographer arrives
    • Focus on both interior and exterior preparation
    • Follow a pre-shoot checklist to ensure nothing is overlooked

    Preparing the Home for Sale

    Getting a home ready for sale involves key steps to make it appealing to buyers. We’ll cover the initial tasks and staging practices that can help showcase your property in the best light.

    Initial Steps

    Cleaning is crucial when preparing a home for sale. We recommend deep cleaning every room, including floors, windows, and light fixtures. Pay special attention to kitchens and bathrooms.

    Decluttering is equally important. Remove personal items and excess furniture to make spaces feel larger. This helps potential buyers imagine themselves living in the home.

    Organize closets and storage areas. Buyers often look in these spaces, so neat, tidy storage can be a big plus.

    Make necessary repairs. Fix leaky faucets, patch holes in walls, and touch up paint where needed. These small details can make a big difference in buyer perception.

    Staging Best Practices

    Neutral colors work best for walls and decor. They create a blank canvas for buyers to envision their own style.

    Maximize natural light by opening curtains and blinds. Good lighting makes rooms feel more spacious and inviting.

    Add some decorative elements:

    • Fresh flowers in vases
    • A bowl of fruit in the kitchen
    • Decorative pillows on sofas and beds

    Keep bedrooms simple and inviting. Make beds with crisp linens and remove personal items from nightstands.

    Consider hiring a professional stager. They can bring in furniture and decor that highlights your home’s best features.

    Remember, the goal is to create a welcoming atmosphere that appeals to a wide range of buyers. A well-prepared home can lead to faster sales and better offers.

    Exterior Preparation

    A real estate photographer's exterior preparation checklist: tripod, camera, lens, cleaning supplies, and lighting equipment

    Getting the outside of a home ready for photos is key. We’ll cover how to spruce up the yard and make outdoor spaces look their best.

    Landscaping and Driveway

    A tidy yard makes a great first impression. Mow and trim the grass at least 24 hours before the shoot. Pull weeds and add fresh mulch to garden beds.

    Remove cars from the driveway. Hide trash cans, garden hoses, and lawn tools in the garage. Sweep the driveway and walkways.

    Make sure sprinklers are off on photo day to avoid puddles. Rake leaves and clean up any pet waste in the yard.

    Outdoor Living Areas

    Clean and arrange patio furniture neatly. Open umbrellas to show off outdoor living spaces. Remove pool covers and skim the water’s surface.

    Put away kids’ toys, gardening supplies, and BBQ tools. Make sure the grill is clean if it will be in photos.

    Sweep decks and patios. Wipe down outdoor tables and chairs. Set the scene with a few colorful potted plants or fresh flowers.

    Turn on landscape lighting or pool lights for twilight shots. These touches help buyers picture themselves enjoying the outdoor spaces.

    Interior Preparation

    A desk with camera, tripod, and lighting equipment set up in a tidy, well-lit room. Checklist and camera settings displayed on a computer screen

    Getting the inside of a home ready for photos is crucial. We’ll cover key steps for living spaces, kitchens, and bathrooms to ensure stunning interior shots.

    Living Spaces

    We start with living areas. Open all curtains and blinds to let in natural light. Turn on lamps and overhead lights to brighten rooms. Remove clutter from surfaces like coffee tables and shelves.

    Fluff pillows and straighten throw blankets on sofas and chairs. Vacuum carpets and rugs. Wipe down mirrors to remove smudges.

    Hide cords and electronics when possible. A few decorative items can add warmth, but keep it minimal. Make sure artwork is straight on walls.

    Kitchen and Bathrooms

    In the kitchen, clear countertops of small appliances and clutter. Leave out a few decorative items like a fruit bowl or vase of flowers. Clean the sink and make sure it’s empty.

    For bathrooms, remove personal items from counters. Hang fresh towels neatly. Close toilet lids. Clean mirrors and shower doors thoroughly.

    In both spaces, wipe down all surfaces so they shine. Hide trash cans and cleaning supplies. Ensure window coverings are even. Turn on all lights, including under-cabinet lighting in kitchens.

    Pre-Photoshoot Checklist

    A well-prepared home is key for stunning real estate photos. We’ll cover essential steps to take before the photographer arrives, focusing on final touches and managing personal belongings.

    Final Touches Before Arrival

    Start by decluttering every room. Remove unnecessary furniture to make spaces look larger. Clean thoroughly, paying extra attention to windows and mirrors.

    Make beds neatly and fluff pillows. Close toilet lids and put away toiletries. Ensure all light bulbs work and turn on lights for a bright atmosphere.

    Clear kitchen counters of appliances and personal items. Hide trash cans and laundry baskets.

    Outside, tidy up the yard. Put away garden hoses, toys, and remove vehicles from the driveway. Mow the lawn and trim bushes for curb appeal.

    Handling Personal Items

    Remove family photos, calendars, and anything with personal information. These can be distracting in photos and pose privacy concerns.

    Store away visible clutter like shoes, books, and magazines. Clear refrigerator doors of magnets and notes.

    Hide pet items such as food bowls and toys. If possible, arrange for pets to be out of the house during the photoshoot.

    Turn off computer screens and put away laptops. Remove any valuable or sentimental items from view.

    On the Day of the Photoshoot

    Real estate photographer's checklist on a table before a photoshoot

    Getting ready for the real estate photographer‘s arrival is crucial. We’ll cover key steps to prepare your home and handle any weather issues that may arise.

    Preparing for the Photographer

    We recommend doing a final walkthrough before the real estate photographer arrives. Open all curtains and blinds to let in natural light. Turn on all lights, including lamps and under-cabinet lighting. This helps create a bright, welcoming atmosphere.

    Clean windows and mirrors one last time to remove any streaks. Put away personal items like toothbrushes, soap dispensers, and trash cans. Fluff pillows and straighten bedspreads.

    Make sure pets are secured and pet items are out of sight. Move cars from the driveway. Mow the lawn if needed and put away garden tools.

    Adjusting to Weather Conditions

    Weather can impact a real estate photoshoot. On sunny days, we open all blinds to let in natural light. For overcast weather, we turn on more interior lights to brighten spaces.

    If it’s raining, we focus on indoor shots first. We may need to reschedule exterior photos for a clearer day. Strong winds can be tricky for outdoor shots, so we may adjust the schedule.

    In extreme heat or cold, we work quickly to maintain comfort. We keep doors closed to regulate temperature. Good planning helps us adapt to any weather while still capturing great images of your home.

    After the Photoshoot

    A cluttered desk with camera gear, checklist, and keys. Bright window light illuminates the organized chaos

    Once the photographer leaves, your work isn’t done. The photos need to be reviewed and used effectively to market your listing. Let’s look at the next steps.

    Reviewing the Photos

    We’ll get the photos from our photographer soon after the shoot. It’s crucial to look them over carefully. We check that each room is shown in its best light. We make sure there are no issues like blurry images or odd angles.

    If something looks off, we don’t hesitate to ask for a reshoot of that area. The photos need to accurately represent the property. We also pick out the best shots to use as the main listing images.

    Good photos can make a big difference in attracting potential buyers. That’s why we take this step seriously.

    Utilizing Photos for Marketing

    With great photos in hand, we’re ready to start marketing. We use these images across many platforms. They go on the MLS listing, our website, and social media.

    We might create virtual tours or slideshows with the photos. These can give buyers a good feel for the property layout.

    High-quality photos help listings stand out. They can lead to more inquiries and faster sales. We make sure to highlight the home’s best features in our marketing materials.

    Professional real estate photos are a powerful tool. We use them to tell a story about the property and attract the right buyers.

    Frequently Asked Questions

    Real estate photography requires careful planning and preparation. We’ve compiled answers to common questions about checklists, home prep, equipment, and camera settings.

    What should be included in a pre-shoot checklist for real estate photography?

    A thorough pre-shoot checklist helps ensure great photos. It should cover exterior preparation, including removing vehicles and hiding trash cans. Inside, decluttering and cleaning are key.

    We recommend checking lighting, removing personal items, and arranging furniture. The checklist should also include equipment checks and battery charging.

    How can I prepare my home for professional real estate photographs?

    To get your home photo-ready, start by deep cleaning and decluttering. Remove personal photos and valuables. Open curtains to let in natural light.

    Make beds and fluff pillows. Clear countertops in kitchens and bathrooms. Mow the lawn and tidy up outdoor spaces. Hide pet items and children’s toys.

    Are there any preparation guidelines to follow before the real estate photographer arrives?

    Yes, there are important steps to take before the photographer arrives. Complete all cleaning and staging in advance. Turn on all lights and open window coverings.

    Put away small appliances and personal care items. Make sure pets are secured. Have a list of key features you want highlighted in the photos.

    What equipment is essential for a real estate photographer to bring to a shoot?

    Essential equipment includes a DSLR or mirrorless camera with wide-angle lens. A sturdy tripod is crucial for steady shots. Bring extra batteries and memory cards.

    We also recommend bringing a flash unit, light stands, and remote triggers. A laptop for tethered shooting can be helpful. Don’t forget lens cleaning supplies.

    Is it customary to give a gratuity to the real estate photographer after the shoot?

    Tipping real estate photographers isn’t common practice. They typically set their rates to cover their time and expertise. However, if you feel the service was exceptional, a tip is appreciated.

    A positive review or referral is often more valuable than a monetary tip. If you want to show extra appreciation, consider recommending them to others.

    What are the best camera settings for capturing high-quality real estate photos?

    For sharp real estate photos, use a small aperture like f/8 or f/11. This ensures a wide depth of field. Set ISO as low as possible, usually 100-400, to minimize noise.

    Shutter speed depends on available light, but we aim for at least 1/60th of a second to avoid blur. Use a tripod for longer exposures. White balance should match the lighting conditions.

  • 6 Creative Marketing Ideas for Real Estate Photography 2024

    6 Creative Marketing Ideas for Real Estate Photography 2024

    Overview

    Offer a free photoshoot

    When we’re new to the real estate photography market, it’s crucial to show our potential clients what we can offer. Real estate agents and home sellers need to see proof of our skills. Offering a free photoshoot can be a great way to persuade them. By showing high-quality images from a free shoot, we prove that investing in our services is worthwhile. It’s essential, though, to maintain the same quality in these free images as we would in any paid work.

    Discuss your presentation over lunch or snacks

    Presenting our work to real estate agents over a casual lunch or snack meeting can be very effective. This allows them to take their time evaluating our photos. We can show a slide show or print out examples of our professional photos compared to standard ones taken with smartphones. The relaxed setting of a meal can make agents more open to considering our services, helping us stand out in their minds.

    Give first-time clients huge discounts

    Offering significant discounts to first-time clients can attract new business. By providing our best package at a lower price, we allow clients to experience the full extent of our services without a large initial investment. This strategy gives potential long-term clients a compelling reason to try us out and discover our value.

    Make your house a “first subject”

    Using our own home as a subject for real estate photography can be a practical way to build a portfolio. We have complete control over the environment and can take time to perfect our shots. Moreover, creating “before and after” photos in a familiar setting can help us refine our skills and create compelling visuals for potential clients.

    Go to open houses and build your network

    Networking is vital in the real estate industry. Attending open houses allows us to meet and build relationships with real estate agents and potential clients. In a transaction-based field, maintaining good rapport ensures repeat business. By being a consistent presence at these events, we can keep in touch with our clients and stay on their radar for future needs.

    Look for high-end listings online with bad photos

    We can find high-end property listings online that have poor quality photos and offer our services to improve their visual appeal. By highlighting the differences between bad photos and our professional-quality images, we can show clients the benefits of hiring a skilled photographer. This approach not only helps in building our portfolio but also in raising awareness about the importance of high-quality real estate photography.

    Frequently Asked Questions

    What innovative strategies can be implemented for effective real estate marketing in 2024?

    In 2024, we can embrace several innovative strategies to elevate our real estate marketing. These include using virtual reality (VR) and augmented reality (AR) to offer virtual tours, which allow potential buyers to explore properties from the comfort of their homes. We should also consider using drone photography for high-quality aerial shots of properties and neighborhoods. Implementing AI-driven chatbots on our websites can help answer client queries instantly, improving user experience.

    How can social media be leveraged to enhance real estate marketing efforts?

    Leveraging social media effectively means creating engaging content that showcases properties in the best light. On platforms like Instagram and Facebook, we can use high-quality images and videos to highlight key features of our listings. It’s also beneficial to host live virtual tours on social media, allowing real-time questions from potential buyers. Including client testimonials and success stories on our social media pages can build trust and showcase our credibility.

    What content should be included in a real estate marketing plan to attract potential sellers?

    To attract potential sellers, our marketing plan should include:

    • Testimonials: Showcase satisfied client testimonials.
    • Case Studies: Present successful case studies of sold properties.
    • Neighborhood Guides: Provide detailed guides about the areas where we list properties.
    • Market Analysis: Offer regular updates on market trends and insights.
    • FAQ Section: Answer common queries about selling homes.

    Which marketing materials are essential for a successful real estate campaign?

    Essential marketing materials for a successful campaign include:

    • High-Quality Photos: Professional images of the listed properties.
    • Virtual Tours: Interactive 3D tours or VR showcases.
    • Brochures and Flyers: Printed materials with detailed property information.
    • Email Newsletters: Regular updates sent to our client base.
    • Business Cards: Personal cards with our contact details.

    How can luxury property marketing differ from standard real estate promotion?

    Luxury property marketing often requires a more sophisticated approach. This might include:

    • Exclusive Events: Hosting private open houses for high-end buyers.
    • High-End Photography: Using professional photographers and videographers to highlight the property’s features.
    • Custom Websites: Creating bespoke websites for luxury listings.
    • Print Marketing: Investing in high-quality brochures and magazines.
    • International Outreach: Marketing properties to international buyers.

    What are best practices for self-promotion for new realtors entering the market?

    For new realtors, effective self-promotion can be achieved through the following best practices:

    • Personal Branding: Building a strong personal brand on social media and professional networks.
    • Networking: Attending industry events and joining local real estate organizations.
    • Content Creation: Writing blog posts or creating videos that offer valuable insights into the real estate market.
    • Client Interaction: Providing excellent customer service to build referrals and positive reviews.
    • Consistency: Regularly updating our online profiles and staying active in our community.


    Editor’s note: This post was originally published in September 2020 and has been updated for comprehensiveness.

  • What is a Hero Shot in Real Estate Photography: Key Features and Benefits

    What is a Hero Shot in Real Estate Photography: Key Features and Benefits

    A hero shot in real estate photography is a pivotal tool used to capture the essence of a property and draw in potential buyers. This key photo showcases the best features of a home, making it more appealing to viewers from the first glance. With perfectly composed lighting, angles, and staging, the hero shot is designed to create an unforgettable first impression.

    Our approach to capturing a hero shot includes careful consideration of the property’s unique elements and arranging every detail to highlight its strengths. From straightening cushions and chairs to ensuring even lighting, every small adjustment contributes to a polished and inviting image.

    In real estate marketing, a compelling hero shot can be the difference between a property that stands out and one that is easily overlooked. Our goal is to make every hero shot a powerful tool that invites buyers to explore further and envision themselves in the space.

    Key Takeaways

    • A hero shot is vital for capturing a property’s best features.
    • Effective hero shots require perfect lighting and composition.
    • The right hero shot can make a property stand out to buyers.

    Understanding the Hero Shot

    Hero shots in real estate photography are key to catching potential buyers’ attention. They help in creating a strong first impression and significantly influence engagement and value perception in a competitive market.

    Definition and Importance

    A hero shot is the primary image used to showcase a property. It captures the essence and most alluring features of the home.

    This photo is the first thing potential buyers see, usually serving as the cover of a virtual property flyer or listing. It should be eye-catching and evoke emotions like warmth, comfort, or excitement.

    Effective hero shots can make a property stand out and increase interest. They play a crucial role in real estate marketing, as buyers often base their initial interest on this single image.

    Role in Real Estate Marketing

    Hero shots are vital in real estate marketing. They act as the hook that draws potential buyers to the property listing.

    In marketing materials, a well-composed hero shot highlights the property’s unique appeal, attracting more engagement. Typically, the hero shot is an exterior photo taken in the best possible lighting.

    Each detail, from the angle to the composition, adds to the perceived value of the property. By ensuring all elements are perfectly aligned, we can appeal to buyers’ preferences and create a lasting impression. This single image can significantly influence a buyer’s decision, highlighting the importance of getting it right.

    Technical Aspects of Hero Shots

    Hero shots in real estate photography capture a property’s best features with optimal lighting and composition. Mastering these technical elements can make a property’s listing stand out.

    Composition and Framing

    Composition and framing play crucial roles in creating a compelling hero shot. We need to identify the property’s most appealing features and ensure they are prominently featured.

    Using the rule of thirds can help balance the image. Placing important elements along these lines or at their intersections creates visually engaging photos. Symmetry can highlight architectural elements, and leading lines can guide the viewer’s eyes through the scene.

    Decluttering the scene is also important. Removing unnecessary items helps focus attention on the property.

    Lighting Conditions

    Proper lighting is key to a successful hero shot. We should photograph during times when natural light is abundant but not harsh, such as in the morning or late afternoon.

    Adjusting brightness and contrast during post-processing can further enhance the image. Balanced lighting helps avoid overexposed highlights and underexposed shadows.

    Artificial lighting might be useful indoors, but relying on natural light generally provides a more authentic and warm feel to the property.

    Best Use of Natural Light

    Natural light brings out the true colors and textures in a property. Positioning ourselves where light floods into the room can result in brighter, more inviting images.

    Opening blinds and curtains allows sunlight to illuminate the space naturally. We should shoot from angles that minimize shadows and avoid shooting directly into the light, as this can create glare.

    Reflectors can also be used to bounce light into darker areas, providing a more even exposure across the entire scene.

    Capturing the Golden Hour

    The golden hour, shortly after sunrise or before sunset, is ideal for exterior hero shots. During this time, the light is soft and warm, adding a touch of magic to the scene.

    This lighting condition highlights the property’s details and creates long, soft shadows that add depth and dimension. We should plan our shoots around these times to take full advantage of this natural phenomenon.

    Using a tripod can help stabilize the camera during the low-light conditions of the golden hour, ensuring sharp, clear images that will captivate potential buyers.

    Including outdoor features like gardens or swimming pools in this light can further enhance the property’s appeal.

    Staging the Scene

    A well-lit, spacious living room with high ceilings, large windows, and stylish furniture arranged in an inviting and open layout

    To create a compelling hero shot for a real estate listing, we must focus on effective preparation and decluttering, highlighting key features, and incorporating lifestyle elements. These steps ensure the property looks inviting and showcases its best aspects.

    Preparation and Decluttering

    Before we start taking photos, we need to prepare the scene meticulously. This involves deep cleaning and decluttering each room to ensure a tidy and appealing space. We recommend removing personal items like family photos, which can distract potential buyers.

    We also pay attention to small details, like making sure cushions are straightened and chairs are pushed in. If we are showcasing a beautiful kitchen, everything should be spotless, with countertops cleared of unnecessary items.

    When we stage the scene, we aim to create a sense of space and welcoming atmosphere, turning each room into part of a potential buyer’s dream home. It’s the foundation of capturing a perfect hero shot.

    Showcasing Key Features

    A successful hero shot highlights the property’s unique features. We focus on elements that make the home stand out, such as an inviting entrance or a spacious living area. Identifying these key features helps us decide where to position the camera and what angle to use.

    For instance, if the property has a large, beautifully landscaped backyard, we take the shot from a point that captures the expanse and greenery. We often shoot exterior photos at a slight elevation to enhance depth and perspective.

    Lighting is crucial. We make sure to shoot at a time of day when natural light enhances the property’s appeal. Don’t forget to turn on lamps and overhead lights to create a warm and inviting glow, particularly for interior shots.

    Incorporating Lifestyle Elements

    We aim to stage the scene with elements that evoke a certain lifestyle. This helps potential buyers visualize themselves living in the space. Simple touches such as setting the dining table with tasteful place settings or placing a cozy throw on the sofa can make a significant impact.

    We often include fresh flowers or stylish decor pieces to add personality to a space without causing clutter. For a beautiful kitchen, we might place a bowl of fresh fruit on the counter or a vase of flowers on the island.

    By incorporating these lifestyle elements thoughtfully, we create scenes that not only look good in photographs but also resonate emotionally with viewers, making them see the property as their potential new home.

    Equipment and Techniques for High-Quality Shots

    Proper equipment and techniques are crucial for capturing high-quality hero shots in real estate photography. Using the right camera and lens, stabilizing tools like tripods, and effective editing techniques significantly enhance the final image.

    Choosing the Right Camera and Lens

    For real estate photography, we need a high-quality digital camera and a suitable lens. A digital camera with a full-frame sensor provides excellent image quality and low-light performance. Wide-angle lenses are essential because they can capture more of the room in a single shot, making spaces appear larger and more inviting.

    A lens with a focal length of 16-35mm is typically ideal for this purpose. Investing in a lens with a low f-stop number can also help us achieve better results in lower light conditions, ensuring the images are sharp and well-lit.

    Utilizing Tripods and Flashes

    Using a tripod is crucial for stability and sharpness. It allows us to use longer exposure times without camera shake, which is particularly helpful in dimly lit areas. This tool ensures our shots are crisp and professional-looking.

    In addition to natural light, flashes or external lighting can enhance photos. When natural light is insufficient, a flash can help fill in shadows and light up dark areas, ensuring even lighting throughout the shot.

    Advanced Editing Techniques

    Editing techniques can transform a good photo into a great one. We use software like Adobe Lightroom or Photoshop for image enhancement. Color correction, exposure adjustment, and sharpening are basic steps that can significantly improve a photo’s quality.

    Utilizing presets can streamline the editing process, giving our photos a consistent and professional look. Techniques like HDR (High Dynamic Range) processing can also combine multiple exposures into one image, ensuring that both the darkest and brightest parts are well-exposed.

    Finally, removing any distracting elements and enhancing key features of the property in editing ensures the hero shot is visually appealing and highlights the best aspects of the property.

    Specialized Hero Shot Variations

    A high-angle shot of a luxury home exterior, with dramatic lighting and a wide-angle lens to showcase the grandeur and elegance of the property

    In real estate photography, a hero shot can highlight various aspects of a property, capturing its unique features and maximizing its appeal to potential buyers. Twilight exterior shots, elevated and drone photography, and interior highlights each play a crucial role in this process.

    Twilight Exterior Shots

    Twilight shots are taken during the “golden hour,” just after sunset or before sunrise. These images can make exterior photos more striking by showcasing both the property and the lighting. The soft, natural light during twilight highlights the building’s architecture and enhances its curb appeal. For instance, a pool area can look inviting, with lights reflecting off the water, creating an ambiance of luxury and relaxation.

    We need to ensure all exterior lights, including path lights and pool lights, are turned on. This adds warmth and depth to the photograph. Using a tripod for stability is crucial for these shots to avoid blurriness, which is common in low-light conditions.

    Elevated and Drone Photography

    Elevated and real estate drone photography provide unique perspectives that ground-level shots simply can’t achieve. Shooting from an elevated position or using a drone can reveal the property’s layout, including large yards, landscaping, and nearby amenities. This is especially beneficial for properties with expansive grounds or stunning surroundings.

    Drone photography ensures that potential buyers get a sense of the elevation and how the property fits into its setting. We recommend capturing multiple angles to offer a comprehensive view. This method is particularly effective for larger properties or those with special outdoor features like a pool or a beautiful garden.

    Interior Highlights

    Interior hero shots focus on the most appealing rooms, such as the bedroom or bathroom. Choosing the right angles and lighting is crucial. For a bedroom, natural light from windows can make the space feel open and welcoming. In bathrooms, highlighting design elements like tile work or a spacious shower can enhance the property’s perceived value.

    We should pay attention to details like straightened cushions and even spacing for chairs. Elevation can also matter here; shooting slightly above eye level can provide a flattering perspective of the room. Turning on interior lights can add warmth and make the rooms look more inviting.

    Maximizing Impact with Hero Shots

    A stunning exterior shot of a luxurious property with impeccable landscaping and dramatic lighting, showcasing its grandeur and elegance

    Hero shots can elevate real estate listings and marketing efforts by making properties stand out. These shots attract attention, evoke emotions, and can lead to higher engagement and inquiries from potential buyers.

    Strategic Use in Real Estate Listings

    We should always start with a hero shot when presenting a property online. This image sets the tone and grabs the viewer’s attention immediately. By highlighting the most attractive feature—whether it’s a spacious living room, a beautifully landscaped yard, or a modern kitchen—we showcase the property’s best attributes right away.

    Consistency is key. All hero shots must be taken in optimal lighting and composed thoughtfully. A well-staged room with clean lines and inviting décor helps potential buyers envision living there. Additionally, ensure the photo resolution is high to maintain quality, even when zoomed in.

    Enhancing Social Media and Marketing Campaigns

    Hero shots are also powerful tools for social media and marketing campaigns. Platforms like Instagram and Facebook rely heavily on visuals. Our hero shots need to be striking enough to pause someone’s scroll. Vibrant colors, dynamic angles, and clear imagery are essential.

    In marketing emails, we use hero shots as the main visual hook. This can boost open rates and engagement. By pairing these shots with a compelling call-to-action, we drive potential buyers to contact us or visit our website for more information. Consistency across all marketing materials ensures that our brand stays recognizable and professional.

    Improving Click-Through Rates and Conversions

    High-quality hero shots improve click-through rates and ultimately lead to higher conversions. Online listings with captivating images receive more views and clicks.

    For best results, hero shots should load quickly on websites and be mobile-friendly. We track performance metrics to see which images best convert viewers into leads and new clients. By analyzing these trends, we refine our approach, focusing on what resonates most with our target audience. This continuous improvement cycle helps us stay ahead in a competitive market.

    Challenges and Solutions in Hero Shot Photography

    Creating a compelling hero shot for real estate can be challenging due to issues with lighting, weather, balancing authenticity and creativity, and avoiding common mistakes. Here, we’ll discuss effective solutions to these problems.

    Dealing with Difficult Lighting and Weather

    Lighting and weather can be unpredictable, affecting the quality of the hero shot. An overcast day may wash out colors, while too much sunlight can cause harsh contrasts and shadows.

    To combat these issues, we can use HDR (High Dynamic Range) photography to balance exposure in mixed lighting conditions. For outdoor shots, we often schedule photo sessions during the golden hours—shortly after sunrise or before sunset—when the light is softer and more even. If weather conditions are poor, shooting well-lit rooms inside can ensure consistent results. Some photographers also use day-to-dusk editing techniques to enhance the appeal of evening shots.

    Balancing Authenticity and Creativity

    While it’s crucial to highlight the best features of a property, it should still look authentic. Over-editing or using unrealistic enhancements can mislead potential buyers.

    We aim for a balanced approach by using natural enhancements such as improved lighting and contrasts without altering the true appearance of the property. For instance, capturing different angles can showcase the property’s unique aspects without exaggeration. When editing, we focus on enhancing what’s already there, like brightening a room’s natural light or emphasizing architectural details, ensuring the hero shot remains authentic yet appealing.

    Overcoming Common Mistakes

    Common mistakes in hero shot photography include poor composition, ignoring small details, and using the wrong focal length.

    We overcome these by framing the shot to focus on the property’s strengths. We also pay close attention to small but significant details such as removing clutter and ensuring the property is clean. Using a suitable wide-angle lens helps us capture the space without distortion. Regularly checking the camera’s settings ensures proper exposure, making the images clear and visually attractive.

    Frequently Asked Questions

    A bright, spacious living room with natural light streaming in, showcasing elegant furniture and modern decor. A focal point, such as a fireplace or large window, draws the eye

    Hero shots play a vital role in making real estate listings more appealing. They can highlight a property’s best features while also increasing its perceived value.

    How does a hero shot enhance real estate listings?

    A hero shot grabs attention quickly. It serves as the first image potential buyers see on platforms like MLS listings. This first impression can significantly affect whether they choose to explore the listing further. High-quality hero shots can lead to more views and, consequently, more inquiries.

    What are the essential elements of an effective hero shot?

    An effective hero shot includes several key elements. These elements are favorable lighting, proper composition, and highlighting the property’s most attractive features. Small details, such as straightened cushions or well-aligned chairs, can also make a big difference. Each element works together to present the property at its best.

    Can a hero shot impact the perceived value of a property?

    Yes, a well-executed hero shot can make a property appear more valuable. It achieves this by capturing the essence and allure of the property in a single frame. When potential buyers see a stunning hero shot, they might perceive the property as more desirable and worth a higher price.

    What is the difference between a hero shot and regular real estate photography?

    A hero shot is different from regular real estate photography because it acts as the primary image used for marketing. While regular photos may document every room and detail, the hero shot focuses on captivating potential buyers. It stands out as the highlight image that draws viewers into the listing.

    How should a hero shot be composed to attract potential buyers?

    Composition is crucial for a hero shot. We should aim for a balanced and aesthetically pleasing image by following the rule of thirds. Emphasizing the property’s unique selling points, like architectural details or landscaping, can also enhance the composition. Shooting from an elevated height often provides a more striking view.

    What lighting techniques are used to capture a compelling hero shot?

    Good lighting is essential for a compelling hero shot. Natural light is often the best option, especially during the golden hour when sunlight is soft and warm. For interior shots, turning on lights and using additional photography lighting can help create a welcoming atmosphere. Proper lighting ensures the property looks its best and grabs potential buyers’ attention.

  • Real Estate Twilight Photography: Capturing Properties in Magical Light

    Real Estate Twilight Photography: Capturing Properties in Magical Light

    Real Estate Twilight Photography: Capturing Properties in Magical Light

    Twilight real estate photography can make a property look stunning and inviting. The unique lighting during twilight minimizes harsh shadows, creating a warm, soft ambiance that enhances a property’s features.

    Using twilight photography can help a property stand out in a crowded market by making it more visually appealing.

    A suburban house with warm interior lights, against a colorful twilight sky with a hint of city lights in the distance

    When we photograph homes at twilight, we capture the perfect balance between natural and artificial light. This blend highlights the property’s exterior features, such as patios, decks, and pools.

    The result is a series of photographs that are both elegant and enticing, encouraging potential buyers to envision themselves living in the space.

    Key Takeaways

    • Twilight photography makes properties look more attractive.
    • Proper planning and equipment are crucial for successful shoots.
    • Combined natural and artificial light highlights key features.

    Understanding Twilight Photography

    Twilight photography captures properties during the brief period after sunset or just before sunrise to create an inviting and unique atmosphere. This imaging technique helps real estate listings stand out and make a lasting impression on potential buyers.

    The Magic of Twilight in Real Estate

    Twilight, also known as the golden hour, transforms ordinary scenes into breathtaking views. As the sun dips below the horizon, the sky takes on a mix of deep blues, purples, and oranges, creating a soft, ambient light that casts an inviting glow on properties.

    This magical timing can make a home look warm and welcoming, adding an emotional appeal that daytime shots often lack.

    Twilight photos highlight the exterior lighting of the property, making it appear more luxurious and well-maintained. This aesthetic is crucial for high-end listings and homes looking to make a strong first impression.

    Defining Twilight for Photography Purposes

    Twilight for photography purposes typically spans the period shortly after sunset or just before sunrise. During this time, the ambient light is soft and even, which minimizes harsh shadows and contrasts that can be problematic in other lighting conditions.

    We aim to take advantage of this window to capture the property’s full potential.

    To achieve the best results, we need to be prepared and set up our equipment beforehand.

    This includes adjusting camera settings to utilize the available natural light effectively. Being well-prepared ensures that we can make the most of this short-lived but highly rewarding time frame.

    Benefits of Twilight Photography in Real Estate Listings

    Twilight photography offers several notable benefits for real estate listings. First, it enhances the property’s visual appeal by showcasing its exterior lighting and landscaping in a flattering way. This can create a more inviting and luxurious appearance, attracting more potential buyers.

    Second, twilight photos can eliminate the harsh shadows and high contrasts present in daytime photography. Softer lighting creates a harmonious and balanced look, which makes the property more pleasing to the eye.

    Finally, twilight photography helps our listings stand out from the competition. As many real estate photos are taken during the day, twilight images provide a unique and memorable perspective that can leave a lasting impression on viewers.

    This differentiation can be the key to capturing the interest of serious buyers.

    Preparation for a Twilight Shoot

    Preparing for a twilight real estate shoot involves several important steps. These include property scouting, understanding weather and lighting conditions, setting up interior and exterior lighting, and planning for the golden hour.

    Scouting the Property

    Before the shoot, it’s crucial to scout the property. We need to identify key areas like the garden, patio, or any unique architectural features.

    This helps us decide the best angles and compositions. Walking around the property allows us to visualize how natural light will change as the sun sets.

    We should also note any potential obstacles, such as overgrown plants or clutter, which might need to be addressed before we start shooting.

    Understanding Weather and Lighting Conditions

    Checking the weather forecast is vital for a twilight shoot. Ideal weather includes clear skies with minimal clouds to enhance the colors of the sunset.

    We also need to monitor the temperature since it affects the comfort and performance of our equipment. Observing the sunset time is key, as it guides our schedule to capture the golden hour’s perfect lighting.

    Setting Up Interior and Exterior Lighting

    Proper lighting setup is essential.

    We should ensure all interior lights, including lamps and ceiling fixtures, are turned on to create a warm and welcoming atmosphere inside.

    For the exterior, it’s important to check that garden lights, patio lights, and other outdoor fixtures are working.

    We might use additional lighting, such as camera flashes or continuous lights, to balance the exposure and minimize shadows.

    Planning for the Golden Hour

    The golden hour, occurring shortly after sunset, provides the best lighting for twilight photography.

    We need to plan our shots to maximize this brief period of soft, even light. Setting up our cameras on tripods in advance ensures stability and allows us to capture multiple exposures.

    Using a timer or remote control can help eliminate camera shake, resulting in sharper images.

    Camera Gear and Settings

    In twilight real estate photography, the right equipment and settings make all the difference. We need to choose the best camera and lens, use appropriate settings, and ensure stability with a tripod.

    Choosing the Right Camera and Lens

    For twilight shots, a camera with excellent low-light performance is essential. We recommend using a DSLR or mirrorless camera with a full-frame sensor to capture more light and detail.

    A wide-angle lens, such as a 16-35mm or 24-70mm, is also ideal.

    These lenses allow us to capture more of the property and highlight its features.

    A lens with a wide aperture, like f/2.8, is beneficial for letting in more light and reducing noise in low-light conditions.

    Important Camera Settings for Twilight Shots

    Setting the ISO between 400-1600 helps in capturing clear twilight images without excessive noise.

    Adjusting the aperture to a small value like f/13 ensures a broader depth of field, keeping both foreground and background in focus.

    The shutter speed should be slow enough to allow proper exposure. Using an HDR technique can help balance the light differences between the twilight sky and the darker areas of the property.

    This involves taking multiple shots at different exposures and combining them for the best result.

    Using a Tripod to Ensure Stability

    A tripod is crucial for shooting in low light. It keeps the camera steady, which is essential when using slow shutter speeds.

    We should place the tripod on an even and stable surface to avoid camera shake.

    Using a timer or a camera remote can further minimize shake.

    This is particularly useful for long exposure shots where the slightest movement can blur the image.

    It’s also helpful to use a tripod with adjustable legs to adapt to uneven surfaces often found around properties.

    Composition and Shooting Techniques

    When we’re composing and shooting for real estate twilight photography, paying attention to framing, lighting, and unique property features is essential.

    We must effectively mix natural and artificial light, highlight the property’s best angles, and capture its unique characteristics.

    Framing the Perfect Twilight Shot

    Good composition in twilight photography helps bring out the best in a property.

    We start by choosing angles that emphasize the house’s architecture and landscaping. To create depth, we include elements like trees, pathways, or fences in the foreground.

    Using the rule of thirds is helpful. We align the property so it’s off-center, creating a balanced look.

    Enhancing the property’s appeal involves capturing reflections on windows and considering symmetry. This makes our photos more interesting and dynamic.

    Working with Natural and Artificial Light

    Lighting is critical in twilight photography. We typically shoot during the “blue hour” when the sky glows softly. This light adds a dramatic and inviting feel to our photos.

    We watch how shadows fall and avoid harsh contrasts by planning the shoot angles.

    We also utilize artificial light to enhance the property’s appeal.

    Outdoor lighting, like porch lights and landscape lighting, adds warmth and highlights features of the home.

    Adjusting our camera settings, such as longer exposures, ensures we capture the warmth and detail in both natural and artificial lights beautifully.

    Post-Processing Twilight Photos

    Editing twilight photos requires attention to detail to enhance the colors, balance the exposure, and remove any distractions that may detract from the property’s appeal.

    Editing for Color Balance and Temperature

    Balancing colors and temperature is crucial when working with twilight photos.

    We start by using software like Photoshop or Lightroom to adjust the color balance to ensure the sky and property lighting look realistic.

    A warm color temperature adds a cozy feel, while cooler tones can enhance the twilight effect.

    It’s vital to adjust the white balance to match the lighting conditions, which can range from the blue of the twilight sky to the yellow glow of indoor lights.

    Color correction tools help in achieving the right balance between natural and artificial light.

    Advanced Techniques: HDR Editing and Layer Masks

    For more advanced edits, HDR (High Dynamic Range) editing and layer masks are indispensable tools.

    HDR editing combines multiple exposures to create a single image with a higher dynamic range, capturing details in both shadows and highlights.

    We typically use Photoshop to merge layers by placing the brightest exposure on top, followed by medium, then dark.

    This method allows us to fine-tune different parts of the image separately.

    Using layer masks, we can blend different exposures seamlessly, ensuring natural transitions between highlights and shadows.

    This technique helps in enhancing the depth and mood of twilight images.

    Removing Unwanted Elements and Enhancing Details

    To perfect the final image, removing unwanted elements and enhancing essential details is essential.

    Tools like the clone stamp and healing brush in Photoshop are effective for removing clutter, glare, and distractions from windows.

    We also focus on window masking to ensure interior lights look natural.

    Enhancing details involves sharpening edges, correcting lines and angles, and adjusting the overall tone to highlight the property’s best features.

    An effective post-processing session can transform an ordinary photo into a captivating twilight scene, making the property stand out. If using a real estate photo editing service, ensure they follow these steps to achieve the best results.

    Utilizing Twilight Photos in Real Estate Marketing

    Twilight photos can make a property stand out by highlighting its unique charm and creating a luxurious feel. They play an essential role in marketing, enhancing online presence and physical collateral, and driving property sales.

    Creating an Impactful Online Presence

    We can use twilight photos to elevate our real estate listings, making them more attractive to potential buyers.

    These photos offer a unique perspective, showing well-lit exteriors against a darkening sky. This contrast captures attention and makes our listings more memorable.

    In our online marketing efforts, such as single property websites and photographer websites, twilight photos can enhance the visual appeal.

    When combined with virtual staging and virtual house tours, they create an engaging experience.

    High-quality twilight photos help us achieve higher visibility on real estate platforms.

    Incorporating Twilight Photography in Collateral

    In addition to online use, twilight photos are valuable for physical marketing materials.

    We can integrate them into property flyers, brochures, and house portraits. The warm tones and soft lighting of these images make them visually appealing.

    When creating physical collateral, the goal is to showcase the property in the best light.

    Twilight real estate photography does just that by emphasizing the beauty of both the interior and exterior lighting. By including these photos in printed materials, we create a lasting impression on potential buyers.

    The Role of Twilight Photos in Property Sales

    Twilight photos are not just about aesthetics; they can also impact property sales.

    Listings featuring well-executed twilight photos often attract more interest, leading to higher prices and faster sales. The inviting glow and luxurious feel create a sense of urgency.

    For real estate professionals, it is important to collaborate with skilled photographers knowledgeable in twilight photography.

    Attention to details like color correction and proper timing ensures the photos are effective.

    Video editing can also enhance the presentation, making the property stand out even more in virtual tours.

    The strategic use of twilight photos boosts our marketing efforts and ultimately helps close deals faster.

    Tips for Real Estate Professionals

    Real estate twilight photography can significantly elevate a property listing, making it stand out and attract potential buyers. Let’s explore how to choose the right photographer, manage the shoot schedule, and strategically use twilight photos.

    Choosing the Right Photographer

    Selecting a skilled photographer is crucial.

    We need someone with experience in twilight real estate photography. Look at their portfolio to ensure they can capture properties beautifully during twilight hours, using proper lighting techniques and angles.

    It’s also beneficial if they bring the right gear, such as tripods and camera remotes, to avoid shaky images.

    We should ask for references from other realtors.

    This will help us gauge whether the photographer is reliable and meets deadlines efficiently.

    A good photographer will understand how to highlight a property’s best features in twilight, creating an inviting and luxurious feel.

    Scheduling Shoots and Managing Timeline

    Timing is key in twilight photography.

    We should book the shoot when the sun is setting, typically about 20-30 minutes after sunset, to capture the best light.

    Align the shoot with clear weather forecasts to avoid rain or heavy clouds that can dull the photos.

    Coordinate closely with the photographer to ensure everything is ready on time.

    This includes making sure the property is prepped with all indoor and outdoor lights on.

    We should also communicate any specific shots we need, allowing the photographer to plan their time efficiently.

    Maximizing Impact with Strategic Use of Twilight Photos

    Using twilight photos strategically in listings can make a huge difference.

    These photos should be placed prominently in marketing materials to immediately catch potential buyers’ eyes.

    Highlight shots that showcase the home’s exterior lighting and any standout features like pools or gardens.

    We should aim to use a mix of daytime and twilight photos to give a complete picture of the property.

    Twilight images add a sense of uniqueness and luxury, setting our listings apart from the competition.

    By carefully selecting which images to use and where, we can maximize the appeal and impact of our property listings.

    Safety and Legal Aspects

    A real estate property at twilight with proper lighting and no identifiable people present. All safety and legal aspects are adhered to

    When conducting real estate twilight photography, it’s important that we address both safety and legal considerations. This ensures not only a smooth shoot but also compliance with laws and protection for everyone involved.

    Ensuring Safety During Twilight Shoots

    Safety is a top priority during twilight photo shoots.

    Given that these shoots occur at dusk, visibility can be low. We must ensure we have proper lighting equipment to prevent any accidents or falls.

    Using a tripod on a stable surface can help minimize blurry photos due to low light.

    Photographers should wear reflective clothing or use safety vests to stay visible. This is especially important if we are shooting near roads or driveways.

    Letting the homeowners and potential buyers know about the shoot schedule can also prevent unexpected interruptions or accidents.

    Bringing a first aid kit is also a wise precaution. Minor injuries can happen, and it’s always better to be prepared.

    These measures ensure that we can take beautiful photos without compromising on safety.

    Understanding the Legal Considerations

    Legal aspects in twilight real estate photography are equally important.

    First, we must obtain permission from property owners before scheduling a shoot. This avoids any legal disputes and ensures a smooth photography session.

    We should also be aware of any local regulations regarding photography, particularly if we plan to use drones for aerial shots.

    Many regions have strict rules about drone usage, and we must comply with these to avoid fines or other legal issues.

    Finally, photographers should be wary of privacy concerns.

    We need to ensure that we do not capture neighboring properties or people without their consent.

    Clear communication and written agreements with property owners help safeguard both our interests and those of our clients.

    Frequently Asked Questions

    Real estate twilight photography offers unique benefits for property listings and can greatly impact the visual appeal and attraction of homes. In this section, we’ll discuss the various aspects and techniques of this photography style.

    What are the benefits of using twilight photography in real estate listings?

    Twilight photography can make a property stand out from the competition. It highlights exterior and indoor lighting, creating a luxurious and exclusive feel.

    These photos can make listings more memorable and appealing to potential buyers by showcasing the property in a striking, visually engaging way.

    How does twilight photography impact the presentation of a property?

    Twilight images enhance the beauty of a home by capturing the soft, diffused light just before sunset.

    This can create a warm and inviting atmosphere, encouraging viewers to explore further.

    Photographs taken at this time can emphasize architectural details and highlight landscaping features that may not be as noticeable during the day.

    What equipment is essential for capturing high-quality twilight photographs for real estate?

    Key equipment includes a DSLR or mirrorless camera with manual settings, a sturdy tripod, and a wide-angle lens.

    Additional tools such as remote shutter releases and lighting kits can also be beneficial. These help achieve clarity, stability, and proper lighting to produce professional-quality images.

    What is the best time of day to schedule a twilight photography session for a property?

    The best time is typically 20-30 minutes after sunset. This period, known as the blue hour, provides optimal lighting conditions.

    The sky takes on a deep blue hue that contrasts beautifully with warm interior lights, resulting in visually appealing and balanced photographs.

    What professional techniques can be used to enhance twilight photos for real estate marketing?

    Proper exposure settings and use of supplementary lighting can ensure the right balance between the natural ambient light and the property’s artificial lights.

    Post-processing techniques like color correction and blending multiple exposures can further enhance image quality. This creates a polished, professional look that appeals to buyers.

    How can virtual twilight photography be differentiated from traditional twilight photography?

    Virtual twilight photography involves post-processing daytime images to mimic the appearance of twilight. This method combines multiple exposures of a property to create a realistic, atmospheric image.

    Virtual twilight photos can be a convenient and cost-effective alternative, providing similar visual appeal without the need for an actual twilight shoot.

  • Is It Worth Investing in Professional Real Estate Photography: Unveiling the Value

    Is It Worth Investing in Professional Real Estate Photography: Unveiling the Value

    In today’s bustling real estate market, standing out from the competition is key. This is where the role of professional real estate photography comes into play. High-quality images can capture the essence of a property, showcasing its best features in a way that amateur photos often fail to do.

    The investment in professional photography may seem substantial initially, but the benefits it brings can be a game-changer. Crisp, well-lit photos are the first interaction potential buyers have with a listing online, and first impressions matter.

    As the real estate industry increasingly moves online, the significance of visual appeal in listings cannot be overstated.

    Professional photographers have the skills and equipment necessary to produce compelling images that not only reflect the property’s physical attributes but also evoke emotions that can inspire potential buyers to take action. Choosing a skilled photographer and utilizing advanced marketing strategies to showcase the property can speed up the sales process and potentially increase the sale price.

    Key Takeaways

    • Professional real estate photography can significantly enhance the appeal of property listings.
    • Quality images are pivotal in fostering buyer interest and engagement.
    • Strategic investment in professional photography may offer a competitive edge in the real estate market.

    The Impact of Professional Real Estate Photography on Sales

    The Impact of Professional Real Estate Photography on Sales

    Investing in professional real estate photography can significantly affect your sales process, enhancing online visibility and shaping buyers’ perceptions of value right from their first glance.

    Enhancing Online Presence and Click-Through Rates

    Your online presence is the modern storefront to your listings, and the quality of your photos can make a substantial difference.

    Professional real estate photography boosts the aesthetic appeal of your properties, which is directly linked to an increase in click-through rates.

    Detailed and artful images from a professional photographer captivate potential clients, keeping them engaged longer with your listing than standard photos might.

    First Impressions and Perceived Property Value

    The initial impact of seeing your listing matters. When potential buyers encounter high-quality photography, it sets a positive first impression, bolstering the perceived value of the property.

    Listings featuring professional images are often seen as more premium, giving clients the impression that the home is worth more.

    An investment in a professional photographer to highlight key selling points can engender trust and influence a buyer’s decision to pursue a property.

    Elements of High-Quality Real Estate Photography

    Elements of High-Quality Real Estate Photography

    To effectively showcase a property, it is essential to focus on two key aspects: the artistry involved in lighting and composition, and the technicalities such as the camera gear and editing tools.

    Importance of Lighting and Composition

    Your ability to manipulate lighting and composition directly influences the appeal of real estate photography.

    Optimal natural light brings out the textures and colors of a property, making spaces appear larger and more inviting.

    Strategic use of light fixtures and flashes can eliminate shadows and highlight a property’s best features.

    When it comes to composition, mastering the rule of thirds and understanding the flow of a property allow you to capture photos that tell a story.

    A wide angle lens is often used to emphasize space and depth, a crucial technique in real estate photography.

    • Lighting: Utilize natural light, avoid harsh shadows, and consider the time of day.
    • Composition: Use the rule of thirds, photograph from the best angles, and showcase key elements of the property.

    Camera Gear and Editing Tools

    Investing in high-quality camera equipment is pivotal.

    A full-frame DSLR or mirrorless camera paired with a professional-grade wide angle lens ensures sharp, high-resolution images.

    A sturdy tripod is essential for stability, especially in low-light conditions.

    A variety of lenses may be needed for different shots—wide angles for full-room views or longer lenses for detail shots.

    After capturing images, editing software plays a significant role in enhancing photos.

    Programs like Adobe Photoshop or Lightroom can adjust exposure, color, and remove blemishes, ensuring each photo accurately represents the property yet is polished and professional.

    Remember, the goal of editing is to improve, not deceive potential buyers.

    • Camera: A full-frame DSLR/mirrorless, wide angle lens, and various other lenses.
    • Editing Tools: Use software like Photoshop or Lightroom to enhance the final images.

    Choosing a Real Estate Photographer

    Choosing a Real Estate Photographer

    As you navigate the competitive world of real estate, securing a professional photographer is a strategic investment that can showcase your property effectively.

    The right real estate photographer will not only have the necessary experience and skill but also fit within your budget.


    Why Hire a Professional Real Estate Photographer?

    Why Hire a Professional Real Estate Photographer? Professional real estate photos taken by a professional photographer can help real estate agents and sellers showcase their properties in the best possible way. High-quality photography can help make a property more appealing and attract potential buyers. Homes with professional photos tend to sell faster and for more money, resulting in a higher return on the investment. By investing in quality photography for your listings, you are setting yourself up for success in the real estate market.

    When it comes to listings with high-quality photos, buyers and sellers can both benefit from the impact that professional real estate photography brings. Utilizing real estate photography tips can not only help sell properties faster but also for a higher ROI. Check out our blog for more information on the benefits of investing in professional real estate photography.

    Evaluating Experience and Portfolio

    Review the Photographer’s Past Work: Examine the portfolios of potential photographers to assess their expertise in real estate photography.

    Look for a diverse range of properties and the ability to highlight each home’s unique features.

    A professional photographer’s portfolio should demonstrate a keen eye for detail and the capability to produce consistently high-quality images.

    Assess Skill Level: Skill level is paramount.

    You want a photographer whose expertise extends to various lighting conditions and architectural styles.

    Pay attention to their use of angles, composition, and the way they capture the essence of the spaces.

    The photographer’s ability to evoke a sense of place and atmosphere in their photos is crucial.

    Understanding the Price Range and Budget

    Establish Your Budget: Before reviewing options, know your budget limits.

    Real estate photographer prices can vary widely depending on experience, demand, and the level of service provided.

    Price Range Expectations:

    • Basic Packages typically cover a small number of high-quality images, suitable for smaller listings.
    • Premium Offers may include additional services like virtual tours or drone photography, essential for showcasing high-end properties.

    A clear understanding of the price range helps you make an informed decision without compromising the quality of the real estate photos, which are integral to marketing your property.

    Marketing Strategies for Real Estate Photography

    Marketing Strategies for Real Estate Photography

    Investing in professional real estate photography is more than just capturing stunning images of properties; it’s about effectively marketing your services to enhance your visibility and attract more clients.

    Building a Strong Online Portfolio

    An impressive online portfolio is your digital storefront. Here are actionable steps to create one:

    1. Select your best work: Include a variety of images that showcase different styles of properties and lighting conditions.
    2. Use a reputable hosting service: Reliability and speed are essential for a professional online presence.
    3. Update regularly: Keep your portfolio fresh with new content to reflect your growing experience.
    4. SEO Optimization: Integrate keywords that potential clients or realtors are likely to search for.
    5. Display testimonials: Positive feedback from past clients adds credibility.

    Networking and Personal Brand Development

    Developing a strong personal brand is crucial for standing out in the real estate market:

    • Attend networking events: Engage with realtors and potential clients face-to-face.
    • Consistency: Ensure your branding is consistent across all forms of communication.
    • Business cards: High-quality business cards leave a lasting impression.
    • Effective negotiation: Show your value as a professional photographer to secure better rates.
    • Strategic email marketing: Use email to stay top of mind with your audience, but keep it concise and professional.
    • Travel smart: Be prepared to travel to clients, but also maximize your trips for networking opportunities.

    Advanced Real Estate Photography Techniques

    Advanced Real Estate Photography Techniques

    When investing in professional real estate photography, utilizing high-end techniques can significantly enhance the allure of your properties. These methodologies are not just about snapping attractive photos, but also about capturing a property’s essence in a way that draws potential buyers in.

    Utilizing Drones for Aerial Shots

    Drones have revolutionized the way aerial shots are captured in real estate photography.

    As a professional photographer, incorporating a drone equipped with a wide-angle lens can provide you with stunning overhead views of a property, its land, and the surrounding area.

    Ideal weather conditions are crucial for clear, sharp images, so plan your drone photography accordingly.

    Not all drones are created equal, so invest in one with a high-resolution camera to ensure your shots of commercial buildings or single-family homes stand out.

    Creating Virtual Tours for Properties

    Virtual tours empower potential buyers to experience a property from the comfort of their device, enhancing your online presence.

    Use professional photography equipment to shoot a sequence of clear, well-illuminated images from various angles.

    Specialized software can stitch these images together, creating an immersive virtual tour that can make properties come alive for viewers.

    Ensure each virtual tour is seamlessly integrated to provide a realistic walkthrough experience, bridging the gap between online exploration and in-person visits.

    Frequently Asked Questions

    When exploring the value of professional real estate photography, several key questions are often asked. This section addresses these queries to help you make an informed decision.

    What are the expected costs associated with hiring a professional real estate photographer?

    Your investment in professional real estate photography can vary widely. Costs can range from a few hundred to over a thousand dollars.

    How does professional real estate photography affect sales?

    Professional photos are known to attract more buyers by presenting the property in the best possible light. This can lead to accelerated sales as properties get more online views and potential buyer interest.

    Can high-quality real estate images significantly impact property sale prices?

    High-quality images captured by professionals can increase perceived property value, often leading to higher sale prices. Professional photography creates trust and emphasizes the best features of your property, justifying a higher asking price.

    What is the return on investment for professional real estate photography?

    The return on investment for professional photography can be considerable. Listings with professional images tend to sell at higher prices and more quickly than those without, which can maximize your net gain from the sale.

    Why is it beneficial to use professional photography in real estate listings?

    Using professional photography in your listings can improve your real estate business by establishing credibility and professionalism. Quality visuals can lead to an increase in listings and networking opportunities.

    What advantages do professionally taken real estate photos offer over amateur shots?

    Professionally taken photos offer substantial advantages. These include better composition, lighting, and post-processing techniques.

    Professional photographers have the equipment and expertise to showcase properties in their finest light. This makes them more compelling to potential buyers compared to amateur photographs.

    Do photos matter on real estate?

    Real estate photography can help make all the difference when it comes to selling a property. As a real estate professional, investing in high-quality photos for your listings is worth every penny. Professional pictures can help a property sell faster and at a higher price. It’s worth considering to hire a professional photographer to showcase the property in the best light possible.

    When you invest in professional photography services, you’ll be able to stage the property effectively and capture the attention of potential buyers. Low-quality photos can deter buyers from even considering a property, while high-quality photographs can help sell a property quickly. Real estate agents who understand the importance of photography for their listings are more likely to see success in the market.

    It is recommended to hire a professional photographer to capture the best angles and lighting, ensuring that the property looks its best in photos. Real estate photography is an essential part of marketing a property, and professional photography services are definitely worth the investment. By showcasing a property with high-quality photos, you can attract more potential buyers and increase the likelihood of a quick sale.

  • What Can Real Estate Photography Bring to My Property? Unveiling the Benefits for Sellers

    What Can Real Estate Photography Bring to My Property? Unveiling the Benefits for Sellers

    Real estate photography can have a profound impact on the marketability of your property. The visual representation of your home is typically the first impression potential buyers encounter.

    High-quality, professional photos can capture the beauty and unique characteristics of your home, making it stand out in a crowded marketplace.

    By showcasing your home in the best possible light, you attract more interest, which can lead to quicker sales and potentially higher offers.

    A bright, spacious living room with large windows showcasing a stunning view of the surrounding landscape. Modern furnishings and tasteful decor create an inviting atmosphere

    Investing in skilled real estate photography isn’t just about having pretty pictures; it’s about visually communicating the value of your property to buyers.

    Professional photographers understand how to use composition, lighting, and angles to highlight the features that matter most.

    A well-executed photoshoot requires meticulous preparation, both in terms of the physical space and the necessary equipment.

    Ensuring your home is clean, staged, and photographed with the right tools will capture the attention of potential buyers scrolling through listings.

    Key Takeaways

    • Professional real estate photos can create a compelling first impression.
    • Expert photography techniques enhance property features and overall appeal.
    • Preparing your home for the photoshoot is crucial for high-quality images.

    Benefits of Professional Real Estate Photography

    A well-lit, spacious living room with modern furnishings and large windows showcasing a beautiful view. A professional camera and tripod are set up to capture the space

    Professional real estate photography can be a pivotal tool in your marketing strategy, directly impacting how quickly your property sells and the interest it garners from potential homebuyers. Let’s explore how expertly taken photographs enhance your listing.

    Enhancing Curb Appeal

    Curb appeal is your property’s first impression on potential buyers, often determining whether they’ll take a closer look. Professional photographs capture the attractiveness of your property, accentuating its best features and inviting homebuyers to envision themselves within the space. This can be a decisive factor in making your listing stand out.

    Attracting More Homebuyers

    High-quality images are a powerful element of your marketing mix, drawing in more homebuyers. Real estate agents understand that a picture is worth more than a thousand words, and when you present your property with professional imagery, you’re likely to attract a higher number of interested buyers, driving up demand.

    Boosting Property Value

    Crisp, clear, and professional photographs can actually help boost the perceived value of your property. When potential homebuyers see a well-presented listing, they are often willing to consider a higher price point.

    By investing in professional real estate photography, you’re not just selling a property; you’re communicating its value and potential.

    Do realtors pay for real estate photography?

    Do realtors pay for real estate photography? When it comes to showcasing a property, hiring a real estate photographer is essential. Professional real estate photographers can provide real estate photography tips to help real estate agents best showcase their properties. Just because a photography company is hired, it doesn’t mean the real estate agent will have the best real estate listing photos. Photo editing can make a big difference in how the real estate listings appear. It’s important to hire a photographer who can provide 3D virtual tours, floor plans, and virtual tours to help real estate marketing materials stand out.

    One of the key aspects of a successful real estate photo shoot is to focus on the time of day and make sure that exterior photography is done in the best light possible. Overcast sky can actually be beneficial in avoiding harsh shadows and distractions. It’s also important to make sure that the properties look clean and free of clutter, as well as removing any family photos or personal items that could distract potential buyers. Before the photo shoot, it’s important to provide the photographer with a detailed shot list and to communicate with the homeowner about the process.

    Key Real Estate Photography Techniques

    A bright, spacious living room with natural light streaming in through large windows, showcasing the open layout and modern decor

    Effective real estate photography demands mastery of certain techniques that ensure your property is showcased at its best. Understanding these methods can significantly enhance the aesthetic appeal and, consequently, the value perception of your property.

    Composition and Framing

    When capturing real estate photos, your composition should convey the purpose and feel of each space.

    Use the rule of thirds to balance elements and lead the viewer’s eye through the scene. For example, ensure that key features like fireplaces or built-in bookcases are well-positioned within the frame.

    Strategic framing can make rooms appear more spacious and inviting.

    Proper Lighting and Exposure

    Lighting is crucial in real estate photography.

    Natural light is preferred, as it can make spaces appear larger and more welcoming.

    Shoot during the golden hours for a warm glow, or on a bright day for clarity and brightness.

    When dealing with interior shots, be mindful of exposure settings on your camera to avoid over or underexposed areas, which could obscure important details of the space.

    Editing and Post-processing

    After taking your shots, editing and post-processing are where you polish the images.

    Tools like Photoshop or Lightroom can be used for adjusting the exposure, contrast, and color balance to better reflect the property’s atmosphere.

    Subtle retouching can remove unwanted items or imperfections, ensuring the final photographs present the property in the most professional light possible.

    Remember, the goal is enhancement, not deception.

    The Right Equipment for the Job

    A camera, tripod, and lighting equipment set up in a well-lit room with attractive home decor and furniture

    In real estate photography, your equipment can make all the difference. Ensuring you have the right tools for capturing spaces is crucial to producing high-quality images that showcase properties in their best light.

    Choosing Cameras and Lenses

    Your choice of camera should be a DSLR or a digital SLR camera, appreciated for their high-quality images and versatility in lens selection.

    Start with a professional camera that allows full manual control over camera settings like aperture, shutter speed, and ISO.

    This is important for adapting to various lighting situations and room sizes.

    A wide-angle lens is indispensable; it captures more of the room and creates a sense of spaciousness, which is essential in real estate photography. An optimal focal length is between 16-35 mm for full-frame cameras.

    Utilizing Tripods and Stabilizers

    To achieve sharp and clear photos, steady your camera using a tripod.

    It’s worth investing in a robust model that can handle the weight of your camera and lens, particularly when employing heavier zoom lenses.

    Stability is key for long exposure images and low-light conditions.

    Consider a tripod with a sturdy head, preferably a ball-head for flexibility or a geared head for precision in alignment, which is often considered the gold standard for architectural and real estate photography.

    Investing in Lighting Tools

    Excellent lighting can transform an image. Natural light is preferred, but it’s not always available.

    Supplement with artificial lighting as needed; flashes and light stands are essential.

    Diffused light works best to illuminate a space evenly and eliminate harsh shadows or highlights.

    Multitasking tools like a reflector can help to bounce light into darker areas of a room.

    Your lighting setup can range from simple on-camera flashes to elaborate multiple flash systems, depending on the scale and complexity of the shoots.

    Preparing Your Property for a Photoshoot

    A well-staged living room with natural light, clean and decluttered, with strategically placed decor and furniture to highlight the space and appeal to potential buyers

    To ensure your property is showcased at its best, attention must be paid to staging, cleanliness, and space optimization. Thorough preparation can dramatically enhance the appeal of your property in the competitive real estate market.

    Staging and Decluttering

    Staging your home entails arranging furniture and decor to maximize the space’s appeal.

    Ensure the living room invites comfort with tasteful furnishings and minimal decor to let the space speak for itself.

    In the bedrooms, especially the master bedroom, aim for a neutral color palette and remove personal items to allow potential buyers to envision themselves in the space.

    Decluttering is equally important.

    Clear kitchen countertops and bathroom vanities, remove magnets from the fridge, and tuck away toys and excess clothes.

    Each room should appear spacious and organized, highlighting the property’s features without distraction.

    Cleaning and Detailing

    Cleaning your home should go beyond the daily routine.

    Every surface from the floors to the ceiling lights should be cleaned meticulously, ensuring kitchens and bathrooms shine.

    Polishing faucets, mirrors, and windows will make these rooms more inviting and suggest a well-maintained property.

    Attention to detail is critical.

    Small touches like fluffed pillows, neatly arranged bookshelves, and a set dining table can make a difference. These elements contribute to the lifestyle your property promises.

    Optimizing Interior and Exterior Spaces

    Take advantage of natural light for interior shots by opening curtains and blinds, which will illuminate the home and create a sense of openness.

    Properly placed furniture helps define spaces within the home, making rooms appear larger and more functional.

    For exterior shots, your home’s first impression counts.

    Maintain landscaping with trimmed hedges and a manicured lawn. Remove any vehicles from the driveway and tidy the yard to ensure a clear view of the property, emphasizing the available outdoor space.

    Real Estate Photography Business Essentials

    A bright, spacious living room with modern furniture and large windows showcasing a scenic view. A professional camera and tripod are set up, ready to capture the space

    To excel in real estate photography, your business must combine competitive pricing strategies, effective marketing tactics, and comprehensive business management. These factors are critical in establishing your reputation and success in the industry.

    Setting Competitive Pricing

    When considering real estate photography pricing, you should evaluate both overhead and market rates to set fees that are fair and competitive.

    Start by listing your expenses such as equipment costs, transportation, and insurance, and then add a margin for profit.

    It’s wise to create a tiered pricing model based on property size or package deals to accommodate various client needs. This allows you to cover small apartments and large estates alike, securing a wider client base.

    • Standard Package: Includes basic coverage, suitable for small properties.
    • Premium Package: Offers extended services like aerial shots, especially for large estates.

    Considering a professional photographer’s time and expertise is also vital in determining your rates.

    Ensure your pricing reflects the quality of work you provide and allows you to maintain a sustainable business model.

    Marketing Your Photography Services

    Your marketing strategy should highlight your strengths and showcase your work to the right audience.

    Build a portfolio that exhibits the best of your real estate photography, which you can use on your business cards, website, and social media.

    A robust portfolio reassures potential clients of your capability to deliver high-quality visual content.

    Immortalize your top projects with descriptions outlining challenges and solutions:

    • Luxury Property: Showcase upscale amenities with elegant photography.
    • Commercial Estate: Highlight business-centered features and design.

    Networking at real estate events and online communities can also boost your reputation.

    Collaborate with real estate agents who can refer your services, and consider joining professional photography associations to increase visibility and credibility.

    Managing a Successful Real Estate Photography Business

    Effective management of your real estate photography business encompasses more than just capturing stunning images; it involves meticulous business planning and client relations.

    Keep detailed records of client interactions, agreements, and invoices to ensure smooth operations.

    Insurance is also a non-negotiable aspect of your business, protecting you from unexpected liabilities and equipment damage.

    Remember to integrate customer feedback into your business model to continuously improve service quality.

    Moreover, regular updates to your portfolio, along with a transparent fee structure, can fortify trust and encourage repeat business.

    Prioritize delivering exceptional service to every client as your reputation will ultimately be the cornerstone of your success.

    Frequently Asked Questions

    A bright and spacious living room with modern furniture and large windows showcasing a beautiful view of the surrounding landscape

    Real estate photography is critical to showcasing your property effectively. It highlights your home’s best features and can make a significant difference in how quickly it sells and for what price.

    Why should I consider professional photography for my property listing?

    Professional photography ensures that your property is presented in the best possible light. High-quality images can grab potential buyers’ attention and are more likely to get them to view the listing in detail.

    What advantages do professionally taken photos offer in selling a home?

    Professionally taken photos offer a realistic and attractive representation of your home, which can attract more buyers and trigger competitive offers. They provide an accurate visual story of your property, emphasizing its strengths.

    Can quality real estate photography impact the selling price of a home?

    Yes, quality real estate photography can impact the selling price. Homes with professional photographs tend to sell for more, as compelling images can increase perceived value and lead to higher offers.

    How can real estate photography influence a buyer’s decision-making process?

    Real estate photography can significantly influence a buyer’s decision by highlighting the features of a home in a compelling way. This visual appeal can create emotional connections, making the property more memorable and desirable.

    What is the role of real estate photography in online property marketing?

    In online property marketing, real estate photography is essential as it is often the first point of contact between the buyer and the property. High-quality photos can increase traffic to the online listing and keep potential buyers engaged.

    How does professional photography affect the length of time a property is on the market?

    Professional photography can reduce the time a property spends on the market.

    Attractive, high-resolution images can lead to faster sales, as they help listings stand out amongst the competition, encouraging quicker buyer interest and action.