Author: Claire Wright

  • 6 Basic Drone Real Estate Photography Tips You Should Learn

    6 Basic Drone Real Estate Photography Tips You Should Learn

    The art of photography has been boosted by drones. They have propelled photography to new heights and have taken the world by storm. Drones have been considered by photographers as a vital source to produce beautiful photos. They have opened up countless possibilities for photographers and videographers alike.

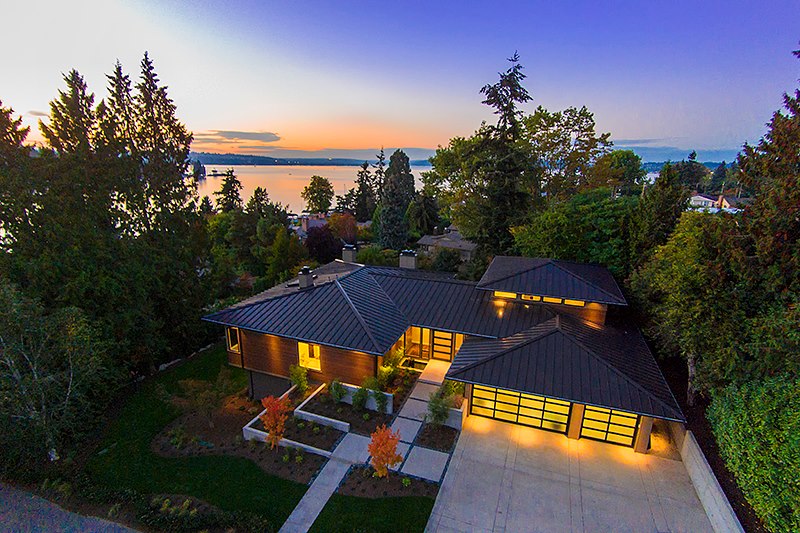
    Most especially for the aerial views of real estate properties, using drones can bring out unique and interesting perspectives. The use of drones allows every photographer to take photos at a higher perspective. According to Digi Cam Control, drones can instantly change plain old photos into something impressive.

    One can be truly impressed at how drones are capable of giving unique photos and videos. Especially important for photographers, drones have built-in cameras to rotate to provide them more freedom in creating magnificent photos. Aside from this, drones can help you reach far-flung areas that are inaccessible.

    Real Estate Drone Photography Tips

    Nowadays, drones are great not only for hobbies but to businesses as well. Adding drone to photography and videography real estate business can really help boost your business thus, increasing cash flow. To be able to master the use of drones, try the following tips below.

    • Basic function of drones must be clearly understood

    Basic function of drones

    According to dronevibes.com, learning to understand the equipment and finding time to practice it is the initial thing to do. Many drones that are available in the market today are very easy to operate with little practice time to spare.

    Making the drone fly in the air and just pushing the shutter button is the easiest part of the work. A photographer also needs to understand the light condition and the environment first before producing the well composed and graded photographs.

    • A well-planned shoot is a requirement

    As with all types of photography engagement, it is important to plan ahead. One of the reasons why photos are produced creatively is because the photographer must initially spend time researching the specific location of the property. To make things easier, Google Maps will aid you in scouting the area.

    Choosing a perfect time of the day to shoot is crucial in the development of a good photograph. Also consider the position of the sun during aerial drone photography because proper lighting is a big factor in the contrast of the shoot.

    Pre-visualizing the shoot will definitely help each photographer to assess the available points of view. For this reason, the camera’s settings can be adjusted like the metering mode and exposure mode.

    • Check propeller balancing and vibration dampening

    According to http://www.droneybee.com/drone-aerial-photography/, it is always important to check the propellers of the drone frequently to avoid the wobbling effect that basically affects the photo or video shoot. Even the slightest imbalance can create an uneven weight distribution that can significantly create extra movement that is prohibited in photo shoots.

    • Know the weather of your location

    Even if you are very creative in your drone photography techniques, it is still better to avoid using your equipment during windy, rainy or snowy weather. Although there are drones that are specifically made for rough conditions, it is still recommended to take shoots when the sun shines brightly.

    • Maximize flight time

    The last thing you really wanted is to damage or crash your drone. Once you are familiar with your equipment, it is important to know how long the drone can fly. It is essential to make test runs first before taking a serious flight for shoot.

    • Learn the concepts of aerial photography

    Even if you master the settings and manipulation of your drone, it is deemed useless if you do not know the basics of aerial photography. These concepts may include the focal length and scale, fiducial marks, overlapping and stereoscopic coverage, and many more. According to http://www.droneybee.com/drone-aerial-photography/, this is one of the requirements in developing the skills with drone aerial photography.

    Aside from the equipment that you own, you can also learn to master the concepts of aerial photography by watching and learning aerial photography and videos. Getting inspiration is one way to improve the art of aerial real estate photography. Learn how to get the piloting done and how the equipment is maneuvered around the area to constantly improve your craft.

    Author:
    Claire Wright circleClaire Wright, a savvy tech nerd and self-taught photographer who lives in Seattle and working at one of the best real estate photography companies called HD Estates.

  • HDR Your Real Estate Photography the Quickest Way

    HDR Your Real Estate Photography the Quickest Way

    The landscape of real estate photography has gone a long way since the turn of the century. Real estate photography involves both residential interiors and exteriors that are taken at different angles. It is known that clients may have different tastes in terms of property characteristics and a perfect shoot may all spell the difference.

    Time is gold in this advocacy as you also need to consider the time you spend with those you are working with and for those who own the property as well. And when we ponder on what time is the best for photo shooting, not all hours of the day are the same. The so-called golden hours for photo shooting are the hours before sunrise and before sunset.

    Efficient shooting and perfect processing workflow are the ones a real estate photographer must consider most. The reproduction of space in a realistic manner will help you sell the properties because of the photos you shoot. This is what clients really appreciate and accept. As we all know, houses and similar real estate properties contain challenging things when photography is concerned.

    HDR Photography: What is it?

    HDR or High Dynamic Range Photography is a trick in photography wherein a photographer can reproduce an efficient range of luminosity. This technique is a far better than what a standard photography can offer. Taking photographs of the same area but in different exposures then blending them altogether is the main concept of HDR Photography.

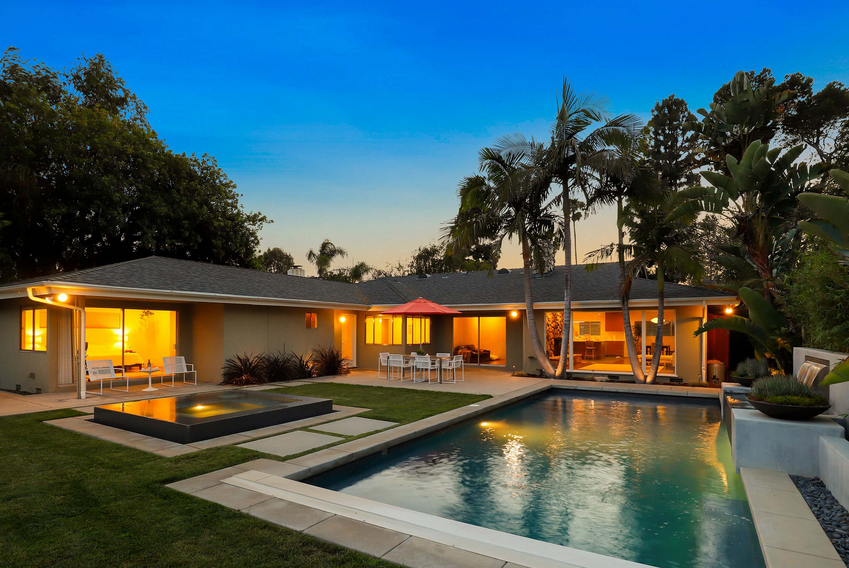
    In the case of real estates, HDR makes the work of the photographer easier. When he shoots photos from the inside, all the details of the room are obviously visible. What is remarkable is that the view outside the window does not look overexposed.

    The use of light is the primary idea when it comes to photography. Yet many of the photographers nowadays are making use of HDR as a solution and emerging alternate to flash guns and the use of multiple lights. In using HDR Photography, the delivery of a fresh and great looking image is exemplary but has a natural feel to it.

    Things Needed for a Good HDR Photography

    Since every photographer is assumed to have media cards, DSLR and lenses, there are still few requirements that needed to be prepared. These are as follows.

    1. Remote Trigger

    A remote trigger for the camera is important. This is required to minimize any unacceptable camera movement. This is also the best way to get a good picture without even touching the camera.

    Remote Trigger

    2. Tripod

    It is mandatory for every real estate photographer to have a tripod. This is important if you have to create a bracketed exposure of the room. Moving the camera just an inch will ruin everything. Aside from the camera, this is the second most important necessity if you want an assurance that your photos are all free from fuzziness.

    Tripod

    3. Flash

    It is widely recommended that a real estate photographer must use a ‘fill flash’. Fill flash means turning the flash to the lowermost setting as possible. There are photographers who oppose the idea of using a flash. But when it comes to working and shooting photos indoor, basic lighting plan with the use of fill flash is required.

    flash photographer

    4. Software

    Using the best possible software for your HDR is a discussion among professional real estate photographers. The list of HDR software that is preferred most by photographers includes Adobe’s Photoshop which basically produce HDR images. Some would say that Photomatrix Pro 5.0 is better than Adobe’s version. What these HDR software do is that after capturing the images and once merged, the product is a new image having the dynamism of the original photos.

    Using HDR: A Step-by-Step Guide

    The procedure in using HDR to real estate photography is mentioned as follows:

    1. Measure the Dynamic Range

    After considering the space for your picture, it is a basic idea to first set the camera to Manual Mode. This allows you to adjust the white balance before you use the camera further. It also permits you to change the shutter speed. Afterwards, you need to set the aperture to either f/8 or f/11 but these are optional settings. It is required to measure the brightest bright and the darkest dark of the area. Everything still depends on what aperture setting the photographer personally likes.

    2. Use HDR Bracketing

    Some practices that are included in HDR bracketing involve overlapping photos during the blending procedure. It is advisable to preserve the focus during the entire process. This is done in order to get the same image results. Bracketed exposures may involve interior shots like balance difficulty, and single frame standard range.

    3. Presets as Starting Points

    There are assortments of presets involving the key areas of color blending. These are the white balance and color fidelity. Based on HDR bracketing, colors that are often found when the bright rays of the sun comes through the window are totally imbalanced. Once extreme highlighting is done, the tonal range and white balance blend each other.

    Using the 5 Stop Natural and 5 Stop Mixed Light presets, balancing of sunlight and warmer fluorescent illumination are made easily. The Single Exposure preset of the HDR technique requires several exposures to blend with the dynamic range. This trick can process several files down to single file only. The procedure mentioned can be several approaches of integrating HDR processing to real estate photography.
    Author:
    Claire Wright circleClaire Wright, a savvy tech nerd and self-taught photographer who lives in Seattle and working at one of the best real estate photography companies called HD Estates.

  • The Benefits of Partnering with a Real Estate Photography Company for Real Estate Marketing

    The Benefits of Partnering with a Real Estate Photography Company for Real Estate Marketing

    Real estate is a tough industry to compete in. Everyone is competitive and racing against time to sell more properties. If you’re in that business, you need to invest in marketing to ensure that your properties sell faster and you book more clients. This is one of your best bets in order to stand out from the competition.

    One of the best marketing strategies that you can implement for your business is to partner with a professional real estate photography company. This could mean a little investment on your part, but this will be worth it in the long run.

    Here are the benefits of hiring a professional company:

    1. Faster turnaround time. In real estate, time is money. Getting the listings out quicker is always important. This could mean selling the property right away when you can. When you’re hiring a real estate photography company to take the pictures, you can get the final output in as early as 24 hours or earlier. They have a whole team who will work on your photos so you can get them faster. This ensures that you can post the photos for listings right away. For some photographers, turnaround time might be more than two days, especially when they are working on their own.

    2. Staged photography. The great thing about working with a real estate photography company is that they have professional photographers who will go on location with you. These photographers are experienced in the industry and know how to create the best atmosphere and setup when it comes to achieving the best real estate photos. Having a photographer who knows how to stage the interior and even do minor arrangement works wonders. Doing so ensures that the resulting photos will be of quality and that the property is seen in the best light.

    3. Proper post-production. Aside from just staging the interiors, doing post-production is important to real estate photography. Often the best photos come from doing the right edits. When executed properly, this can make or break the photos. With a good photographer, the edits are fewer. However, there will be little post-production necessary like straightening the lines and ensuring that the colors are accurate. Professional retouchers will know this, especially those who have been working in real estate.

    4. Get the best quality photos. With the proper staging and post-production, you can get the best quality photos for your listings. Hiring a real estate photography company means that you will be provided with the highest quality of photos for listings and other marketing collaterals. These companies are professionals with years of experience in the real estate industry. They know the requirements needed by those in the business in order to sell, which is amazing photos.

    5. Generate more leads. When you’re real estate photography company provides you with amazing photos, you are able to generate more leads. Most of the potential home buyers look at the photos first before calling the agent for a meeting. This is what potential buyers will look at especially when checking out different properties online. When you have the best photos, most often than not, you’ll get the most calls and inquiries.

    Author:
    Claire Wright, a savvy tech nerd and self-taught photographer who lives in Seattle and working at one of the best real estate photography companies called HD Estates.

  • How to Spot an Amateur Real Estate Photographer in 6 Easy Ways

    How to Spot an Amateur Real Estate Photographer in 6 Easy Ways

    Real estate photography can be a lucrative business especially if you get booked by a lot of real estate brokers. Because of this, there can be a ton of photographers who are also offering the same services in one area. The challenge for many homeowners and real estate brokers is finding a professional photographer who can deliver quality images.

    To set apart amateur photographers from real ones, here are some of the quick giveaways that you need to keep an eye on.

    Once you spot one or two of these errors in the final output, then you’ve hired an amateur photographer.

    1. Weak perspectives.

    photo weak perspective

    Composition is key in photography, no matter what the industry is. An amateur photographer will have weak perspectives and composing strategies. When shooting real estate, this often results in incorrect horizontals or converging verticals. Inexperienced photographers will not see this issue in the final photo. The goal of real estate photography is to have pleasing photos of the property in order to sell it fast. When horizontals are misaligned, the space looks crooked. In addition to that, a photo should have one or two strong points where the lines converge on a disappearing point.

    2. Over-processed HDR.

    OVERPROCESSED hdr

    HDR photography is a mainstay in real estate photography. Often, this is used as a creative take in a space. But when done inappropriately, this can look over-the-top and overprocessed. An HDR photo with a bad tone map can be caused by invalid settings during post-production. This can happen when the photographer only took ambient photos of the space without taking photos with flash or photos that are well-lit. Before combining photos for HDR, each of the photos must also be edited properly for color balance.

    3. Flash hotspots.

    Flash Spots Photo Failure

    This can be an issue when using flashes for interior photos. Flash spots can occur when the flash is directed to one area and is not diffused properly. This can also happen when you’re using on-camera flash. This is not aesthetically pleasing especially when posted on listings. Amateur real estate photographers sometimes point their flashes straightforward without diffusion. This can create harsh hotspots on surfaces. Just using an umbrella or bouncing light off the ceiling can create a more diffused light that’s great for photos.

    4. Harsh shadows.

    hash shadows

    In real estate, a photographer must work well with light. This is important in order to achieve the most amazing and well-lit photos. When shooting the interior, shadows can be a problem. If you see final photos with harsh shadows, then you’ve found an amateur photographer. You can find these shadows on walls and at the back of fixtures or furniture pieces. This is a no-no when it comes to real estate, especially when home buyers prefer homes that are well-lit. Harsh shadows can often make the property look dirty or stained.

    5. Incorrect white balance.

    wrong white balance

    No matter what you’re shooting, the right white balance can make or break your image. White balancing ensures that there is no cast of unrealistic color on the image so white objects does appear white. This is something that needs to be done especially when shooting interiors since there will be different light sources with different temperatures. This could mess up the output if not corrected during post-process. Amateur photographers often present photos that do not show the accurate colors of the space. Final output should have the right colors as this is an accurate representation of the property.

    6. Lens distortion.

    lens destortion

    Wide-angle lenses are often the most used gear in real estate photography. This makes it easy to capture the entire home, especially when shooting large rooms. However, you can get lens distortion when using ultra-wide lenses. This is because they have a wide field of view that lines tend to bow outward or away from the center. A professional and experienced photographer will easily spot the distortion and have it corrected during post-processing.

    References:
    http://blog.phixer.net/amateur-real-estate-photographer/
    https://expertphotography.com/5-levels-amateur-photographer-which-group-are-you-in/
    https://digital-photography-school.com/find-fulfillment-amateur-photographer/
    http://www.milliondollarphotographer.com/19-signs-you-are-treating.html
    https://www.quora.com/What-are-the-most-obvious-signs-of-an-amateur-photograph

    Author:
    Claire Wright, a savvy tech nerd and self-taught photographer who lives in Seattle and working at one of the best real estate photography companies called HD Estates.

  • Things to Consider in Hiring a Pro Real Estate Photographer

    Things to Consider in Hiring a Pro Real Estate Photographer

    Being in the real estate industry can be challenging. The industry can be tough and competitive. There are quotas to reach and sales to make. Time is always of the essence and first impressions are essential.

    If you’re a broker or running a real estate business, you know for a fact that pictures are your best allies. These can help you create a good impression or just help you in selling properties fast. To achieve this, you need to invest in the services of a professional real estate photographer.

    Here are factors that you need to consider when looking for a photographer to help you in your real estate business:

    • Experience. Look for someone who is familiar with real estate. Although different photography works are similar on most levels, there are certain things that an experienced real estate photographer knows. This includes shooting interiors and capturing the best photographs of a commercial or residential space. There are also certain editing and photography techniques that only experienced real estate photographers are familiar. With this knowledge in the industry, they are also able to deliver the kind of images that clients and buyers actually want. You’ll save more time when you hire an experienced photographer.

    • Portfolio. You don’t want to miss asking for a solid portfolio from any photographer. Ask for portfolios from potential candidates to make sure that they can walk their talk. This allows you to check their work and ensure that they can produce the kind of images that you are looking for. Look for a photographer whose style matches with your business and the kind of clients that you take. A portfolio can tell you a lot about a photographer’s skills and what to expect from them. It can also help filter choices according to you project’s needs.

    • Film-making skills. Make sure that you hire someone who can be flexible in doing stills and videos, especially if both are things that you need in the business. Both are usually needed in order to make listings stand out from the rest. A real estate photographer who can bounce between the two will help you in drawing in more viewers and more clients. This should be something that you need to ask upfront. This skill can cost you more but it’ll be worth it down the road.

    • Pricing. This is a consideration that you wouldn’t want to miss. You wouldn’t want to spend money on work that’s subpar. Most often, than not, the cheapest photographer cannot provide you with the type of quality that you need. Do not always go for the lowest price that you get. Make sure that you invest and pay for what the image is worth. It is often the service and the output that you’re paying for when hiring a photographer. Ensure that the price is fair for both your business and the photographer.

    • Turnaround time. A fast turnaround time will help you achieve your goals. Since the real estate industry is fast-paced, you need to look for a photographer who can deliver the finished photos in a timely manner. This makes sure that you can quickly post your listings and make a sale right away. A 24- to 48-hour turnaround time is usually the standard when it comes to real estate photos. Make sure that your photographer can provide you with quality photos at this set time or even earlier.

    • Professionalism. Of course, you’d want to work with a professional photographer who delivers. You have to remember that the output is an extension of your name and brand. Hire a photographer who shows up on time during photo shoots and conducts themselves professionally in front of clients. Your photographer also needs to understand your business and make sure that he/she communicates this through photography. A professional photographer can be a dream to work with and this prevents any issues that you may encounter in the future.

  • Real Estate Tips and Tricks: How to Capture a Beautiful Shot Using Your Android Phone

    Real Estate Tips and Tricks: How to Capture a Beautiful Shot Using Your Android Phone

    Smartphone photography is becoming predominant no matter what field you are in. These pocket devices are now packed with great features that allow anyone to become photographers even without spending on expensive gears. Smartphones are now powerful enough to take amazing photos. These can even be used in real estate photography.

    The real estate industry is big on photography. Photos and videos are used for sales and marketing. If you’re in real estate and you want to sell properties effectively, you need to have great photos on your listings. Instead of investing in expensive photography gear or paying someone else for photos, you can use your own smartphone to take photos. You just need to know the tips and tricks to hack your Android phone for real estate photography.

    Basics of photography

    Make sure that you are familiar with the basic photography first. This will be your guide to taking strong images for real estate. No matter what kind of gear you’re using, the rules of photography are pretty much the same.

    Here are some basics that you need to be familiar with when shooting with a mobile phone:

    Lighting. No matter what your subject is when you’re shooting, it’s best to shoot with a good lighting situation. This can be especially beneficial when you’re shooting an interior in a project. Make sure that you shoot when there is light so you wouldn’t have to go through the pains of editing the photo. Shoot in the early morning or late afternoon when the natural light is diffused and soft. If you’re taking a photo of a room, ensure that the blinds and curtains are open and all the lights are turned on.

    Strong subject. You need to make sure that your subject or main focus stands out in the photo. It needs to be the most pronounced in your image. Viewers should be able to tell what your subject is. In case of real estate images, capture as much as you can of the room.

    Composition. How you compose your image will make or break you. Knowing the basic composition techniques will help you up your game and improve your overall photography. No matter what gear you’re using, if you don’t know how to compose your photo, then you wouldn’t get the results that you want. The most common technique is the rule of thirds. This is where you will divide the frame into nine rectangles and place the most important element along where the lines intersect. Putting your subject off center will create a more interesting composition. Other composition strategies are symmetry, leading lines, frame within a frame, and diagonals and triangles among many others. With composition, you have to train your eye to look at the scene from a different perspective and find out what makes it interesting.

    Apps for real estate photography

    If you’re shooting with an Android phone, there are a few apps that can help you up your game and improve your photos. Just having a few reliable apps under your sleeves can help you in taking better images and help you in editing your photos afterward.

    1. Snapseed. This software is made by Google’s subsidiary. Snapseed can be a great starter editing app for those who are new to photography and post-processing. Its user interface is simple. It has the basic editing features, such as rotate, crop, brush, white balance, rotate, text, select, transform, and curve. You can easily make adjustments and edit your photo to make it look even better.

    2. Diptic. When you need to create collages for a listing, you can use Diptic. This app has an easy-to-use design so you can quickly create a collage of the photos you’ve taken. It has 179 different layouts and filters that you can use in editing your work. Just select the layout that you prefer and add the photographs that you want to use. You can use Diptic collages in creating before and after images of a property or make a collage for a presentation.

    3. 360 Panorama. This app is a favorite among many smartphone photographers. It provides you with creative features to create more interesting photos. You can use the app in photographing panoramic sceneries. Apply this in real estate by capturing the exterior of the property to show the curb appeal. You can also use this app to capture the entire room.

    4. LightTrac. Because lighting is essential in real estate photography, you need to know where the sun is when you’re out for a shoot. This app is helpful when you need to take outdoor photos. To use the app, just put your location information and the app will calculate the position of the sun based on your location. LightTrac will also give you information regarding the moonrise, sunrise, and sunset.

    Tips for using a smartphone

    Once you know the basics of photography and have downloaded the needed apps in improving your images, make sure that you keep practicing to improve your photos.

    Here are other tips that you could use when photographing with your Android phone:

    a) Take multiple images. Even professional photographers don’t get the best image with their first shot. Take multiple photos of your intended subject and never settle for the first photo. You might get the best photo on your fourth try.

    b) Try various angles. Whatever you’re photographing, experiment with different angles to find one that’s most appealing. If you’re shooting a room, try shooting from all four corners with a high angle.

    c) Edit your work. The above-mentioned apps will help you in editing your work. Apply filters and editing features effectively to create better images. However, it’s best to not over-edit. Make sure that everything still looks realistic instead of over-processed.