Category: Uncategorized

  • What to Do Before Selling Your House for Top Dollar

    What to Do Before Selling Your House for Top Dollar

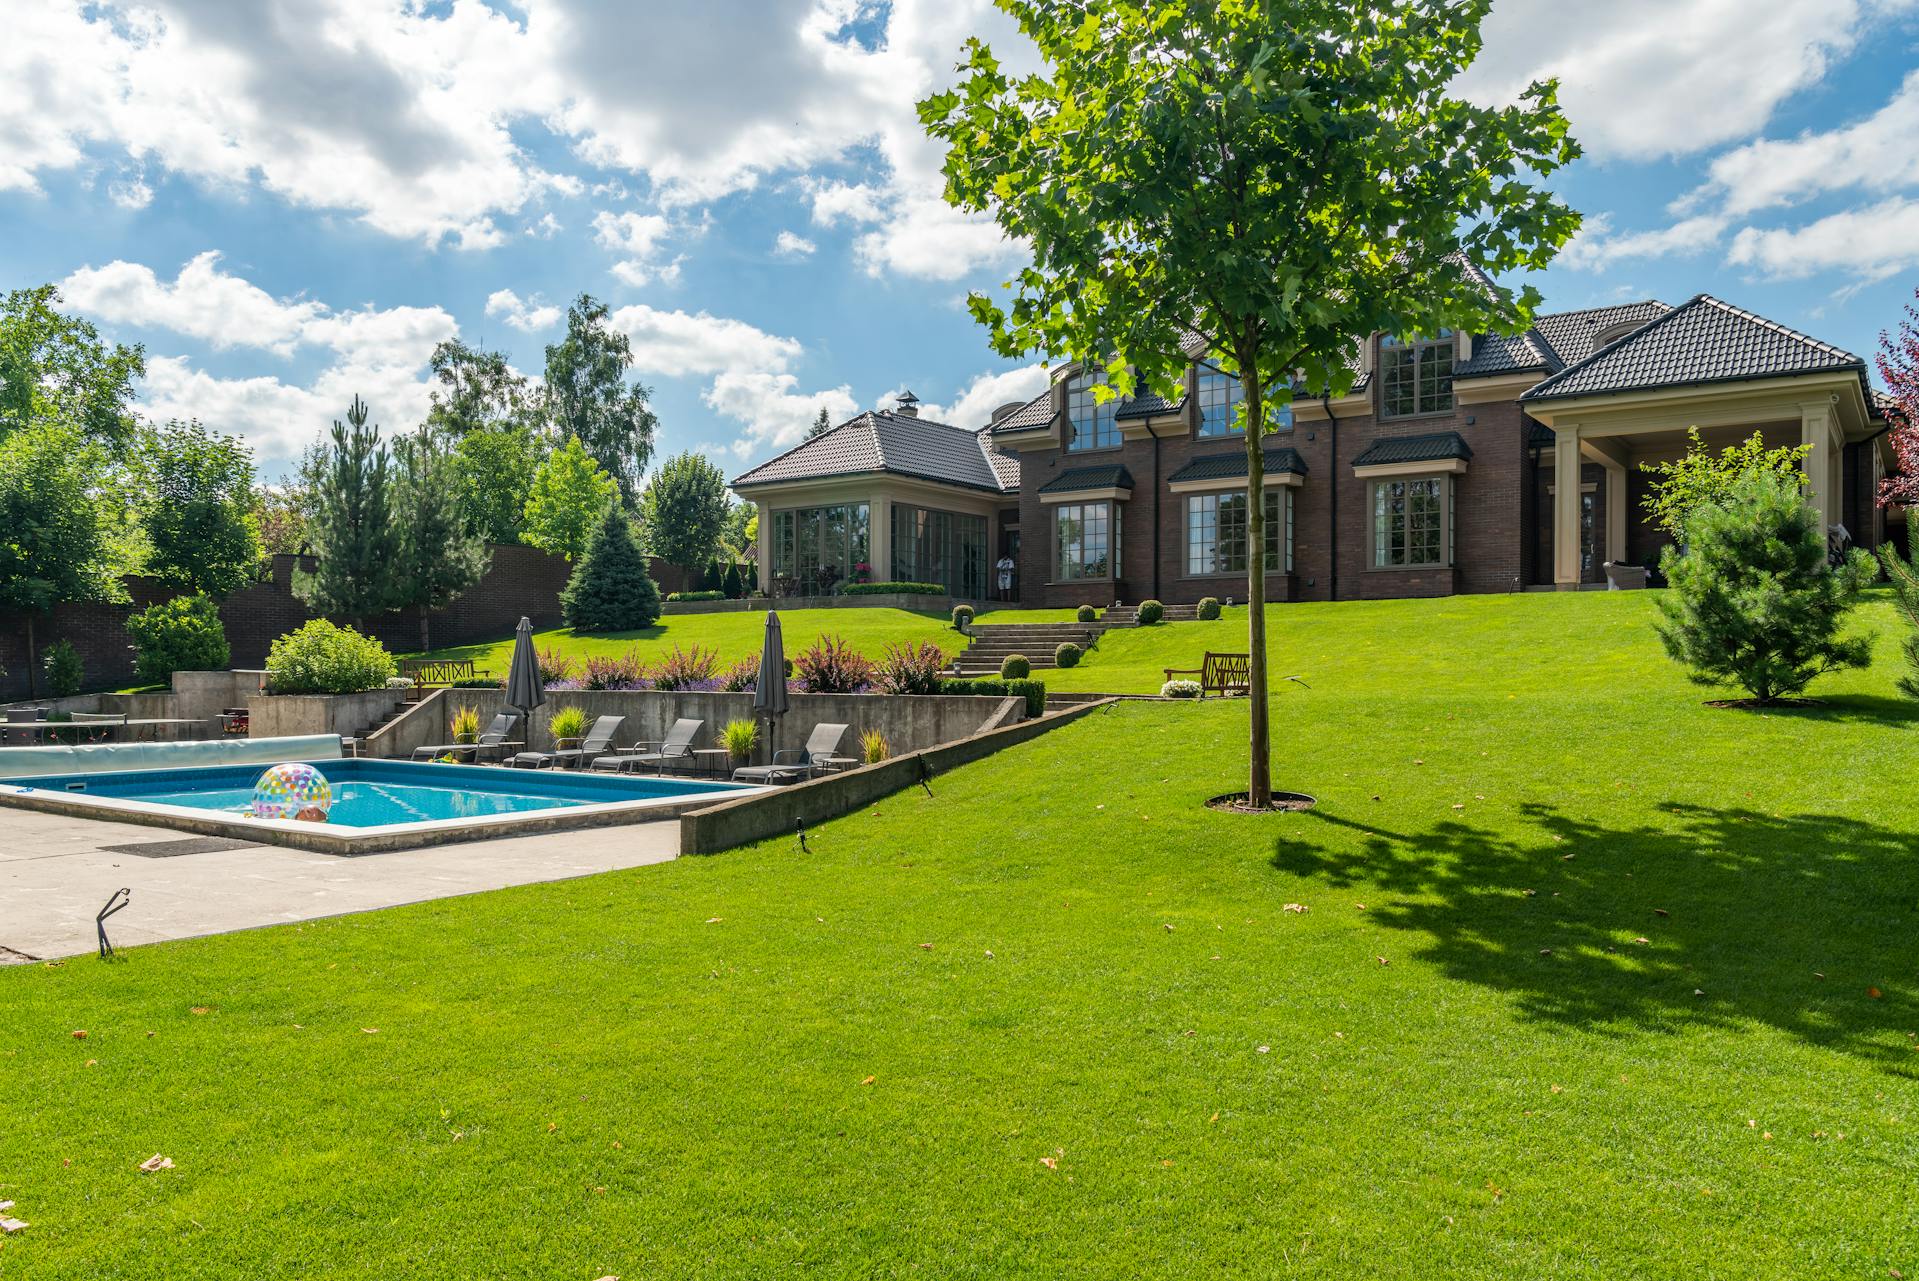
    When homeowners begin thinking about what to do before selling a house, the first challenge is often figuring out where to start. Every property is different, and so is every market, which means the steps that lead to a top-dollar sale depend heavily on preparation.

    Buyers today, especially throughout the Pacific Northwest, expect homes to feel clean, polished and well-presented long before they ever schedule a showing. They’re comparing your listing against dozens of others online, and most will decide within seconds whether to click for more information.

    Getting the highest possible price requires a strategic approach that blends presentation, condition, timing and smart marketing. It’s about viewing your home the way a buyer will and anticipating what they’ll notice first. High-quality listing media also plays a major role, and many sellers rely on professional real estate photography, such as the work produced by HD Estates, to make those early impressions count.

    In this guide, we’ll break down the key steps you should take before listing, including essential repairs, staging tips, decluttering, curb appeal enhancements, the importance of great photos, pricing strategies and choosing the right timing for your sale.

    real estate photo HD Estates

    Source: Unsplash (CC0)

    Preparing Your Home for Sale

    Preparing a house to sell starts with learning to see your property through fresh eyes. One of the most effective first steps is walking through every room as if you were a potential buyer.

    Look for anything that stands out in both a good way or a bad way. Scuffed walls, outdated light fixtures, overflowing closets, worn flooring, and cluttered surfaces all distract from the home’s strengths. Take note of cosmetic updates you can make quickly and any areas that may require deeper attention.

    A full walkthrough also helps you identify patterns: Is there enough natural light? Are rooms arranged to feel spacious? Are there small repairs you’ve ignored because you’ve simply gotten used to them? These details matter. Buyers interpret even minor flaws as signs that larger issues might be lurking, so your goal is to remove doubt before it forms.

    It can also be helpful to consider a pre-listing inspection. While not mandatory, it can uncover issues early, giving you time to address them before negotiations begin. This proactive step often reduces stress and helps create a smoother path to closing.

    Emotion plays a surprisingly big role here as well. When selling your home, you need to detach yourself from the way you use the space and focus on how buyers will use it. That shift in perspective will guide smarter decisions about updates, staging and layout. Many agents pair this preparation with professional listing photos or virtual staging to present each space in its best light.

    To conclude, the more move-in ready your home appears, the more appealing it becomes to buyers.

    Essential Repairs to Consider

    Once you have a clear sense of your home’s condition, the next step is prioritizing repairs.

    Safety and functionality

    Focus first on anything related to safety or functionality. Buyers pay close attention to major systems such as HVAC units, plumbing, electrical panels, water heaters and roofing. Leaky faucets, inconsistent heating, outdated wiring, or any sign of water damage can quickly turn into negotiation leverage for a buyer.

    Handling these issues upfront shows that the home has been well cared for, which increases confidence and perceived value.

    Consider upgrades

    After addressing functional items, consider upgrades that provide strong cosmetic impact without requiring major investment. Repainting rooms with neutral tones can do wonders for creating a clean, cohesive look. Replacing worn carpet, refinishing hardwood floors, updating cabinet hardware or swapping old light fixtures for modern alternatives can transform a space instantly.

    These small improvements photograph beautifully and help buyers see the home as fresh rather than dated.

    Early repairs can protect your sale price

    Keep in mind that when selling your home, many buyers assume repairs will cost far more than they actually do. If they notice issues during a showing, they may lower their offer significantly to account for those assumed expenses. By completing strategic repairs early, you reduce the likelihood of price reductions or extended negotiations.

    High-quality, high-resolution photography can further showcase these improvements. Fresh paint, restored flooring and updated fixtures look more impressive online when captured accurately. This strengthens your listing and helps your home stand out from the competition before buyers even step inside.

    Staging Tips for Attracting Buyers

    Staging plays a major role in helping buyers imagine how they might live in your home. A well-staged space highlights each room’s purpose, creates a natural flow and gives buyers a sense of comfort and potential. When people walk into a staged home, they form emotional connections more quickly, and this can translate into stronger offers and a faster sale.

    DIY or professional staging?

    You can stage a home yourself, or you can hire a professional. DIY staging can work well if you have an eye for decor and are simply refreshing what you already own.

    Professionals, on the other hand, bring experience, neutral furnishings and a clear understanding of what today’s buyers expect. They also know how to use proportion, balance and color to make each room look bigger and more inviting.

    Staging considerations

    Color and lighting also play an important role. Neutral tones, soft whites and gentle grays help buyers see the architecture rather than the decor. Warm lighting creates an inviting atmosphere that photographs beautifully. Personal decor should be minimized, including bold artwork, niche collections and anything that distracts from the space itself.

    Staging trends tend to favor natural textures, minimalistic palettes and organic materials. Wood, linen, stone and greenery help create a calm environment that suits the region’s lifestyle and aesthetic.
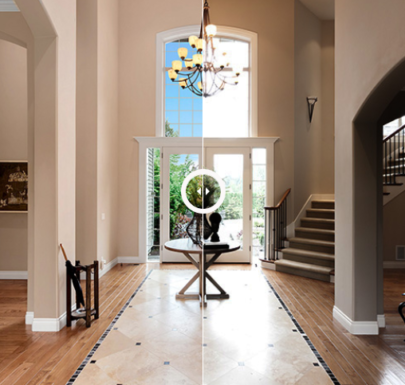
    Virtual staging

    For vacant homes, virtual staging is a strong alternative. It allows potential buyers to visualize rooms furnished with high-quality digital decor. HD Estates offers virtual staging that can make empty rooms feel complete and help listings stand out online.

    No matter which approach you choose, staged homes almost always photograph better. Clean lines, intentional furniture placement and consistent design make listing photos more appealing and increase the chances of buyers clicking for more information.

    Decluttering: A Step-by-Step Guide

    Decluttering is one of the most effective ways to prepare your home for the market. When buyers see a clean, spacious home, they perceive it as well cared for and easier to move into. And when thinking about what to do before you sell your house, decluttering consistently ranks as a top priority.

    Start with the spaces buyers notice first

    Start with visible surfaces. Clear kitchen countertops, tidy entryways, empty bathroom vanities and simplify shelves or side tables. The goal is to remove visual noise so buyers focus on the home rather than the belongings inside it.

    Move on to hidden storage areas

    Next, work on hidden areas like closets, cabinets, drawers and storage rooms. Buyers will open everything, and full or disorganized spaces make them assume the home lacks storage. Organize items neatly, pack away what you do not use regularly and consider donating anything you no longer need.

    Remove personal items to create neutral spaces

    Remove overly personal items such as family photos, children’s artwork, personal collections and bold decorations. Buyers need space to imagine their own lives in the home. If your décor is too specific, it becomes harder for them to picture themselves living there.

    Keep surfaces clear and rooms uncluttered

    Minimize furniture where possible to create more open, breathable rooms. Too many pieces make spaces feel smaller in person and in listing photos. If needed, rent a storage unit temporarily to keep extra furniture and boxes out of sight.

    Why decluttering matters for your listing photos

    Decluttered spaces photograph significantly better, especially when captured with wide-angle interior photography. Teams like HD Estates specialize in showcasing clean, organized rooms in a way that highlights natural light, layout and depth.

    A well-decluttered home not only looks polished but also communicates that it has been well maintained, which increases buyer confidence and improves the likelihood of a strong offer.

    Enhancing Curb Appeal Effectively

    Before buyers see your kitchen, bathrooms or updated flooring, they see the outside of your home. That first impression sets the tone for the rest of the showing and has a surprisingly strong effect on how buyers evaluate value. Enhancing curb appeal is one of the simplest and most cost-effective steps you can take when preparing a house to sell.

    Simple updates that make a big difference

    Start by refreshing the exterior. Pressure wash sidewalks, driveways, porches and siding to remove dirt and discoloration. Add fresh mulch to garden beds, trim shrubs and trees, and plant seasonal flowers for a welcoming look.

    Repainting or replacing the front door can make a dramatic impact, especially when paired with updated hardware and clear, modern house numbers. Good exterior lighting is another small upgrade that improves both safety and visual appeal.

    How curb appeal influences listing media

    Curb appeal also influences how well your listing photographs and videos turn out. A clean driveway, neat landscaping and a well-kept facade look better in exterior photos and drone overhead shots. Since most buyers discover homes online, that first exterior image matters significantly.

    Small investments in curb appeal often deliver some of the highest returns, making it a smart and strategic part of preparing your home for top-dollar results.

    Special considerations for Pacific Northwest sellers

    For sellers in the Pacific Northwest, there are additional considerations. Moss buildup, fallen leaves, heavy rain and damp conditions are common, so make sure walkways are clean, roofs are cleared and exterior surfaces are free from moisture damage.

    These small steps prevent a home from appearing weather-worn.

    Importance of High-Quality Photos

    In today’s digital-first market, nearly every buyer begins their home search online. That means listing photos creates the very first impression of your property. High-quality images can highlight your home’s strengths, while poor photos can cause buyers to skip the listing entirely.

    Skilled photographers understand how to balance light, showcase room dimensions and capture the true feel of a space. They use proper composition, exposure and equipment, techniques that eliminate harsh shadows, crooked lines or distorted rooms. Professional photos help buyers perceive your home as brighter, larger and better maintained, which increases its appeal and perceived value.

    Beyond photos, video walkthroughs, drone shots and 3D tours help buyers visualize the layout and get a more immersive sense of the property. Drone photography is particularly helpful for homes with water views, expansive lots or unique architectural elements.

    Setting the Right Asking Price

    Setting the right asking price requires understanding local market conditions, recent comparable sales and your home’s overall condition. The goal is to position the home competitively so it attracts serious buyers without leaving money on the table.

    Overpricing is one of the most common mistakes when selling your home. A home priced too high often receives fewer showings, stays on the market longer and ultimately sells for less once price reductions begin.

    Work with an experienced real estate agent who can perform a comparative market analysis (CMA). They’ll evaluate similar properties, recent sales and neighborhood trends. Be realistic about your home’s features and condition. If you have made major repairs, updated finishes or invested in staging, those improvements will support a stronger price point.

    Pricing slightly below market value can generate more interest and potentially spark multiple offers, especially in competitive areas. A well-prepared home backed by strong listing media often performs exceptionally well with this strategy.

    Timing Your Sale for Maximum Profit

    Choosing the right time to list can significantly impact your sale price. In the United States, the spring and early summer months typically attract the most buyers. Families prefer to move during school breaks, and longer daylight hours make showings feel more inviting.

    The Pacific Northwest, particularly cities like Seattle and Bellevue, experiences unique weather patterns that influence buyer behavior. Homes listed during brighter, sunnier months often perform better because natural light improves photos and video quality.

    Lastly, interest rates, economic conditions and neighborhood trends may create windows where it’s beneficial to list quickly. Consult with your agent and be ready to act when the market is working in your favor.

    If you’re preparing to list your home, high-quality visuals can make all the difference. HD Estates is here to help you showcase your property at its very best. Contact us today to get started.

  • Why do we use HD photography in real estate photography?

    Why do we use HD photography in real estate photography?

    In photography, both niche and expertise matter.

    As a company that focuses on real estate photography, we ensure that our photographers are skilled enough and have a working knowledge of HD photography.

    Why?

    We are dedicated to providing only the best photography services to interested realtors and property owners.

    Now, we’ll share with you more magic of HD Photography.

    We know it is all about taking high-definition photographs, but that is not everything.

    Aside from understanding its technicality, it has many more benefits than what you can think about now.

    Importance of HD Photography

    It is common knowledge that compelling images matter in real estate listings.

    Given this, no one would want to see crappy photos in listings.

    Hence, we must take high-definition photos only. Here at HD Estates, we offer hand-retouched 16 bit HD Photos leveraging the real estate photography industry.

    Using this technology yields compelling images that create conversion.

    Here are more reasons why HD photography is vital in the real estate industry.

    Lead Generation

    Realtors or agents get prospected leads online.

    Since everything is now digital, they also need to upgrade the way they look for leads.

    Although the traditional way of finding leads is still significant, doing this online is more convenient now.

    Adding impressive images on a listing attracts potential leads in browsing the pictures and, eventually, inquire about the featured property.

    Improved Online Visibility

    If you aim to increase your visibility online, it is best to start with a website and social media accounts.

    Of course, you need to add attractive images on your posts or website pages so you can awe users.

    Such compelling images have the most potential for being shared, liked, and commented on by your visitors.

    Furthermore, it is vital that what you are uploading is of the highest quality, as that will help boost your business further on social media platforms.

    Fast Selling Properties

    According to previous statistics in the United States, homes with high-quality photography sell 32% faster than those who do not have quality images on the listings.

    This remains true, regardless if it is a brand new property or a previously owned one.

    Moreover, homes with more photos sell faster than properties that only have one image in the listings.

    As per the statistics, a home with one photo spends an average of 70 days on the market, while a property with 20 photos or more only stays 32 days on the market before it gets sold.

    Increased Home Value

    Some homeowners are not aware of this yet – that great images increase the value of the property.

    In a Redfin report, homes with professional real estate photos average $11,000 over market value.

    That’s big!

    That is why investing a bit for your photography needs is not much compared to the property’s value once you posted it online.

    To do this, you can incorporate aerial shots and videography to highlight more features and amenities of the property.

    Produce Great Images With HD Estates

    Are you ready to upgrade your real estate listings?

    Let us know! Our team of expert photographers and videographers are always ready to help you achieve your goals.

    Your home is a haven.

    It is one good reason why interested buyers should feel comfortable already with the property at first glance.

    And what is the best way to do this than having creative photos?

    We exist because clients need us.


    If you think it is now time to seek professional photography help, contact us anytime at support@hdestates.com or via a quick phone call at 206-453-5291.

    We wish you the best for your next property listings!

  • Things to Know about Real Estate Photography Pricing

    Things to Know about Real Estate Photography Pricing

    Real estate photography pricing depends on your prospective market, location, type of properties, photographers, and the number of photos. These are the things you need to consider before hiring a real estate photographer to make high-quality images portraying the overall quality of the properties on sale.

    In the midst of real estate competition, the best way to keep on top is to stand out among your competitors. You’ll find hundreds and thousands of agents, brokers, and realtors who use various tactics to make their market skyrocketing. One of their strategies is using catchy photography depicting the property regarding its appearance and characteristics.

    What’s more, photography in real estate business is a must-have to gain potential clients in no time. It will give them better ideas on the properties you are selling without them visiting directly. Moreover, you can use the photos to post on your blogs and social media profiles to find the best client you’ll ever have.

    Before we proceed to the real estate photography pricing, you have to learn about the factors that will help your potential clients see the whole picture.

    The Real Estate Photography Pricing

    1. Aerial Drone Photography – approximately $300 for 10 photos

    2. 3D Matterport Tours – $300 – $500 depending on the quality. Some prefer an hourly rate, so it also depends on your negotiation. But the price mentioned is the typical worth of this type of service.

    3D Matterport Tours HD Estates

    3. Additional tours – It might cause you an additional $250, based on what length you want to upgrade or add on your photos.

    4. Aerial video tour – The minimum price could be $150 and higher.

    Basic Drone Real Estate Photography

    Factors to Consider Before Starting on the Real Estate Photography Project

    • Decide whether you are going for aerial drone or virtual tours.

    Since we are now living in an advanced technology, aerial and virtual tours are becoming more prevalent and available. So, it’s fine to ask the photographers if they offer one of these. But keep in mind that each has different pricing.

    • The number of photos

    Some photographers offer packages, and the prices depend on the number of photos you want them to take. Therefore, you need to think about how you want the properties to appear on the viewers’ end. If you want to focus on the landscape, then you might want to go for aerial photography with several photos in it.

    On the other hand, if your subject is an apartment, you can focus on the elegance of the property by taking 3D virtual tours. The number of photos may depend on the size and number of rooms inside the single-family homes or apartments.

    • Usage license

    The image license depends on the scope of the agreement. If you want to own the full copyright of the photos, the pricing could be higher. Nonetheless, the good news is that you can use it anywhere for advertising. You can talk about the usage license and its price to your photographers to have a clear understanding of the contract.

    • Your budget

    Here’s the most crucial factor you have to consider before anything else. You need at least $150 to $500 budget to come up with excellent images you can present to your clients. Still, prices vary from one place to another.
    You can check with the posting near your place, or you can search within your area. If not, the better way to know about professional photographers is through word of mouth. There might be someone from your family or relative who knows someone for taking excellent photography.

    Before You Go: Photographer Background Check

    Real Estate Photography PricingLooking for a professional photographer can be challenging, especially if you don’t know someone in your area. Don’t just go with anyone offering you the cheapest price. Remember, great real estate photography can create potential clients as a return. Think about the profit you might gain for having excellent visual presentations for your target market.

    When your friend refers a photographer to you, the first thing you have to do is to do some background checking. Ask for a portfolio and sample work to see if it matches your expectation.

    Moreover, look for a photographer who is committed – someone who knows how to cope up despite challenging situations. Also, it is essential to note that the photographer should know how to listen well with the instructions.
    The last thing to know about your prospective photographer is the pricing. See if the portfolio or sample work is reasonable enough for the skills and knowledge about photography.

    If you see that all of these real estate photography’s key points match to the photographer you have in mind, then you are probably in the right lane. Next thing you know, your visual presentation reaches your target market to bring more profits on your end.

  • Real Estate Tips and Tricks: How to Capture a Beautiful Shot Using Your Android Phone

    Real Estate Tips and Tricks: How to Capture a Beautiful Shot Using Your Android Phone

    Smartphone photography is becoming predominant no matter what field you are in. These pocket devices are now packed with great features that allow anyone to become photographers even without spending on expensive gears. Smartphones are now powerful enough to take amazing photos. These can even be used in real estate photography.

    The real estate industry is big on photography. Photos and videos are used for sales and marketing. If you’re in real estate and you want to sell properties effectively, you need to have great photos on your listings. Instead of investing in expensive photography gear or paying someone else for photos, you can use your own smartphone to take photos. You just need to know the tips and tricks to hack your Android phone for real estate photography.

    Basics of photography

    Make sure that you are familiar with the basic photography first. This will be your guide to taking strong images for real estate. No matter what kind of gear you’re using, the rules of photography are pretty much the same.

    Here are some basics that you need to be familiar with when shooting with a mobile phone:

    Lighting. No matter what your subject is when you’re shooting, it’s best to shoot with a good lighting situation. This can be especially beneficial when you’re shooting an interior in a project. Make sure that you shoot when there is light so you wouldn’t have to go through the pains of editing the photo. Shoot in the early morning or late afternoon when the natural light is diffused and soft. If you’re taking a photo of a room, ensure that the blinds and curtains are open and all the lights are turned on.

    Strong subject. You need to make sure that your subject or main focus stands out in the photo. It needs to be the most pronounced in your image. Viewers should be able to tell what your subject is. In case of real estate images, capture as much as you can of the room.

    Composition. How you compose your image will make or break you. Knowing the basic composition techniques will help you up your game and improve your overall photography. No matter what gear you’re using, if you don’t know how to compose your photo, then you wouldn’t get the results that you want. The most common technique is the rule of thirds. This is where you will divide the frame into nine rectangles and place the most important element along where the lines intersect. Putting your subject off center will create a more interesting composition. Other composition strategies are symmetry, leading lines, frame within a frame, and diagonals and triangles among many others. With composition, you have to train your eye to look at the scene from a different perspective and find out what makes it interesting.

    Apps for real estate photography

    If you’re shooting with an Android phone, there are a few apps that can help you up your game and improve your photos. Just having a few reliable apps under your sleeves can help you in taking better images and help you in editing your photos afterward.

    1. Snapseed. This software is made by Google’s subsidiary. Snapseed can be a great starter editing app for those who are new to photography and post-processing. Its user interface is simple. It has the basic editing features, such as rotate, crop, brush, white balance, rotate, text, select, transform, and curve. You can easily make adjustments and edit your photo to make it look even better.

    2. Diptic. When you need to create collages for a listing, you can use Diptic. This app has an easy-to-use design so you can quickly create a collage of the photos you’ve taken. It has 179 different layouts and filters that you can use in editing your work. Just select the layout that you prefer and add the photographs that you want to use. You can use Diptic collages in creating before and after images of a property or make a collage for a presentation.

    3. 360 Panorama. This app is a favorite among many smartphone photographers. It provides you with creative features to create more interesting photos. You can use the app in photographing panoramic sceneries. Apply this in real estate by capturing the exterior of the property to show the curb appeal. You can also use this app to capture the entire room.

    4. LightTrac. Because lighting is essential in real estate photography, you need to know where the sun is when you’re out for a shoot. This app is helpful when you need to take outdoor photos. To use the app, just put your location information and the app will calculate the position of the sun based on your location. LightTrac will also give you information regarding the moonrise, sunrise, and sunset.

    Tips for using a smartphone

    Once you know the basics of photography and have downloaded the needed apps in improving your images, make sure that you keep practicing to improve your photos.

    Here are other tips that you could use when photographing with your Android phone:

    a) Take multiple images. Even professional photographers don’t get the best image with their first shot. Take multiple photos of your intended subject and never settle for the first photo. You might get the best photo on your fourth try.

    b) Try various angles. Whatever you’re photographing, experiment with different angles to find one that’s most appealing. If you’re shooting a room, try shooting from all four corners with a high angle.

    c) Edit your work. The above-mentioned apps will help you in editing your work. Apply filters and editing features effectively to create better images. However, it’s best to not over-edit. Make sure that everything still looks realistic instead of over-processed.

  • How to Edit RAW Real Estate Photographs Using Lightroom

    How to Edit RAW Real Estate Photographs Using Lightroom

    Understanding the editing process is necessary for every photographer, especially if you’re in the business of real estate. You need to know the methods of post-processing so you are familiar with the necessary steps that you have to take in order to achieve the output that you need. From the photo shoot down to the post-processing, a professional photographer should know the methods involved in order to produce quality photos that will sell properties right away.

    Shooting RAW

    For photographers, shooting RAW is a must. Unlike JPEG, the RAW file format captures all the image data that can be captured by the sensor. JPEG, on the other hand, has compressed information. With RAW, you are able to correct problems that you potentially could not with JPEG and create high-quality images.

    In shooting real estate RAW, you get to record higher levels of brightness which can be necessary for interiors. It is easy to correct exposures, which will be done through Adobe Lightroom. You can also do non-destructive editing with RAW which allows you to adjust without affecting the original data.

    There are a ton of benefits to shooting RAW and it’s always the pro-choice whenever you’re out for a shoot.

    Editing Exteriors on Adobe Lightroom

    basic HDR image

    Once you have your photos shot on RAW, you need to go over them for retouching so these are ready for client’s use. When editing, Adobe Lightroom is often the most trusted software. It allows you to make adjustments and apply color presets on your images.

    Adjust the exposure. Check the exposure of your photos. If it’s underexposed, try to recover the exposure by dragging the exposure bar. Adjust the exposure accordingly depending on what the image needs. You can also adjust the contrast in order to add a little punch to your image.

    Change the highlights and shadows. Move the highlights bar to the left in order to remove the hotspots in exposure. If there are dark areas in the photo, up the shadows bar in order bring in the details to the photo. Ensure that you fine-tune the highlights and shadows as you seem fit.

    Set the whites and blacks. Hold the Alt key on Windows or the Option key on Mac while dragging the Whites slider to the right in order to expand the brightest whites. The screen will turn black and you will have to continue dragging until you see dots of whites. Hold down the same key for the Blacks slider while you’re dragging it. This turns the screen white. Continue dragging the slider to the left until the black areas in the photo start to appear. This adds a punch back to the image.

    Move the clarity. Add a little bit of clarity to the image by moving the clarity slider. This adds a little blow to the mid-range tones without affecting the highlights and shadows.

    Adjust the temperature. Once you have a good overall exposure on your photo, check the temperature of your photo. If you think adding a cool tone to the image is important, drag the temperature slider to the left until you’re satisfied.

    De-saturate the correct colors. Scroll down to the HSL/Color/B&W tab and click on the saturation option. To choose a specific color that you want to de-saturate or over-saturate without affecting the rest of the image, click on the small clicker box, pick the area that you want to de-saturate and drag the mouse down.

    Define your skies. If your image is shot outdoors and you have a washed out sky, what you can do is click on Luminance and drag the Blue slider to the left in order to bring the color out.

    Control the detail. Adjust the amount of sharpening by moving the sliders around. Add a little bit of radius just to put in some details on the photo. With masking, hold the Alt or the Option key down while dragging the slider to the right. This adds a little sharpening to the image.

    Do a little noise reduction. If you’ve upped the shadows, you may need to increase the luminance a little bit. This removes the grain that your image has from sharpening.

    Click on the lens correction. On the Lightroom, there are options for lens correction. Tick all the options or boxes under lens correction and click vertical adjustments. The boxes are: enable profile correction, remove chromatic aberrations, and constraint crop. This adjusts your image immediately. You can readjust the vertical corrections by increasing the vertical correction to bring out the edges of the building or home. Check the verticals to ensure that they are aligned properly.

    Editing Interiors on Adobe Lightroom

    Editing interior photos can be quite different from editing exterior shots. Often, you get slightly underexposed images because you’re working indoors.

    Adjust exposure. With these shots, adjust the exposure slider to the right and add a little contrast to the image by dragging the slider to the right. Adjust depending on the needs of your image.

    Modify the highlights and shadows. Since you have light coming from the windows, you may want to pull down the highlights a bit to the left. Bring up the shadows bar in order to level out the darker areas of the photos.
    Raise the whites and blacks. Hold down the Alt key if you’re on Windows or the Option key if you’re on Mac, and drag the Whites slider to the right until you see specs of white on the black screen. For your blacks, hold the same keys and drag the slider to the left until you see a couple of specs of black show up.

    Adjust the warmth of your photo. If your photo looks too warm, move the temperature slider to the left to make it a tad bit cooler. Adjust this depending on your preference. You can also adjust the tint as to the left as needed to remove the magenta tint to the image.

    Move the clarity, vibrance, and saturation. Add a little clarity to your photo by moving the slider to the right. You can opt to bring up the vibrance more in order to bring more color to the photo. Increasing the saturation will also bring the color to the greens and the oranges to your interior photos.

    Play with the tone curve. If your image looks a little bit flat, bring the medium tone curve into your photo to see what it does. Usually doing so adds a punch back to your photos.

    De-saturate some of the colors. This step will depend on your personal taste. However, desaturating the oranges and yellows will add a bit of a cool tone to the photo.

    Adjust the sharpening and noise reduction. Move the sharpening amount slider depending on your preference and adjust the masking accordingly. Set the noise reduction depending on how far you dragged up your shadows to get your image sharp.

    Lens correction. The last step is to tick all the options under lens correction and click the vertical correction button. This aligns the edges properly and automatically.

    Author:
    Claire Wright, a savvy tech nerd and self-taught photographer who lives in Seattle and working at one of the best real estate photography companies called HD Estates.