When we’re new to the real estate photography market, it’s crucial to show our potential clients what we can offer. Real estate agents and home sellers need to see proof of our skills. Offering a free photoshoot can be a great way to persuade them. By showing high-quality images from a free shoot, we prove that investing in our services is worthwhile. It’s essential, though, to maintain the same quality in these free images as we would in any paid work.
Discuss your presentation over lunch or snacks
Presenting our work to real estate agents over a casual lunch or snack meeting can be very effective. This allows them to take their time evaluating our photos. We can show a slide show or print out examples of our professional photos compared to standard ones taken with smartphones. The relaxed setting of a meal can make agents more open to considering our services, helping us stand out in their minds.
Give first-time clients huge discounts
Offering significant discounts to first-time clients can attract new business. By providing our best package at a lower price, we allow clients to experience the full extent of our services without a large initial investment. This strategy gives potential long-term clients a compelling reason to try us out and discover our value.
Make your house a “first subject”
Using our own home as a subject for real estate photography can be a practical way to build a portfolio. We have complete control over the environment and can take time to perfect our shots. Moreover, creating “before and after” photos in a familiar setting can help us refine our skills and create compelling visuals for potential clients.
Go to open houses and build your network
Networking is vital in the real estate industry. Attending open houses allows us to meet and build relationships with real estate agents and potential clients. In a transaction-based field, maintaining good rapport ensures repeat business. By being a consistent presence at these events, we can keep in touch with our clients and stay on their radar for future needs.
Look for high-end listings online with bad photos
We can find high-end property listings online that have poor quality photos and offer our services to improve their visual appeal. By highlighting the differences between bad photos and our professional-quality images, we can show clients the benefits of hiring a skilled photographer. This approach not only helps in building our portfolio but also in raising awareness about the importance of high-quality real estate photography.
Frequently Asked Questions
What innovative strategies can be implemented for effective real estate marketing in 2024?
In 2024, we can embrace several innovative strategies to elevate our real estate marketing. These include using virtual reality (VR) and augmented reality (AR) to offer virtual tours, which allow potential buyers to explore properties from the comfort of their homes. We should also consider using drone photography for high-quality aerial shots of properties and neighborhoods. Implementing AI-driven chatbots on our websites can help answer client queries instantly, improving user experience.
How can social media be leveraged to enhance real estate marketing efforts?
Leveraging social media effectively means creating engaging content that showcases properties in the best light. On platforms like Instagram and Facebook, we can use high-quality images and videos to highlight key features of our listings. It’s also beneficial to host live virtual tours on social media, allowing real-time questions from potential buyers. Including client testimonials and success stories on our social media pages can build trust and showcase our credibility.
What content should be included in a real estate marketing plan to attract potential sellers?
To attract potential sellers, our marketing plan should include:
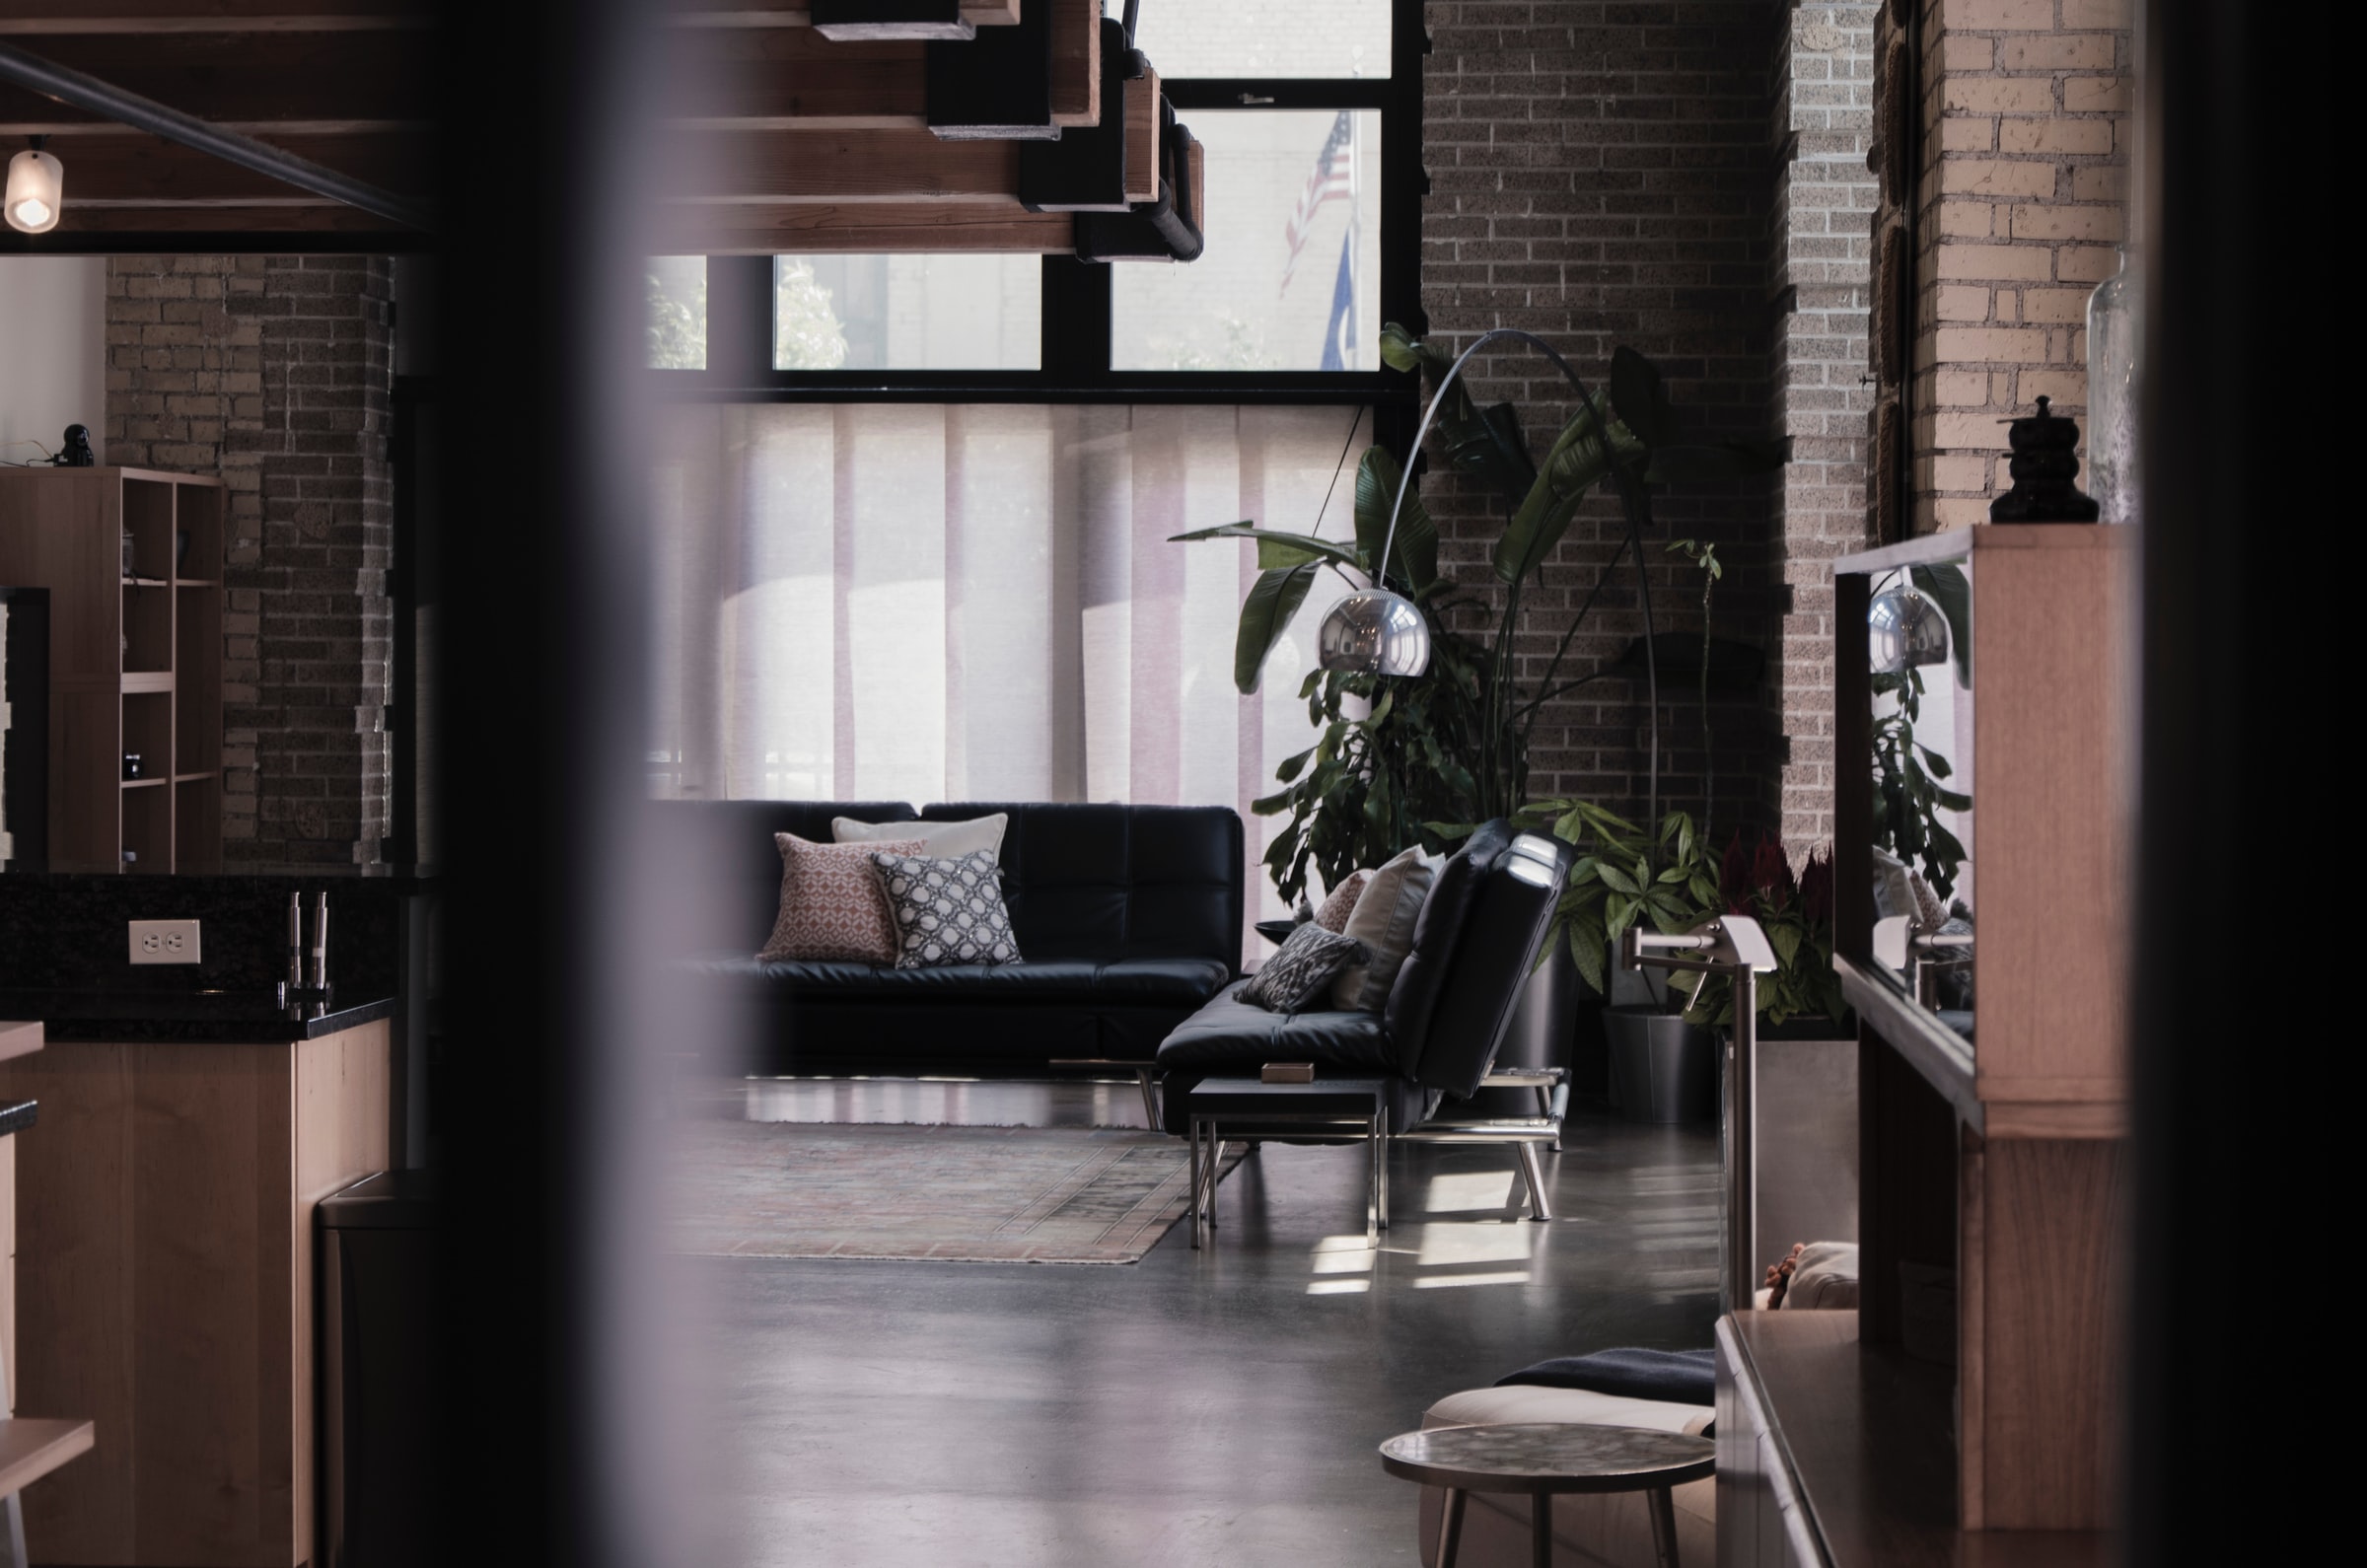
A hero shot in real estate photography is a pivotal tool used to capture the essence of a property and draw in potential buyers. This key photo showcases the best features of a home, making it more appealing to viewers from the first glance. With perfectly composed lighting, angles, and staging, the hero shot is designed to create an unforgettable first impression.
Our approach to capturing a hero shot includes careful consideration of the property’s unique elements and arranging every detail to highlight its strengths. From straightening cushions and chairs to ensuring even lighting, every small adjustment contributes to a polished and inviting image.
In real estate marketing, a compelling hero shot can be the difference between a property that stands out and one that is easily overlooked. Our goal is to make every hero shot a powerful tool that invites buyers to explore further and envision themselves in the space.
Key Takeaways
A hero shot is vital for capturing a property’s best features.
Effective hero shots require perfect lighting and composition.
The right hero shot can make a property stand out to buyers.
Understanding the Hero Shot
Hero shots in real estate photography are key to catching potential buyers’ attention. They help in creating a strong first impression and significantly influence engagement and value perception in a competitive market.
Definition and Importance
A hero shot is the primary image used to showcase a property. It captures the essence and most alluring features of the home.
This photo is the first thing potential buyers see, usually serving as the cover of a virtual property flyer or listing. It should be eye-catching and evoke emotions like warmth, comfort, or excitement.
Effective hero shots can make a property stand out and increase interest. They play a crucial role in real estate marketing, as buyers often base their initial interest on this single image.
Role in Real Estate Marketing
Hero shots are vital in real estate marketing. They act as the hook that draws potential buyers to the property listing.
In marketing materials, a well-composed hero shot highlights the property’s unique appeal, attracting more engagement. Typically, the hero shot is an exterior photo taken in the best possible lighting.
Each detail, from the angle to the composition, adds to the perceived value of the property. By ensuring all elements are perfectly aligned, we can appeal to buyers’ preferences and create a lasting impression. This single image can significantly influence a buyer’s decision, highlighting the importance of getting it right.
Technical Aspects of Hero Shots
Hero shots in real estate photography capture a property’s best features with optimal lighting and composition. Mastering these technical elements can make a property’s listing stand out.
Composition and Framing
Composition and framing play crucial roles in creating a compelling hero shot. We need to identify the property’s most appealing features and ensure they are prominently featured.
Using the rule of thirds can help balance the image. Placing important elements along these lines or at their intersections creates visually engaging photos. Symmetry can highlight architectural elements, and leading lines can guide the viewer’s eyes through the scene.
Decluttering the scene is also important. Removing unnecessary items helps focus attention on the property.
Lighting Conditions
Proper lighting is key to a successful hero shot. We should photograph during times when natural light is abundant but not harsh, such as in the morning or late afternoon.
Adjusting brightness and contrast during post-processing can further enhance the image. Balanced lighting helps avoid overexposed highlights and underexposed shadows.
Artificial lighting might be useful indoors, but relying on natural light generally provides a more authentic and warm feel to the property.
Best Use of Natural Light
Natural light brings out the true colors and textures in a property. Positioning ourselves where light floods into the room can result in brighter, more inviting images.
Opening blinds and curtains allows sunlight to illuminate the space naturally. We should shoot from angles that minimize shadows and avoid shooting directly into the light, as this can create glare.
Reflectors can also be used to bounce light into darker areas, providing a more even exposure across the entire scene.
Capturing the Golden Hour
The golden hour, shortly after sunrise or before sunset, is ideal for exterior hero shots. During this time, the light is soft and warm, adding a touch of magic to the scene.
This lighting condition highlights the property’s details and creates long, soft shadows that add depth and dimension. We should plan our shoots around these times to take full advantage of this natural phenomenon.
Using a tripod can help stabilize the camera during the low-light conditions of the golden hour, ensuring sharp, clear images that will captivate potential buyers.
Including outdoor features like gardens or swimming pools in this light can further enhance the property’s appeal.
Staging the Scene
To create a compelling hero shot for a real estate listing, we must focus on effective preparation and decluttering, highlighting key features, and incorporating lifestyle elements. These steps ensure the property looks inviting and showcases its best aspects.
Preparation and Decluttering
Before we start taking photos, we need to prepare the scene meticulously. This involves deep cleaning and decluttering each room to ensure a tidy and appealing space. We recommend removing personal items like family photos, which can distract potential buyers.
We also pay attention to small details, like making sure cushions are straightened and chairs are pushed in. If we are showcasing a beautiful kitchen, everything should be spotless, with countertops cleared of unnecessary items.
When we stage the scene, we aim to create a sense of space and welcoming atmosphere, turning each room into part of a potential buyer’s dream home. It’s the foundation of capturing a perfect hero shot.
Showcasing Key Features
A successful hero shot highlights the property’s unique features. We focus on elements that make the home stand out, such as an inviting entrance or a spacious living area. Identifying these key features helps us decide where to position the camera and what angle to use.
For instance, if the property has a large, beautifully landscaped backyard, we take the shot from a point that captures the expanse and greenery. We often shoot exterior photos at a slight elevation to enhance depth and perspective.
Lighting is crucial. We make sure to shoot at a time of day when natural light enhances the property’s appeal. Don’t forget to turn on lamps and overhead lights to create a warm and inviting glow, particularly for interior shots.
Incorporating Lifestyle Elements
We aim to stage the scene with elements that evoke a certain lifestyle. This helps potential buyers visualize themselves living in the space. Simple touches such as setting the dining table with tasteful place settings or placing a cozy throw on the sofa can make a significant impact.
We often include fresh flowers or stylish decor pieces to add personality to a space without causing clutter. For a beautiful kitchen, we might place a bowl of fresh fruit on the counter or a vase of flowers on the island.
By incorporating these lifestyle elements thoughtfully, we create scenes that not only look good in photographs but also resonate emotionally with viewers, making them see the property as their potential new home.
Equipment and Techniques for High-Quality Shots
Proper equipment and techniques are crucial for capturing high-quality hero shots in real estate photography. Using the right camera and lens, stabilizing tools like tripods, and effective editing techniques significantly enhance the final image.
Choosing the Right Camera and Lens
For real estate photography, we need a high-quality digital camera and a suitable lens. A digital camera with a full-frame sensor provides excellent image quality and low-light performance. Wide-angle lenses are essential because they can capture more of the room in a single shot, making spaces appear larger and more inviting.
A lens with a focal length of 16-35mm is typically ideal for this purpose. Investing in a lens with a low f-stop number can also help us achieve better results in lower light conditions, ensuring the images are sharp and well-lit.
Utilizing Tripods and Flashes
Using a tripod is crucial for stability and sharpness. It allows us to use longer exposure times without camera shake, which is particularly helpful in dimly lit areas. This tool ensures our shots are crisp and professional-looking.
In addition to natural light, flashes or external lighting can enhance photos. When natural light is insufficient, a flash can help fill in shadows and light up dark areas, ensuring even lighting throughout the shot.
Advanced Editing Techniques
Editing techniques can transform a good photo into a great one. We use software like Adobe Lightroom or Photoshop for image enhancement. Color correction, exposure adjustment, and sharpening are basic steps that can significantly improve a photo’s quality.
Utilizing presets can streamline the editing process, giving our photos a consistent and professional look. Techniques like HDR (High Dynamic Range) processing can also combine multiple exposures into one image, ensuring that both the darkest and brightest parts are well-exposed.
Finally, removing any distracting elements and enhancing key features of the property in editing ensures the hero shot is visually appealing and highlights the best aspects of the property.
Specialized Hero Shot Variations
In real estate photography, a hero shot can highlight various aspects of a property, capturing its unique features and maximizing its appeal to potential buyers. Twilight exterior shots, elevated and drone photography, and interior highlights each play a crucial role in this process.
Twilight Exterior Shots
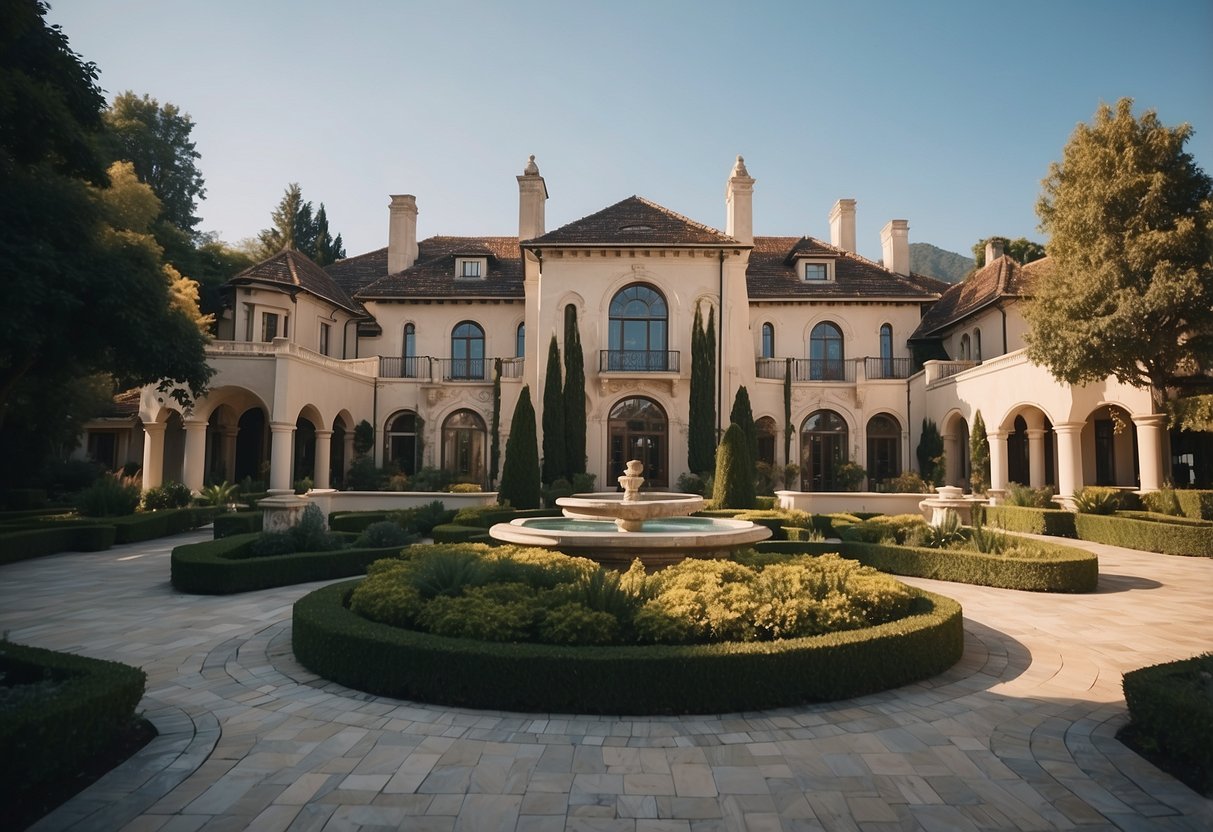
Twilight shots are taken during the “golden hour,” just after sunset or before sunrise. These images can make exterior photos more striking by showcasing both the property and the lighting. The soft, natural light during twilight highlights the building’s architecture and enhances its curb appeal. For instance, a pool area can look inviting, with lights reflecting off the water, creating an ambiance of luxury and relaxation.
We need to ensure all exterior lights, including path lights and pool lights, are turned on. This adds warmth and depth to the photograph. Using a tripod for stability is crucial for these shots to avoid blurriness, which is common in low-light conditions.
Elevated and Drone Photography
Elevated and real estate drone photography provide unique perspectives that ground-level shots simply can’t achieve. Shooting from an elevated position or using a drone can reveal the property’s layout, including large yards, landscaping, and nearby amenities. This is especially beneficial for properties with expansive grounds or stunning surroundings.
Drone photography ensures that potential buyers get a sense of the elevation and how the property fits into its setting. We recommend capturing multiple angles to offer a comprehensive view. This method is particularly effective for larger properties or those with special outdoor features like a pool or a beautiful garden.
Interior Highlights
Interior hero shots focus on the most appealing rooms, such as the bedroom or bathroom. Choosing the right angles and lighting is crucial. For a bedroom, natural light from windows can make the space feel open and welcoming. In bathrooms, highlighting design elements like tile work or a spacious shower can enhance the property’s perceived value.
We should pay attention to details like straightened cushions and even spacing for chairs. Elevation can also matter here; shooting slightly above eye level can provide a flattering perspective of the room. Turning on interior lights can add warmth and make the rooms look more inviting.
Maximizing Impact with Hero Shots
Hero shots can elevate real estate listings and marketing efforts by making properties stand out. These shots attract attention, evoke emotions, and can lead to higher engagement and inquiries from potential buyers.
Strategic Use in Real Estate Listings
We should always start with a hero shot when presenting a property online. This image sets the tone and grabs the viewer’s attention immediately. By highlighting the most attractive feature—whether it’s a spacious living room, a beautifully landscaped yard, or a modern kitchen—we showcase the property’s best attributes right away.
Consistency is key. All hero shots must be taken in optimal lighting and composed thoughtfully. A well-staged room with clean lines and inviting décor helps potential buyers envision living there. Additionally, ensure the photo resolution is high to maintain quality, even when zoomed in.
Enhancing Social Media and Marketing Campaigns
Hero shots are also powerful tools for social media and marketing campaigns. Platforms like Instagram and Facebook rely heavily on visuals. Our hero shots need to be striking enough to pause someone’s scroll. Vibrant colors, dynamic angles, and clear imagery are essential.
In marketing emails, we use hero shots as the main visual hook. This can boost open rates and engagement. By pairing these shots with a compelling call-to-action, we drive potential buyers to contact us or visit our website for more information. Consistency across all marketing materials ensures that our brand stays recognizable and professional.
Improving Click-Through Rates and Conversions
High-quality hero shots improve click-through rates and ultimately lead to higher conversions. Online listings with captivating images receive more views and clicks.
For best results, hero shots should load quickly on websites and be mobile-friendly. We track performance metrics to see which images best convert viewers into leads and new clients. By analyzing these trends, we refine our approach, focusing on what resonates most with our target audience. This continuous improvement cycle helps us stay ahead in a competitive market.
Challenges and Solutions in Hero Shot Photography
Creating a compelling hero shot for real estate can be challenging due to issues with lighting, weather, balancing authenticity and creativity, and avoiding common mistakes. Here, we’ll discuss effective solutions to these problems.
Dealing with Difficult Lighting and Weather
Lighting and weather can be unpredictable, affecting the quality of the hero shot. An overcast day may wash out colors, while too much sunlight can cause harsh contrasts and shadows.
To combat these issues, we can use HDR (High Dynamic Range) photography to balance exposure in mixed lighting conditions. For outdoor shots, we often schedule photo sessions during the golden hours—shortly after sunrise or before sunset—when the light is softer and more even. If weather conditions are poor, shooting well-lit rooms inside can ensure consistent results. Some photographers also use day-to-dusk editing techniques to enhance the appeal of evening shots.
Balancing Authenticity and Creativity
While it’s crucial to highlight the best features of a property, it should still look authentic. Over-editing or using unrealistic enhancements can mislead potential buyers.
We aim for a balanced approach by using natural enhancements such as improved lighting and contrasts without altering the true appearance of the property. For instance, capturing different angles can showcase the property’s unique aspects without exaggeration. When editing, we focus on enhancing what’s already there, like brightening a room’s natural light or emphasizing architectural details, ensuring the hero shot remains authentic yet appealing.
Overcoming Common Mistakes
Common mistakes in hero shot photography include poor composition, ignoring small details, and using the wrong focal length.
We overcome these by framing the shot to focus on the property’s strengths. We also pay close attention to small but significant details such as removing clutter and ensuring the property is clean. Using a suitable wide-angle lens helps us capture the space without distortion. Regularly checking the camera’s settings ensures proper exposure, making the images clear and visually attractive.
Frequently Asked Questions
Hero shots play a vital role in making real estate listings more appealing. They can highlight a property’s best features while also increasing its perceived value.
How does a hero shot enhance real estate listings?
A hero shot grabs attention quickly. It serves as the first image potential buyers see on platforms like MLS listings. This first impression can significantly affect whether they choose to explore the listing further. High-quality hero shots can lead to more views and, consequently, more inquiries.
What are the essential elements of an effective hero shot?
An effective hero shot includes several key elements. These elements are favorable lighting, proper composition, and highlighting the property’s most attractive features. Small details, such as straightened cushions or well-aligned chairs, can also make a big difference. Each element works together to present the property at its best.
Can a hero shot impact the perceived value of a property?
Yes, a well-executed hero shot can make a property appear more valuable. It achieves this by capturing the essence and allure of the property in a single frame. When potential buyers see a stunning hero shot, they might perceive the property as more desirable and worth a higher price.
What is the difference between a hero shot and regular real estate photography?
A hero shot is different from regular real estate photography because it acts as the primary image used for marketing. While regular photos may document every room and detail, the hero shot focuses on captivating potential buyers. It stands out as the highlight image that draws viewers into the listing.
How should a hero shot be composed to attract potential buyers?
Composition is crucial for a hero shot. We should aim for a balanced and aesthetically pleasing image by following the rule of thirds. Emphasizing the property’s unique selling points, like architectural details or landscaping, can also enhance the composition. Shooting from an elevated height often provides a more striking view.
What lighting techniques are used to capture a compelling hero shot?
Good lighting is essential for a compelling hero shot. Natural light is often the best option, especially during the golden hour when sunlight is soft and warm. For interior shots, turning on lights and using additional photography lighting can help create a welcoming atmosphere. Proper lighting ensures the property looks its best and grabs potential buyers’ attention.
Real Estate Twilight Photography: Capturing Properties in Magical Light
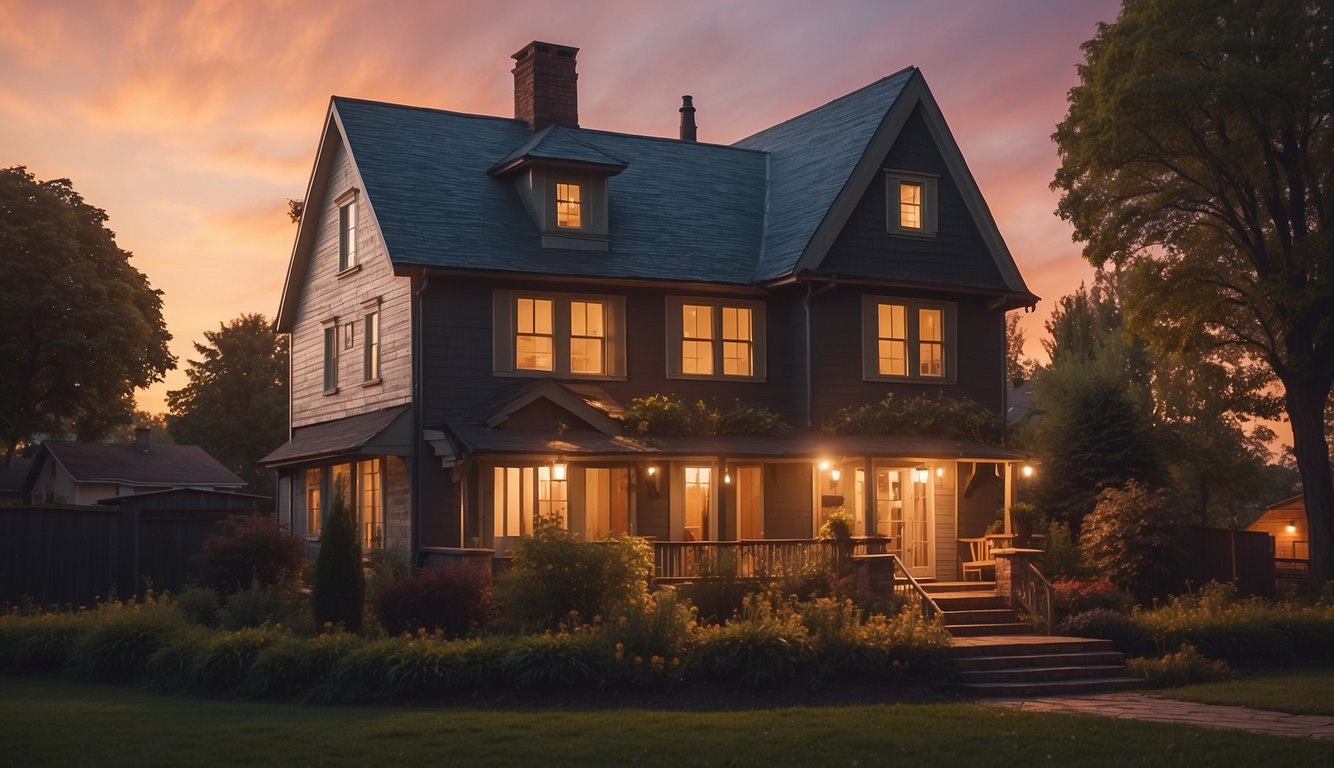
Twilight real estate photography can make a property look stunning and inviting. The unique lighting during twilight minimizes harsh shadows, creating a warm, soft ambiance that enhances a property’s features.
Using twilight photography can help a property stand out in a crowded market by making it more visually appealing.
When we photograph homes at twilight, we capture the perfect balance between natural and artificial light. This blend highlights the property’s exterior features, such as patios, decks, and pools.
The result is a series of photographs that are both elegant and enticing, encouraging potential buyers to envision themselves living in the space.
Proper planning and equipment are crucial for successful shoots.
Combined natural and artificial light highlights key features.
Understanding Twilight Photography
Twilight photography captures properties during the brief period after sunset or just before sunrise to create an inviting and unique atmosphere. This imaging technique helps real estate listings stand out and make a lasting impression on potential buyers.
The Magic of Twilight in Real Estate
Twilight, also known as the golden hour, transforms ordinary scenes into breathtaking views. As the sun dips below the horizon, the sky takes on a mix of deep blues, purples, and oranges, creating a soft, ambient light that casts an inviting glow on properties.
This magical timing can make a home look warm and welcoming, adding an emotional appeal that daytime shots often lack.
Twilight photos highlight the exterior lighting of the property, making it appear more luxurious and well-maintained. This aesthetic is crucial for high-end listings and homes looking to make a strong first impression.
Defining Twilight for Photography Purposes
Twilight for photography purposes typically spans the period shortly after sunset or just before sunrise. During this time, the ambient light is soft and even, which minimizes harsh shadows and contrasts that can be problematic in other lighting conditions.
We aim to take advantage of this window to capture the property’s full potential.
To achieve the best results, we need to be prepared and set up our equipment beforehand.
This includes adjusting camera settings to utilize the available natural light effectively. Being well-prepared ensures that we can make the most of this short-lived but highly rewarding time frame.
Benefits of Twilight Photography in Real Estate Listings
Twilight photography offers several notable benefits for real estate listings. First, it enhances the property’s visual appeal by showcasing its exterior lighting and landscaping in a flattering way. This can create a more inviting and luxurious appearance, attracting more potential buyers.
Second, twilight photos can eliminate the harsh shadows and high contrasts present in daytime photography. Softer lighting creates a harmonious and balanced look, which makes the property more pleasing to the eye.
Finally, twilight photography helps our listings stand out from the competition. As many real estate photos are taken during the day, twilight images provide a unique and memorable perspective that can leave a lasting impression on viewers.
This differentiation can be the key to capturing the interest of serious buyers.
Preparation for a Twilight Shoot
Preparing for a twilight real estate shoot involves several important steps. These include property scouting, understanding weather and lighting conditions, setting up interior and exterior lighting, and planning for the golden hour.
Scouting the Property
Before the shoot, it’s crucial to scout the property. We need to identify key areas like the garden, patio, or any unique architectural features.
This helps us decide the best angles and compositions. Walking around the property allows us to visualize how natural light will change as the sun sets.
We should also note any potential obstacles, such as overgrown plants or clutter, which might need to be addressed before we start shooting.
Understanding Weather and Lighting Conditions
Checking the weather forecast is vital for a twilight shoot. Ideal weather includes clear skies with minimal clouds to enhance the colors of the sunset.
We also need to monitor the temperature since it affects the comfort and performance of our equipment. Observing the sunset time is key, as it guides our schedule to capture the golden hour’s perfect lighting.
Setting Up Interior and Exterior Lighting
Proper lighting setup is essential.
We should ensure all interior lights, including lamps and ceiling fixtures, are turned on to create a warm and welcoming atmosphere inside.
For the exterior, it’s important to check that garden lights, patio lights, and other outdoor fixtures are working.
We might use additional lighting, such as camera flashes or continuous lights, to balance the exposure and minimize shadows.
Planning for the Golden Hour
The golden hour, occurring shortly after sunset, provides the best lighting for twilight photography.
We need to plan our shots to maximize this brief period of soft, even light. Setting up our cameras on tripods in advance ensures stability and allows us to capture multiple exposures.
Using a timer or remote control can help eliminate camera shake, resulting in sharper images.
Camera Gear and Settings
In twilight real estate photography, the right equipment and settings make all the difference. We need to choose the best camera and lens, use appropriate settings, and ensure stability with a tripod.
Choosing the Right Camera and Lens
For twilight shots, a camera with excellent low-light performance is essential. We recommend using a DSLR or mirrorless camera with a full-frame sensor to capture more light and detail.
A wide-angle lens, such as a 16-35mm or 24-70mm, is also ideal.
These lenses allow us to capture more of the property and highlight its features.
A lens with a wide aperture, like f/2.8, is beneficial for letting in more light and reducing noise in low-light conditions.
Important Camera Settings for Twilight Shots
Setting the ISO between 400-1600 helps in capturing clear twilight images without excessive noise.
Adjusting the aperture to a small value like f/13 ensures a broader depth of field, keeping both foreground and background in focus.
The shutter speed should be slow enough to allow proper exposure. Using an HDR technique can help balance the light differences between the twilight sky and the darker areas of the property.
This involves taking multiple shots at different exposures and combining them for the best result.
Using a Tripod to Ensure Stability
A tripod is crucial for shooting in low light. It keeps the camera steady, which is essential when using slow shutter speeds.
We should place the tripod on an even and stable surface to avoid camera shake.
Using a timer or a camera remote can further minimize shake.
This is particularly useful for long exposure shots where the slightest movement can blur the image.
It’s also helpful to use a tripod with adjustable legs to adapt to uneven surfaces often found around properties.
Composition and Shooting Techniques
When we’re composing and shooting for real estate twilight photography, paying attention to framing, lighting, and unique property features is essential.
We must effectively mix natural and artificial light, highlight the property’s best angles, and capture its unique characteristics.
Framing the Perfect Twilight Shot
Good composition in twilight photography helps bring out the best in a property.
We start by choosing angles that emphasize the house’s architecture and landscaping. To create depth, we include elements like trees, pathways, or fences in the foreground.
Using the rule of thirds is helpful. We align the property so it’s off-center, creating a balanced look.
Enhancing the property’s appeal involves capturing reflections on windows and considering symmetry. This makes our photos more interesting and dynamic.
Working with Natural and Artificial Light
Lighting is critical in twilight photography. We typically shoot during the “blue hour” when the sky glows softly. This light adds a dramatic and inviting feel to our photos.
We watch how shadows fall and avoid harsh contrasts by planning the shoot angles.
We also utilize artificial light to enhance the property’s appeal.
Outdoor lighting, like porch lights and landscape lighting, adds warmth and highlights features of the home.
Adjusting our camera settings, such as longer exposures, ensures we capture the warmth and detail in both natural and artificial lights beautifully.
Post-Processing Twilight Photos
Editing twilight photos requires attention to detail to enhance the colors, balance the exposure, and remove any distractions that may detract from the property’s appeal.
Editing for Color Balance and Temperature
Balancing colors and temperature is crucial when working with twilight photos.
We start by using software like Photoshop or Lightroom to adjust the color balance to ensure the sky and property lighting look realistic.
A warm color temperature adds a cozy feel, while cooler tones can enhance the twilight effect.
It’s vital to adjust the white balance to match the lighting conditions, which can range from the blue of the twilight sky to the yellow glow of indoor lights.
Color correction tools help in achieving the right balance between natural and artificial light.
Advanced Techniques: HDR Editing and Layer Masks
For more advanced edits, HDR (High Dynamic Range) editing and layer masks are indispensable tools.
HDR editing combines multiple exposures to create a single image with a higher dynamic range, capturing details in both shadows and highlights.
We typically use Photoshop to merge layers by placing the brightest exposure on top, followed by medium, then dark.
This method allows us to fine-tune different parts of the image separately.
Using layer masks, we can blend different exposures seamlessly, ensuring natural transitions between highlights and shadows.
This technique helps in enhancing the depth and mood of twilight images.
Removing Unwanted Elements and Enhancing Details
To perfect the final image, removing unwanted elements and enhancing essential details is essential.
Tools like the clone stamp and healing brush in Photoshop are effective for removing clutter, glare, and distractions from windows.
We also focus on window masking to ensure interior lights look natural.
Enhancing details involves sharpening edges, correcting lines and angles, and adjusting the overall tone to highlight the property’s best features.
An effective post-processing session can transform an ordinary photo into a captivating twilight scene, making the property stand out. If using a real estate photo editing service, ensure they follow these steps to achieve the best results.
Utilizing Twilight Photos in Real Estate Marketing
Twilight photos can make a property stand out by highlighting its unique charm and creating a luxurious feel. They play an essential role in marketing, enhancing online presence and physical collateral, and driving property sales.
Creating an Impactful Online Presence
We can use twilight photos to elevate our real estate listings, making them more attractive to potential buyers.
These photos offer a unique perspective, showing well-lit exteriors against a darkening sky. This contrast captures attention and makes our listings more memorable.
In our online marketing efforts, such as single property websites and photographer websites, twilight photos can enhance the visual appeal.
When combined with virtual staging and virtual house tours, they create an engaging experience.
High-quality twilight photos help us achieve higher visibility on real estate platforms.
Incorporating Twilight Photography in Collateral
In addition to online use, twilight photos are valuable for physical marketing materials.
We can integrate them into property flyers, brochures, and house portraits. The warm tones and soft lighting of these images make them visually appealing.
When creating physical collateral, the goal is to showcase the property in the best light.
Twilight real estate photography does just that by emphasizing the beauty of both the interior and exterior lighting. By including these photos in printed materials, we create a lasting impression on potential buyers.
The Role of Twilight Photos in Property Sales
Twilight photos are not just about aesthetics; they can also impact property sales.
Listings featuring well-executed twilight photos often attract more interest, leading to higher prices and faster sales. The inviting glow and luxurious feel create a sense of urgency.
For real estate professionals, it is important to collaborate with skilled photographers knowledgeable in twilight photography.
Attention to details like color correction and proper timing ensures the photos are effective.
Video editing can also enhance the presentation, making the property stand out even more in virtual tours.
The strategic use of twilight photos boosts our marketing efforts and ultimately helps close deals faster.
Tips for Real Estate Professionals
Real estate twilight photography can significantly elevate a property listing, making it stand out and attract potential buyers. Let’s explore how to choose the right photographer, manage the shoot schedule, and strategically use twilight photos.
We need someone with experience in twilight real estate photography. Look at their portfolio to ensure they can capture properties beautifully during twilight hours, using proper lighting techniques and angles.
It’s also beneficial if they bring the right gear, such as tripods and camera remotes, to avoid shaky images.
We should ask for references from other realtors.
This will help us gauge whether the photographer is reliable and meets deadlines efficiently.
A good photographer will understand how to highlight a property’s best features in twilight, creating an inviting and luxurious feel.
Scheduling Shoots and Managing Timeline
Timing is key in twilight photography.
We should book the shoot when the sun is setting, typically about 20-30 minutes after sunset, to capture the best light.
Align the shoot with clear weather forecasts to avoid rain or heavy clouds that can dull the photos.
Coordinate closely with the photographer to ensure everything is ready on time.
This includes making sure the property is prepped with all indoor and outdoor lights on.
We should also communicate any specific shots we need, allowing the photographer to plan their time efficiently.
Maximizing Impact with Strategic Use of Twilight Photos
Using twilight photos strategically in listings can make a huge difference.
These photos should be placed prominently in marketing materials to immediately catch potential buyers’ eyes.
Highlight shots that showcase the home’s exterior lighting and any standout features like pools or gardens.
We should aim to use a mix of daytime and twilight photos to give a complete picture of the property.
Twilight images add a sense of uniqueness and luxury, setting our listings apart from the competition.
By carefully selecting which images to use and where, we can maximize the appeal and impact of our property listings.
Safety and Legal Aspects
When conducting real estate twilight photography, it’s important that we address both safety and legal considerations. This ensures not only a smooth shoot but also compliance with laws and protection for everyone involved.
Given that these shoots occur at dusk, visibility can be low. We must ensure we have proper lighting equipment to prevent any accidents or falls.
Using a tripod on a stable surface can help minimize blurry photos due to low light.
Photographers should wear reflective clothing or use safety vests to stay visible. This is especially important if we are shooting near roads or driveways.
Letting the homeowners and potential buyers know about the shoot schedule can also prevent unexpected interruptions or accidents.
Bringing a first aid kit is also a wise precaution. Minor injuries can happen, and it’s always better to be prepared.
These measures ensure that we can take beautiful photos without compromising on safety.
Understanding the Legal Considerations
Legal aspects in twilight real estate photography are equally important.
First, we must obtain permission from property owners before scheduling a shoot. This avoids any legal disputes and ensures a smooth photography session.
We should also be aware of any local regulations regarding photography, particularly if we plan to use drones for aerial shots.
Many regions have strict rules about drone usage, and we must comply with these to avoid fines or other legal issues.
Finally, photographers should be wary of privacy concerns.
We need to ensure that we do not capture neighboring properties or people without their consent.
Clear communication and written agreements with property owners help safeguard both our interests and those of our clients.
Frequently Asked Questions
Real estate twilight photography offers unique benefits for property listings and can greatly impact the visual appeal and attraction of homes. In this section, we’ll discuss the various aspects and techniques of this photography style.
What are the benefits of using twilight photography in real estate listings?
Twilight photography can make a property stand out from the competition. It highlights exterior and indoor lighting, creating a luxurious and exclusive feel.
These photos can make listings more memorable and appealing to potential buyers by showcasing the property in a striking, visually engaging way.
How does twilight photography impact the presentation of a property?
Twilight images enhance the beauty of a home by capturing the soft, diffused light just before sunset.
This can create a warm and inviting atmosphere, encouraging viewers to explore further.
Photographs taken at this time can emphasize architectural details and highlight landscaping features that may not be as noticeable during the day.
What equipment is essential for capturing high-quality twilight photographs for real estate?
Key equipment includes a DSLR or mirrorless camera with manual settings, a sturdy tripod, and a wide-angle lens.
Additional tools such as remote shutter releases and lighting kits can also be beneficial. These help achieve clarity, stability, and proper lighting to produce professional-quality images.
What is the best time of day to schedule a twilight photography session for a property?
The best time is typically 20-30 minutes after sunset. This period, known as the blue hour, provides optimal lighting conditions.
The sky takes on a deep blue hue that contrasts beautifully with warm interior lights, resulting in visually appealing and balanced photographs.
What professional techniques can be used to enhance twilight photos for real estate marketing?
Proper exposure settings and use of supplementary lighting can ensure the right balance between the natural ambient light and the property’s artificial lights.
Post-processing techniques like color correction and blending multiple exposures can further enhance image quality. This creates a polished, professional look that appeals to buyers.
How can virtual twilight photography be differentiated from traditional twilight photography?
Virtual twilight photography involves post-processing daytime images to mimic the appearance of twilight. This method combines multiple exposures of a property to create a realistic, atmospheric image.
Virtual twilight photos can be a convenient and cost-effective alternative, providing similar visual appeal without the need for an actual twilight shoot.
In today’s bustling real estate market, standing out from the competition is key. This is where the role of professional real estate photography comes into play. High-quality images can capture the essence of a property, showcasing its best features in a way that amateur photos often fail to do.
The investment in professional photography may seem substantial initially, but the benefits it brings can be a game-changer. Crisp, well-lit photos are the first interaction potential buyers have with a listing online, and first impressions matter.
As the real estate industry increasingly moves online, the significance of visual appeal in listings cannot be overstated.
Professional photographers have the skills and equipment necessary to produce compelling images that not only reflect the property’s physical attributes but also evoke emotions that can inspire potential buyers to take action. Choosing a skilled photographer and utilizing advanced marketing strategies to showcase the property can speed up the sales process and potentially increase the sale price.
Quality images are pivotal in fostering buyer interest and engagement.
Strategic investment in professional photography may offer a competitive edge in the real estate market.
The Impact of Professional Real Estate Photography on Sales
Investing in professional real estate photography can significantly affect your sales process, enhancing online visibility and shaping buyers’ perceptions of value right from their first glance.
Enhancing Online Presence and Click-Through Rates
Your online presence is the modern storefront to your listings, and the quality of your photos can make a substantial difference.
Professional real estate photography boosts the aesthetic appeal of your properties, which is directly linked to an increase in click-through rates.
The initial impact of seeing your listing matters. When potential buyers encounter high-quality photography, it sets a positive first impression, bolstering the perceived value of the property.
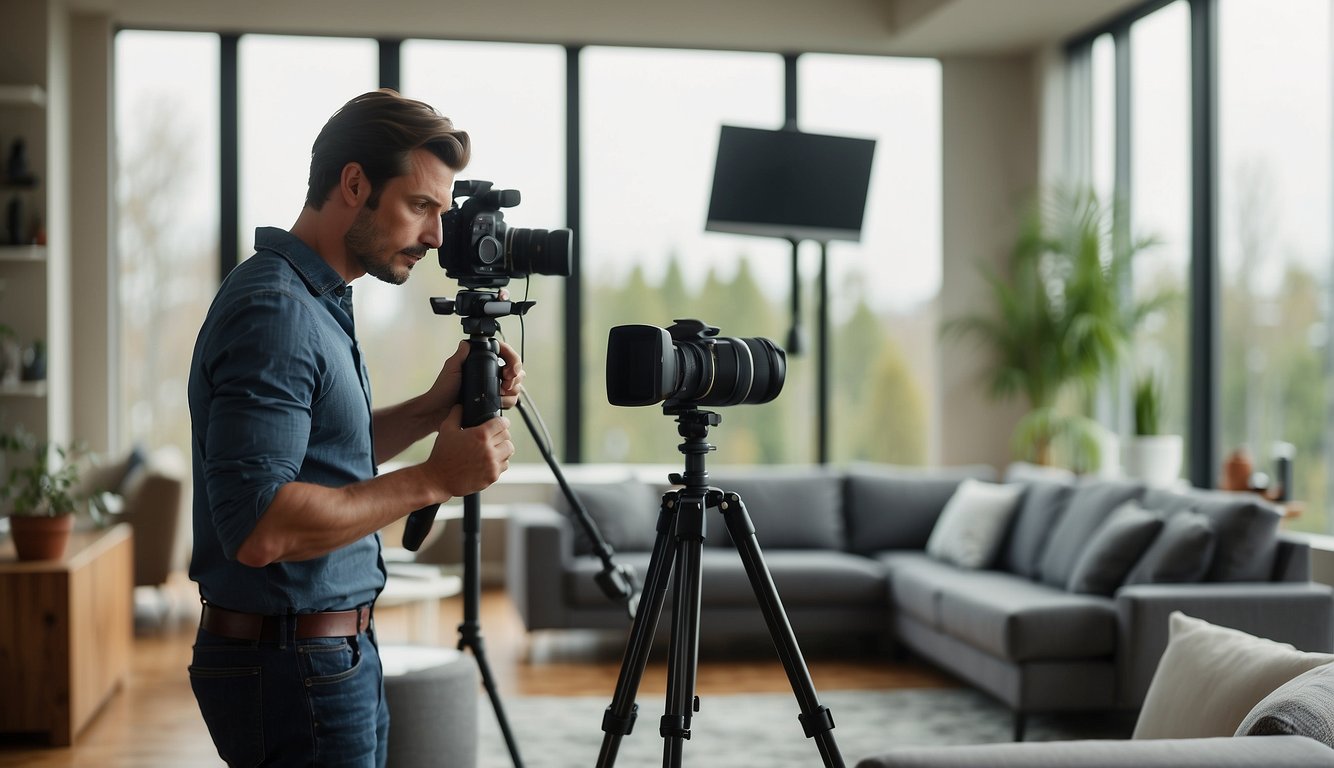
To effectively showcase a property, it is essential to focus on two key aspects: the artistry involved in lighting and composition, and the technicalities such as the camera gear and editing tools.
Importance of Lighting and Composition
Your ability to manipulate lighting and composition directly influences the appeal of real estate photography.
Optimal natural light brings out the textures and colors of a property, making spaces appear larger and more inviting.
Strategic use of light fixtures and flashes can eliminate shadows and highlight a property’s best features.
When it comes to composition, mastering the rule of thirds and understanding the flow of a property allow you to capture photos that tell a story.
A wide angle lens is often used to emphasize space and depth, a crucial technique in real estate photography.
Lighting: Utilize natural light, avoid harsh shadows, and consider the time of day.
Composition: Use the rule of thirds, photograph from the best angles, and showcase key elements of the property.
A full-frame DSLR or mirrorless camera paired with a professional-grade wide angle lens ensures sharp, high-resolution images.
A sturdy tripod is essential for stability, especially in low-light conditions.
A variety of lenses may be needed for different shots—wide angles for full-room views or longer lenses for detail shots.
After capturing images, editing software plays a significant role in enhancing photos.
Programs like Adobe Photoshop or Lightroom can adjust exposure, color, and remove blemishes, ensuring each photo accurately represents the property yet is polished and professional.
Remember, the goal of editing is to improve, not deceive potential buyers.
Camera: A full-frame DSLR/mirrorless, wide angle lens, and various other lenses.
Editing Tools: Use software like Photoshop or Lightroom to enhance the final images.
Choosing a Real Estate Photographer
As you navigate the competitive world of real estate, securing a professional photographer is a strategic investment that can showcase your property effectively.
The right real estate photographer will not only have the necessary experience and skill but also fit within your budget.
Why Hire a Professional Real Estate Photographer?
Why Hire a Professional Real Estate Photographer? Professional real estate photos taken by a professional photographer can help real estate agents and sellers showcase their properties in the best possible way. High-quality photography can help make a property more appealing and attract potential buyers. Homes with professional photos tend to sell faster and for more money, resulting in a higher return on the investment. By investing in quality photography for your listings, you are setting yourself up for success in the real estate market.
When it comes to listings with high-quality photos, buyers and sellers can both benefit from the impact that professional real estate photography brings. Utilizing real estate photography tips can not only help sell properties faster but also for a higher ROI. Check out our blog for more information on the benefits of investing in professional real estate photography.
Evaluating Experience and Portfolio
Review the Photographer’s Past Work: Examine the portfolios of potential photographers to assess their expertise in real estate photography.
Look for a diverse range of properties and the ability to highlight each home’s unique features.
A professional photographer’s portfolio should demonstrate a keen eye for detail and the capability to produce consistently high-quality images.
Assess Skill Level: Skill level is paramount.
You want a photographer whose expertise extends to various lighting conditions and architectural styles.
Pay attention to their use of angles, composition, and the way they capture the essence of the spaces.
The photographer’s ability to evoke a sense of place and atmosphere in their photos is crucial.
Understanding the Price Range and Budget
Establish Your Budget: Before reviewing options, know your budget limits.
Real estate photographer prices can vary widely depending on experience, demand, and the level of service provided.
Price Range Expectations:
Basic Packages typically cover a small number of high-quality images, suitable for smaller listings.
Premium Offers may include additional services like virtual tours or drone photography, essential for showcasing high-end properties.
A clear understanding of the price range helps you make an informed decision without compromising the quality of the real estate photos, which are integral to marketing your property.
Marketing Strategies for Real Estate Photography
Investing in professional real estate photography is more than just capturing stunning images of properties; it’s about effectively marketing your services to enhance your visibility and attract more clients.
Building a Strong Online Portfolio
An impressive online portfolio is your digital storefront. Here are actionable steps to create one:
Select your best work: Include a variety of images that showcase different styles of properties and lighting conditions.
Use a reputable hosting service: Reliability and speed are essential for a professional online presence.
Update regularly: Keep your portfolio fresh with new content to reflect your growing experience.
SEO Optimization: Integrate keywords that potential clients or realtors are likely to search for.
Display testimonials: Positive feedback from past clients adds credibility.
Networking and Personal Brand Development
Developing a strong personal brand is crucial for standing out in the real estate market:
Attend networking events: Engage with realtors and potential clients face-to-face.
Consistency: Ensure your branding is consistent across all forms of communication.
Business cards: High-quality business cards leave a lasting impression.
Effective negotiation: Show your value as a professional photographer to secure better rates.
Strategic email marketing: Use email to stay top of mind with your audience, but keep it concise and professional.
Travel smart: Be prepared to travel to clients, but also maximize your trips for networking opportunities.
Advanced Real Estate Photography Techniques
When investing in professional real estate photography, utilizing high-end techniques can significantly enhance the allure of your properties. These methodologies are not just about snapping attractive photos, but also about capturing a property’s essence in a way that draws potential buyers in.
Utilizing Drones for Aerial Shots
Drones have revolutionized the way aerial shots are captured in real estate photography.
As a professional photographer, incorporating a drone equipped with a wide-angle lens can provide you with stunning overhead views of a property, its land, and the surrounding area.
Ideal weather conditions are crucial for clear, sharp images, so plan your drone photography accordingly.
Not all drones are created equal, so invest in one with a high-resolution camera to ensure your shots of commercial buildings or single-family homes stand out.
Creating Virtual Tours for Properties
Virtual tours empower potential buyers to experience a property from the comfort of their device, enhancing your online presence.
Use professional photography equipment to shoot a sequence of clear, well-illuminated images from various angles.
Specialized software can stitch these images together, creating an immersive virtual tour that can make properties come alive for viewers.
Ensure each virtual tour is seamlessly integrated to provide a realistic walkthrough experience, bridging the gap between online exploration and in-person visits.
Frequently Asked Questions
When exploring the value of professional real estate photography, several key questions are often asked. This section addresses these queries to help you make an informed decision.
What are the expected costs associated with hiring a professional real estate photographer?
Your investment in professional real estate photography can vary widely. Costs can range from a few hundred to over a thousand dollars.
How does professional real estate photography affect sales?
Professional photos are known to attract more buyers by presenting the property in the best possible light. This can lead to accelerated sales as properties get more online views and potential buyer interest.
Can high-quality real estate images significantly impact property sale prices?
High-quality images captured by professionals can increase perceived property value, often leading to higher sale prices. Professional photography creates trust and emphasizes the best features of your property, justifying a higher asking price.
What is the return on investment for professional real estate photography?
The return on investment for professional photography can be considerable. Listings with professional images tend to sell at higher prices and more quickly than those without, which can maximize your net gain from the sale.
Why is it beneficial to use professional photography in real estate listings?
Using professional photography in your listings can improve your real estate business by establishing credibility and professionalism. Quality visuals can lead to an increase in listings and networking opportunities.
What advantages do professionally taken real estate photos offer over amateur shots?
Professionally taken photos offer substantial advantages. These include better composition, lighting, and post-processing techniques.
Professional photographers have the equipment and expertise to showcase properties in their finest light. This makes them more compelling to potential buyers compared to amateur photographs.
Do photos matter on real estate?
Real estate photography can help make all the difference when it comes to selling a property. As a real estate professional, investing in high-quality photos for your listings is worth every penny. Professional pictures can help a property sell faster and at a higher price. It’s worth considering to hire a professional photographer to showcase the property in the best light possible.
When you invest in professional photography services, you’ll be able to stage the property effectively and capture the attention of potential buyers. Low-quality photos can deter buyers from even considering a property, while high-quality photographs can help sell a property quickly. Real estate agents who understand the importance of photography for their listings are more likely to see success in the market.
It is recommended to hire a professional photographer to capture the best angles and lighting, ensuring that the property looks its best in photos. Real estate photography is an essential part of marketing a property, and professional photography services are definitely worth the investment. By showcasing a property with high-quality photos, you can attract more potential buyers and increase the likelihood of a quick sale.
Real estate photography can have a profound impact on the marketability of your property. The visual representation of your home is typically the first impression potential buyers encounter.
By showcasing your home in the best possible light, you attract more interest, which can lead to quicker sales and potentially higher offers.
Investing in skilled real estate photography isn’t just about having pretty pictures; it’s about visually communicating the value of your property to buyers.
Professional photographers understand how to use composition, lighting, and angles to highlight the features that matter most.
A well-executed photoshoot requires meticulous preparation, both in terms of the physical space and the necessary equipment.
Ensuring your home is clean, staged, and photographed with the right tools will capture the attention of potential buyers scrolling through listings.
Key Takeaways
Professional real estate photos can create a compelling first impression.
Expert photography techniques enhance property features and overall appeal.
Professional real estate photography can be a pivotal tool in your marketing strategy, directly impacting how quickly your property sells and the interest it garners from potential homebuyers. Let’s explore how expertly taken photographs enhance your listing.
Enhancing Curb Appeal
Curb appeal is your property’s first impression on potential buyers, often determining whether they’ll take a closer look. Professional photographs capture the attractiveness of your property, accentuating its best features and inviting homebuyers to envision themselves within the space. This can be a decisive factor in making your listing stand out.
Attracting More Homebuyers
High-quality images are a powerful element of your marketing mix, drawing in more homebuyers. Real estate agents understand that a picture is worth more than a thousand words, and when you present your property with professional imagery, you’re likely to attract a higher number of interested buyers, driving up demand.
Boosting Property Value
Crisp, clear, and professional photographs can actually help boost the perceived value of your property. When potential homebuyers see a well-presented listing, they are often willing to consider a higher price point.
Do realtors pay for real estate photography? When it comes to showcasing a property, hiring a real estate photographer is essential. Professional real estate photographers can provide real estate photography tips to help real estate agents best showcase their properties. Just because a photography company is hired, it doesn’t mean the real estate agent will have the best real estate listing photos. Photo editing can make a big difference in how the real estate listings appear. It’s important to hire a photographer who can provide 3D virtual tours, floor plans, and virtual tours to help real estate marketing materials stand out.
One of the key aspects of a successful real estate photo shoot is to focus on the time of day and make sure that exterior photography is done in the best light possible. Overcast sky can actually be beneficial in avoiding harsh shadows and distractions. It’s also important to make sure that the properties look clean and free of clutter, as well as removing any family photos or personal items that could distract potential buyers. Before the photo shoot, it’s important to provide the photographer with a detailed shot list and to communicate with the homeowner about the process.
Key Real Estate Photography Techniques
Effective real estate photography demands mastery of certain techniques that ensure your property is showcased at its best. Understanding these methods can significantly enhance the aesthetic appeal and, consequently, the value perception of your property.
Composition and Framing
When capturing real estate photos, your composition should convey the purpose and feel of each space.
Use the rule of thirds to balance elements and lead the viewer’s eye through the scene. For example, ensure that key features like fireplaces or built-in bookcases are well-positioned within the frame.
Strategic framing can make rooms appear more spacious and inviting.
Natural light is preferred, as it can make spaces appear larger and more welcoming.
Shoot during the golden hours for a warm glow, or on a bright day for clarity and brightness.
When dealing with interior shots, be mindful of exposure settings on your camera to avoid over or underexposed areas, which could obscure important details of the space.
Editing and Post-processing
After taking your shots, editing and post-processing are where you polish the images.
Tools like Photoshop or Lightroom can be used for adjusting the exposure, contrast, and color balance to better reflect the property’s atmosphere.
Subtle retouching can remove unwanted items or imperfections, ensuring the final photographs present the property in the most professional light possible.
Remember, the goal is enhancement, not deception.
The Right Equipment for the Job
In real estate photography, your equipment can make all the difference. Ensuring you have the right tools for capturing spaces is crucial to producing high-quality images that showcase properties in their best light.
Choosing Cameras and Lenses
Your choice of camera should be a DSLR or a digital SLR camera, appreciated for their high-quality images and versatility in lens selection.
This is important for adapting to various lighting situations and room sizes.
A wide-angle lens is indispensable; it captures more of the room and creates a sense of spaciousness, which is essential in real estate photography. An optimal focal length is between 16-35 mm for full-frame cameras.
Utilizing Tripods and Stabilizers
To achieve sharp and clear photos, steady your camera using a tripod.
It’s worth investing in a robust model that can handle the weight of your camera and lens, particularly when employing heavier zoom lenses.
Stability is key for long exposure images and low-light conditions.
Consider a tripod with a sturdy head, preferably a ball-head for flexibility or a geared head for precision in alignment, which is often considered the gold standard for architectural and real estate photography.
Investing in Lighting Tools
Excellent lighting can transform an image. Natural light is preferred, but it’s not always available.
Supplement with artificial lighting as needed; flashes and light stands are essential.
Diffused light works best to illuminate a space evenly and eliminate harsh shadows or highlights.
Multitasking tools like a reflector can help to bounce light into darker areas of a room.
Your lighting setup can range from simple on-camera flashes to elaborate multiple flash systems, depending on the scale and complexity of the shoots.
Preparing Your Property for a Photoshoot
To ensure your property is showcased at its best, attention must be paid to staging, cleanliness, and space optimization. Thorough preparation can dramatically enhance the appeal of your property in the competitive real estate market.
Staging and Decluttering
Staging your home entails arranging furniture and decor to maximize the space’s appeal.
Ensure the living room invites comfort with tasteful furnishings and minimal decor to let the space speak for itself.
In the bedrooms, especially the master bedroom, aim for a neutral color palette and remove personal items to allow potential buyers to envision themselves in the space.
Decluttering is equally important.
Clear kitchen countertops and bathroom vanities, remove magnets from the fridge, and tuck away toys and excess clothes.
Each room should appear spacious and organized, highlighting the property’s features without distraction.
Cleaning and Detailing
Cleaning your home should go beyond the daily routine.
Every surface from the floors to the ceiling lights should be cleaned meticulously, ensuring kitchens and bathrooms shine.
Polishing faucets, mirrors, and windows will make these rooms more inviting and suggest a well-maintained property.
Attention to detail is critical.
Small touches like fluffed pillows, neatly arranged bookshelves, and a set dining table can make a difference. These elements contribute to the lifestyle your property promises.
Optimizing Interior and Exterior Spaces
Take advantage of natural light for interior shots by opening curtains and blinds, which will illuminate the home and create a sense of openness.
Properly placed furniture helps define spaces within the home, making rooms appear larger and more functional.
For exterior shots, your home’s first impression counts.
Maintain landscaping with trimmed hedges and a manicured lawn. Remove any vehicles from the driveway and tidy the yard to ensure a clear view of the property, emphasizing the available outdoor space.
Real Estate Photography Business Essentials
To excel in real estate photography, your business must combine competitive pricing strategies, effective marketing tactics, and comprehensive business management. These factors are critical in establishing your reputation and success in the industry.
Setting Competitive Pricing
When considering real estate photography pricing, you should evaluate both overhead and market rates to set fees that are fair and competitive.
Start by listing your expenses such as equipment costs, transportation, and insurance, and then add a margin for profit.
It’s wise to create a tiered pricing model based on property size or package deals to accommodate various client needs. This allows you to cover small apartments and large estates alike, securing a wider client base.
Standard Package: Includes basic coverage, suitable for small properties.
Premium Package: Offers extended services like aerial shots, especially for large estates.
Ensure your pricing reflects the quality of work you provide and allows you to maintain a sustainable business model.
Marketing Your Photography Services
Your marketing strategy should highlight your strengths and showcase your work to the right audience.
Build a portfolio that exhibits the best of your real estate photography, which you can use on your business cards, website, and social media.
A robust portfolio reassures potential clients of your capability to deliver high-quality visual content.
Immortalize your top projects with descriptions outlining challenges and solutions:
Luxury Property: Showcase upscale amenities with elegant photography.
Commercial Estate: Highlight business-centered features and design.
Networking at real estate events and online communities can also boost your reputation.
Collaborate with real estate agents who can refer your services, and consider joining professional photography associations to increase visibility and credibility.
Managing a Successful Real Estate Photography Business
Keep detailed records of client interactions, agreements, and invoices to ensure smooth operations.
Insurance is also a non-negotiable aspect of your business, protecting you from unexpected liabilities and equipment damage.
Remember to integrate customer feedback into your business model to continuously improve service quality.
Moreover, regular updates to your portfolio, along with a transparent fee structure, can fortify trust and encourage repeat business.
Prioritize delivering exceptional service to every client as your reputation will ultimately be the cornerstone of your success.
Frequently Asked Questions
Real estate photography is critical to showcasing your property effectively. It highlights your home’s best features and can make a significant difference in how quickly it sells and for what price.
Why should I consider professional photography for my property listing?
Professional photography ensures that your property is presented in the best possible light. High-quality images can grab potential buyers’ attention and are more likely to get them to view the listing in detail.
What advantages do professionally taken photos offer in selling a home?
Professionally taken photos offer a realistic and attractive representation of your home, which can attract more buyers and trigger competitive offers. They provide an accurate visual story of your property, emphasizing its strengths.
Can quality real estate photography impact the selling price of a home?
Yes, quality real estate photography can impact the selling price. Homes with professional photographs tend to sell for more, as compelling images can increase perceived value and lead to higher offers.
How can real estate photography influence a buyer’s decision-making process?
Real estate photography can significantly influence a buyer’s decision by highlighting the features of a home in a compelling way. This visual appeal can create emotional connections, making the property more memorable and desirable.
What is the role of real estate photography in online property marketing?
In online property marketing, real estate photography is essential as it is often the first point of contact between the buyer and the property. High-quality photos can increase traffic to the online listing and keep potential buyers engaged.
How does professional photography affect the length of time a property is on the market?
Professional photography can reduce the time a property spends on the market.
Attractive, high-resolution images can lead to faster sales, as they help listings stand out amongst the competition, encouraging quicker buyer interest and action.
In the competitive real estate industry, over 95% of real estate agents have recognized the immense value of professional real estate photography, making it a cornerstone of their marketing strategy [1]. High-quality real estate pictures not only help agents and firms stand out but are also instrumental in creating a powerful first impression online, where clients first encounter properties and the quality of agents’ services [2]. This initial interaction underscores why using professional photography for real estate is more than just a choice; it’s a critical investment in branding and market positioning.
Professional real estate photography goes beyond merely taking pictures; it encompasses a meticulous approach to showcasing properties in the best light possible. From understanding the optimal time for natural lighting to selecting the right angles and post-processing techniques, professional photographers bring out the essence of real estate, thereby elevating property value and enhancing online visibility [1]. A consistent and professional brand image armed with high-quality real estate photos lays a solid foundation for real estate agents, providing them the confidence needed during listing presentations to demonstrate their unparalleled value to potential clients [1].
The Impact of First Impressions
High-quality photography significantly enhances a property’s appeal, capturing the attention of potential buyers within seconds. Professional real estate images that showcase a home in its best light increase the likelihood of clicks and further interest, setting a positive tone from the first glance [3][4]. These photos for real estate highlight unique selling points like hardwood floors or gourmet kitchens, conveying luxury and sophistication that resonate with buyers [4].
Key Factors in Creating Positive First Impressions
Curb Appeal: Enhancing the exterior of the home, including a well-maintained lawn and inviting entryway, plays a crucial role in forming a positive first impression [10].
Quality of Photography: Using skilled property photographer who utilize high-quality equipment ensures that the property is presented in the most flattering light [4].
Emotional Connection: Captivating real estate pictures create an emotional response, helping potential buyers visualize themselves in the home [8][11].
Attention to Detail: Professional images accurately showcase important features and amenities of the property, leaving no room for ambiguity [7].
Strategies for Maximizing First Impressions
Optimal Lighting: Choosing the right time of day and using natural light can dramatically improve the quality of the property photos [5].
Staging and Decor: Neutral decor and strategic staging can make the space more appealing and help buyers imagine their life in the new home [11].
Maintenance and Cleanliness: Addressing minor repairs and ensuring the property is clean and orderly can significantly enhance its attractiveness [10][11].
By focusing on these elements, professional real estate photography can transform the initial viewing experience, increasing the likelihood of a quicker sale and potentially at a higher price [6][12].
Professional Quality vs DIY
Choosing to hire a professional real estate photographer can significantly influence the effectiveness of property market listings. These professionals utilize High Dynamic Range (HDR) photography, which is proven to attract more motivated buyers due to the enhanced visual appeal, thereby expediting the decision-making process [4]. Moreover, real estate agents who invest in professional photography often earn twice as much commission compared to those who do not, highlighting the tangible benefits of professional input [17].
Professional photographers bring a suite of advanced equipment and editing software to the table, which allows them to capture and accentuate a property’s best features. This includes using wide-angle lenses, optimal lighting, and post-production techniques to create images that are not just pictures, but a form of visual storytelling that highlights the unique aspects of each property [6][18][8].
On the other hand, DIY photography, while cost-effective, often cannot match the quality delivered by real estate agent photographer. The limitations of devices like smartphones or basic cameras, especially in challenging lighting conditions, can significantly undermine the visual appeal of real estate listings. Tips for DIY photography such as using natural light, a tripod, and photo editing software can improve outcomes but still fall short of professional standards [19][8].
Ultimately, the choice between professional and DIY photography should consider the potential return on investment. Properties featuring high-quality, professional real estate photos tend to sell faster and at higher prices, particularly in higher price brackets [15][17]. This is due to the professional’s ability to not only capture but also enhance the visual narrative of the property, thereby making it more appealing to potential buyers [16][17].
Enhancing Property Value
High-quality real estate photographs are not just about aesthetics; they significantly influence the financial outcomes of property sales. Listings featuring professional photography close at prices ranging from $934 to $116,076 higher than those with lower quality images [3]. This price elevation is supported by the fact that homes with superior photos command higher asking prices [17]. Moreover, properties showcased through professional photography tend to sell about 50% faster compared to those without, underscoring the efficiency and economic benefits of investing in professional real estate photography [4].
The value enhancement doesn’t stop there. Properties photographed by professionals sell for 47% more per square foot, demonstrating the substantial impact of quality visuals on real estate valuation [21]. This effect is partly due to the emotional connection that well-crafted professional house photos can establish with potential buyers, allowing sellers to justify higher asking prices [22]. For homes priced over $200,000, this can translate to an additional $3,000 to $11,000 in the sale price [2].
The strategic presentation of homes, including staging and maintaining a neat, well-kept appearance, plays a crucial role in attracting buyers and can lead to sales prices that exceed the market average by $11,000 [20][17][16]. Through professional photography, homes not only sell faster but also achieve a higher sale price, enhancing the overall value extracted from the real estate transaction [23][24].
Boosting Online Visibility and Engagement
Boosting Online Visibility and Engagement
In the digital age, real estate marketing strategies must leverage online platforms to reach potential buyers effectively. A staggering 100% of home buyers utilize the internet during their home search, highlighting the crucial role of online visibility [3]. Here are several ways professional real estate photography enhances online engagement:
Increased Inquiries with Video Content: Listings that include video content generate 403% more inquiries, demonstrating the powerful impact of dynamic visual aids in attracting potential buyers [3].
Virtual Tours and Reduced Market Time: Properties featuring virtual tours not only offer an immersive viewing experience but also spend up to 31% less time on the market, speeding up the sales process [3].
Emotional Connections Through High-Quality Photography: High-quality images foster an emotional connection with viewers, making them more likely to envisage living in the property. This emotional engagement is pivotal in converting views into sales [6][22].
Enhanced Brand Visibility for Real Estate Agents: Professional photography elevates a real estate agent’s brand, attracting more potential buyers through compelling marketing materials [21].
Social Media Engagement: Professionally photographed listings attract higher engagement on social media platforms. Utilizing strategic hashtags related to the property and its location can further increase this visibility [7][25].
Geo-Tagging for Targeted Exposure: By geo-tagging images, real estate listings gain additional exposure, attracting leads from specific geographical areas [25].
Effective Calls to Action: Incorporating calls to action in listings encourages potential buyers to engage further, whether it’s inquiring about a property or scheduling a viewing [25].
Comprehensive Digital Marketing Tools: Real estate listings are enhanced by a variety of tools such as drone services, 3D tours, and virtual staging, which provide a richer, more detailed view of the property [25].
SEO Benefits of High-Quality Images: Search engines prioritize high-quality images, making them an integral component of SEO strategies for real estate listings, thereby improving the overall online visibility of the properties [24].
These strategies, when combined with professional real estate photography, not only boost the visibility of listings but also significantly enhance online engagement, ultimately leading to quicker sales and higher satisfaction rates among buyers.
Faster Sales Process
Faster Sales Process
Reduced Market Time: Real estate listings featuring professional photography spend significantly fewer days on the market, averaging 89 days compared to 123 days for listings with standard photos [3].
Aerial Photography Advantage: Listings that include aerial photographs sell 68% faster than those with only standard images, providing a broader and more appealing perspective of the property [3].
Impact of Virtual Tours: A significant 63% of homebuyers in 2020 made offers on properties based solely on the virtual tours available, illustrating the powerful influence of immersive visual content [3].
Enhanced Visuals for Faster Sales: Homes showcased with professional real estate photography can sell as much as 32% faster than those without such high-quality visuals, underscoring the importance of professional imagery in the sales process [2].
Simplifying Buyer Decisions: High-quality real estate photos streamline the home buying process for busy buyers by allowing them to effectively assess and narrow down their options online [2].
Quicker Transactions: Homes that are professionally photographed have been shown to sell 21 days faster than those without professional photography, highlighting the direct impact on sales timelines [23].
Conclusion
Throughout this discussion, we’ve illuminated the undeniable value that professional real estate photography brings to the table, from catalyzing quicker sales to enhancing property values and strengthening online engagement. The evidence is clear: investing in high-quality imagery is not merely an aesthetic choice but a strategic business decision that can significantly impact the seller’s bottom line and the buyer’s experience. By leveraging the skills of professional photographers, real estate agents can elevate their listings above the competition, creating compelling visual narratives that resonate with prospective buyers and facilitate a faster, more profitable sales process.
As we’ve seen, the benefits of professional real estate photography extend far beyond simply making properties look attractive. It is about crafting an emotional connection, enhancing the perceived value of the property, and strategically positioning listings to capture maximum attention in a crowded digital marketplace. For sellers and agents looking to achieve optimal outcomes in their real estate ventures, the choice is clear: professional real estate photography is an essential component of effective marketing strategy. By understanding and utilizing this powerful tool, stakeholders can not only expedite sales but also maximize investment returns, highlighting the transformative role of professional photography in the real estate industry.
FAQs
Q: What is the significance of professional photography in the real estate market?
A: Professional photography is critical in real estate as it presents the property in the most flattering manner, enhancing its appeal to prospective buyers. It also reflects the listing agent’s commitment to quality and can significantly influence a buyer’s perception of both the property and the seller’s dedication.
Q: Can professional photographs impact the sale of a home?
A: Yes, professional photographs are a decisive factor for home sales. Statistics show that 84% of homebuyers are likely to dismiss a listing if it lacks photographs. Additionally, homes with professional photos can command up to 47% more in terms of asking price per square foot, indicating a substantial financial benefit for sellers.
Q: How do homes with professional photographs tend to sell more quickly?
A: Professional photographs are likely to garner more clicks and interest from potential buyers when posted online, potentially doubling the visibility of the listing. The immediate positive impression created by high-quality images can lead to more inquiries, a faster sale, and even an increase in referrals for the seller or agent.
Q: Are photographs important in real estate listings?
A: Absolutely, photographs are a key element in real estate listings. They are the first point of contact for potential buyers or renters and play a pivotal role in drawing attention to the property. Typically, these images are captured by professional photographers who specialize in real estate, ensuring that the property is showcased to its best advantage.