Real Estate Twilight Photography: Capturing Properties in Magical Light
Twilight real estate photography can make a property look stunning and inviting. The unique lighting during twilight minimizes harsh shadows, creating a warm, soft ambiance that enhances a property’s features.
Using twilight photography can help a property stand out in a crowded market by making it more visually appealing.

When we photograph homes at twilight, we capture the perfect balance between natural and artificial light. This blend highlights the property’s exterior features, such as patios, decks, and pools.
The result is a series of photographs that are both elegant and enticing, encouraging potential buyers to envision themselves living in the space.
Key Takeaways
- Twilight photography makes properties look more attractive.
- Proper planning and equipment are crucial for successful shoots.
- Combined natural and artificial light highlights key features.
Understanding Twilight Photography
Twilight photography captures properties during the brief period after sunset or just before sunrise to create an inviting and unique atmosphere. This imaging technique helps real estate listings stand out and make a lasting impression on potential buyers.
The Magic of Twilight in Real Estate
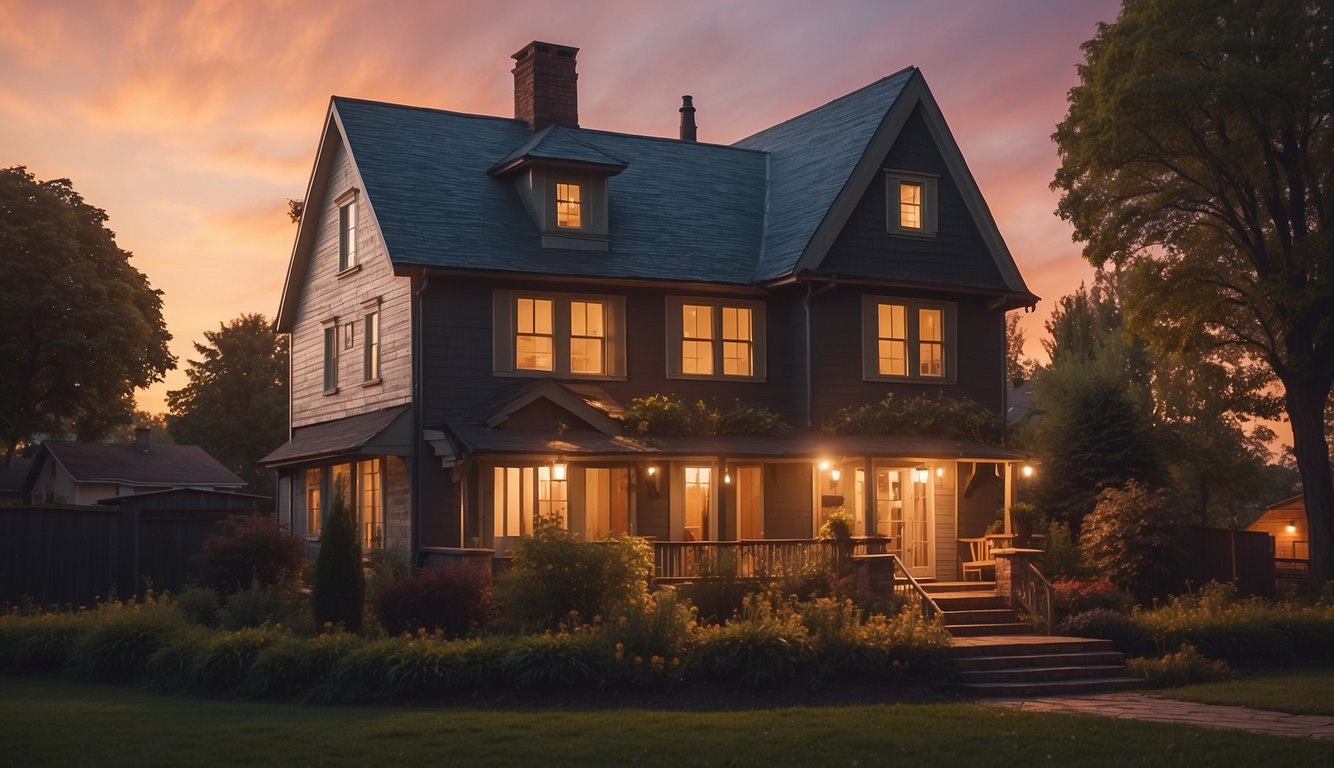
Twilight, also known as the golden hour, transforms ordinary scenes into breathtaking views. As the sun dips below the horizon, the sky takes on a mix of deep blues, purples, and oranges, creating a soft, ambient light that casts an inviting glow on properties.
This magical timing can make a home look warm and welcoming, adding an emotional appeal that daytime shots often lack.
Twilight photos highlight the exterior lighting of the property, making it appear more luxurious and well-maintained. This aesthetic is crucial for high-end listings and homes looking to make a strong first impression.
Defining Twilight for Photography Purposes
Twilight for photography purposes typically spans the period shortly after sunset or just before sunrise. During this time, the ambient light is soft and even, which minimizes harsh shadows and contrasts that can be problematic in other lighting conditions.
We aim to take advantage of this window to capture the property’s full potential.
To achieve the best results, we need to be prepared and set up our equipment beforehand.
This includes adjusting camera settings to utilize the available natural light effectively. Being well-prepared ensures that we can make the most of this short-lived but highly rewarding time frame.
Benefits of Twilight Photography in Real Estate Listings
Twilight photography offers several notable benefits for real estate listings. First, it enhances the property’s visual appeal by showcasing its exterior lighting and landscaping in a flattering way. This can create a more inviting and luxurious appearance, attracting more potential buyers.
Second, twilight photos can eliminate the harsh shadows and high contrasts present in daytime photography. Softer lighting creates a harmonious and balanced look, which makes the property more pleasing to the eye.
Finally, twilight photography helps our listings stand out from the competition. As many real estate photos are taken during the day, twilight images provide a unique and memorable perspective that can leave a lasting impression on viewers.
This differentiation can be the key to capturing the interest of serious buyers.
Preparation for a Twilight Shoot
Preparing for a twilight real estate shoot involves several important steps. These include property scouting, understanding weather and lighting conditions, setting up interior and exterior lighting, and planning for the golden hour.
Scouting the Property
Before the shoot, it’s crucial to scout the property. We need to identify key areas like the garden, patio, or any unique architectural features.
This helps us decide the best angles and compositions. Walking around the property allows us to visualize how natural light will change as the sun sets.
We should also note any potential obstacles, such as overgrown plants or clutter, which might need to be addressed before we start shooting.
Understanding Weather and Lighting Conditions
Checking the weather forecast is vital for a twilight shoot. Ideal weather includes clear skies with minimal clouds to enhance the colors of the sunset.
We also need to monitor the temperature since it affects the comfort and performance of our equipment. Observing the sunset time is key, as it guides our schedule to capture the golden hour’s perfect lighting.
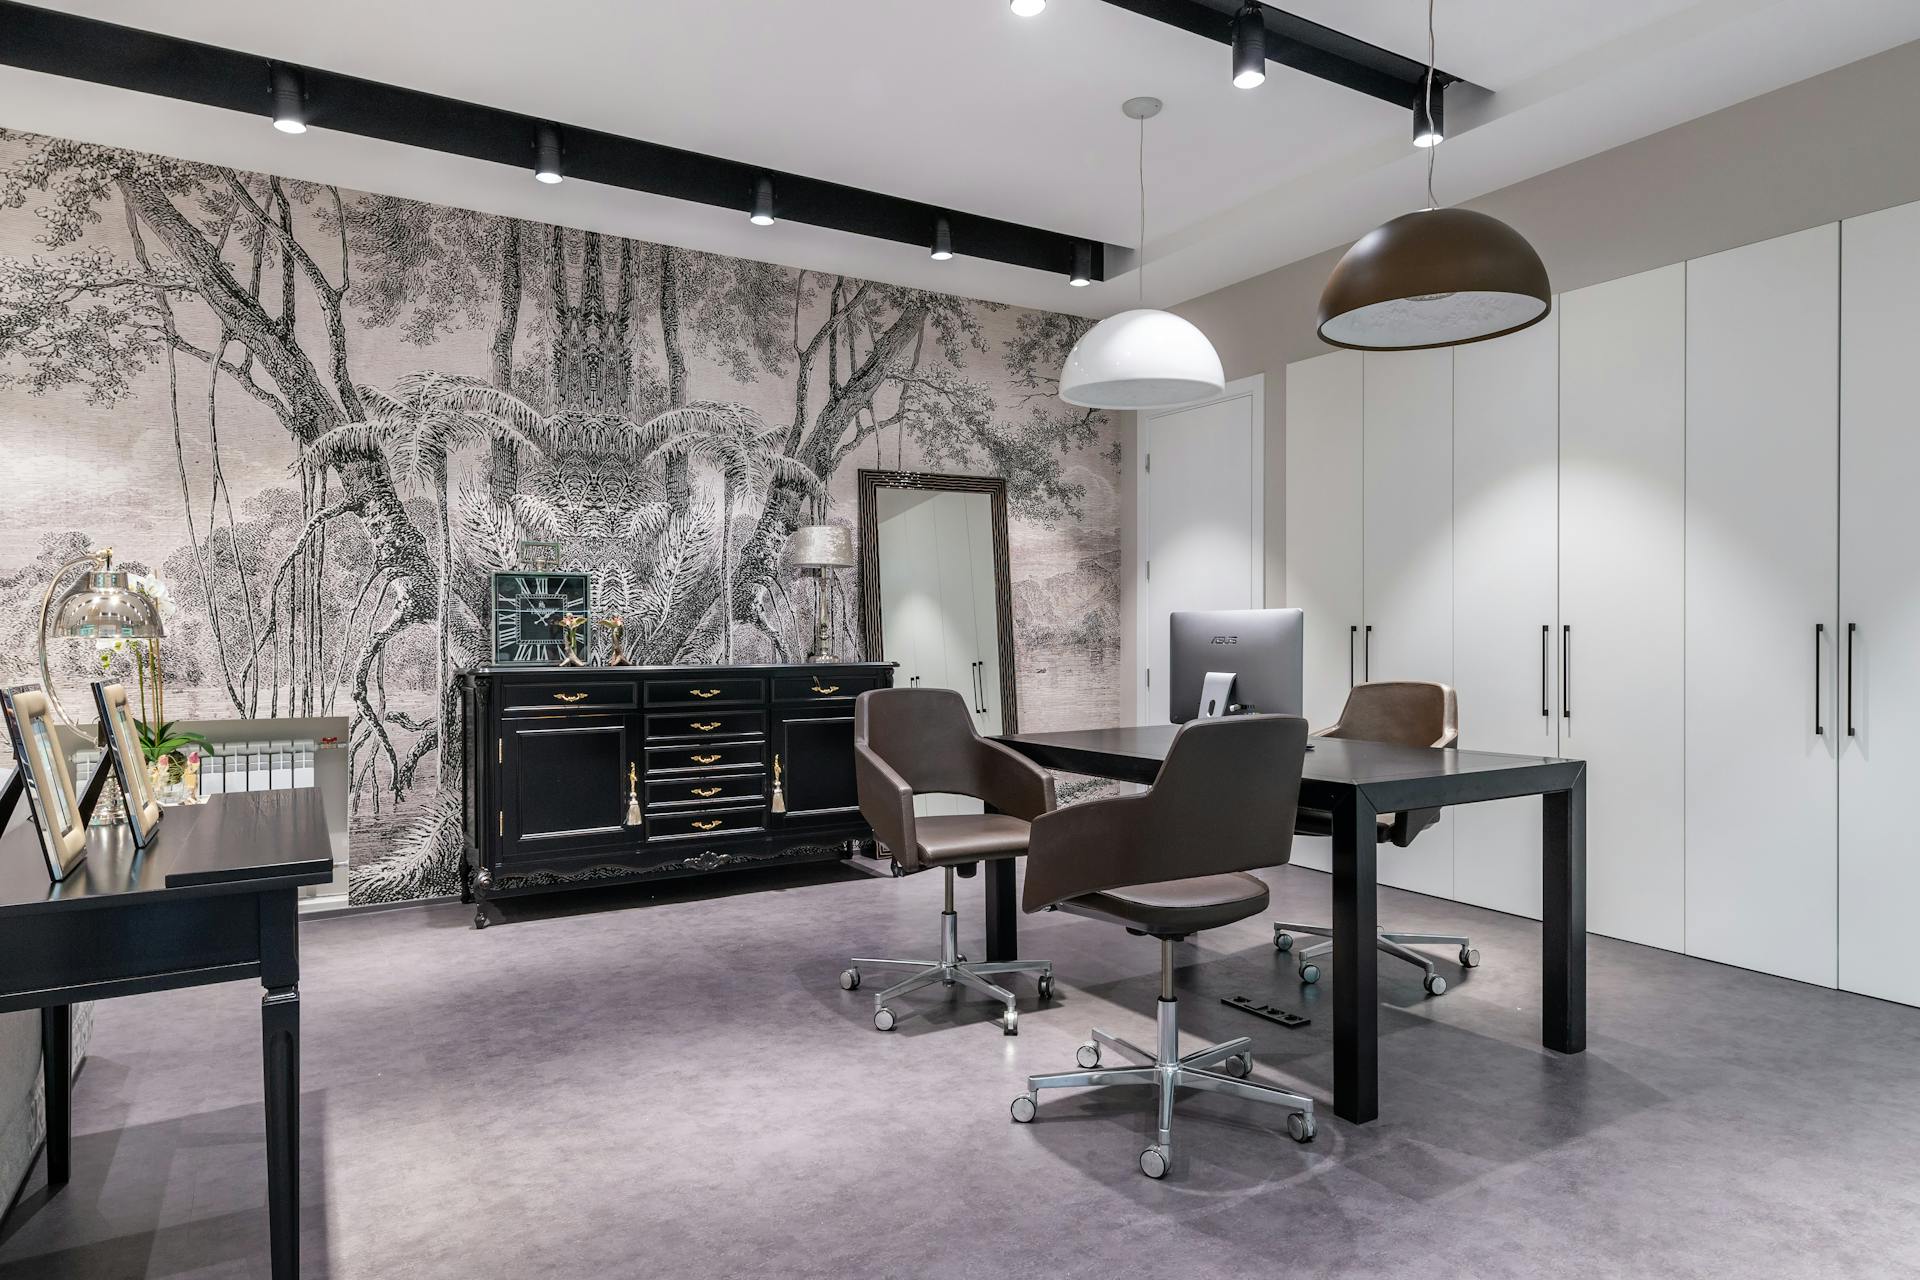
Setting Up Interior and Exterior Lighting
Proper lighting setup is essential.
We should ensure all interior lights, including lamps and ceiling fixtures, are turned on to create a warm and welcoming atmosphere inside.
For the exterior, it’s important to check that garden lights, patio lights, and other outdoor fixtures are working.
We might use additional lighting, such as camera flashes or continuous lights, to balance the exposure and minimize shadows.
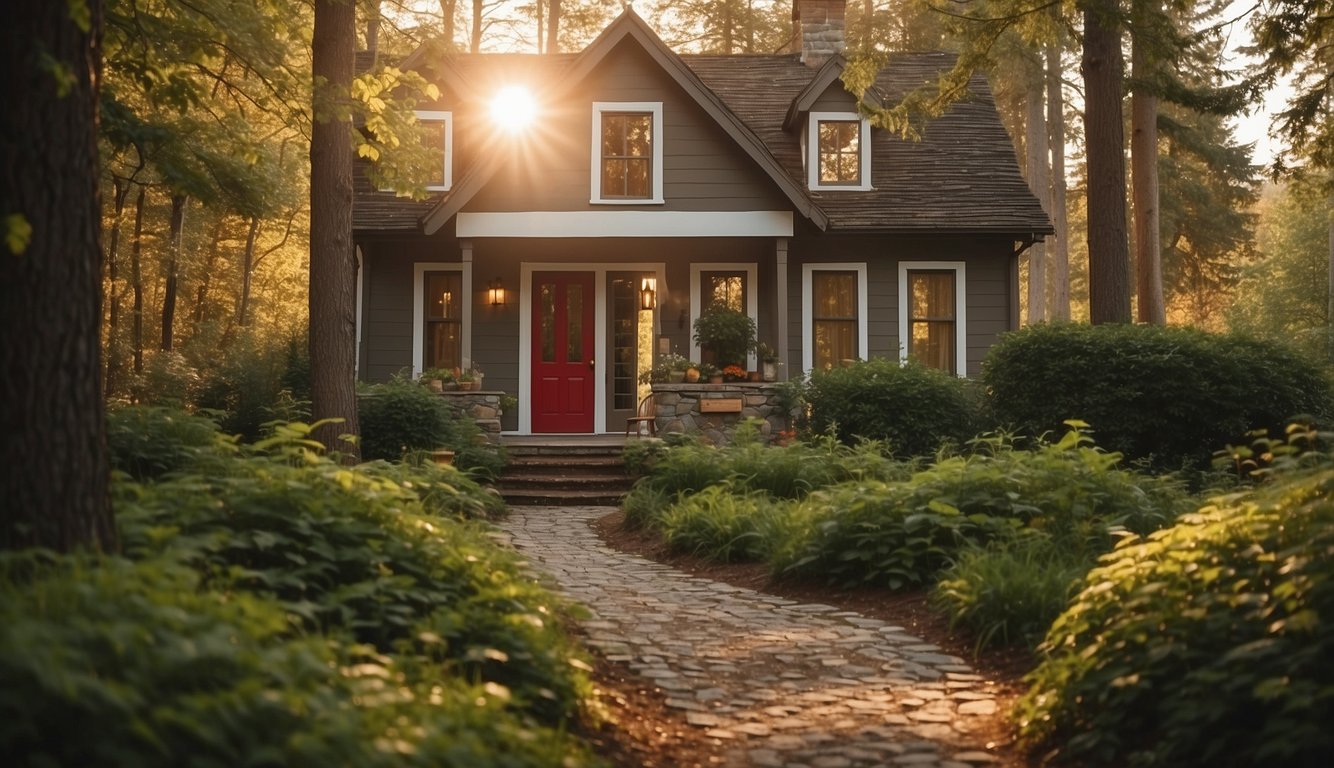
Planning for the Golden Hour
The golden hour, occurring shortly after sunset, provides the best lighting for twilight photography.
We need to plan our shots to maximize this brief period of soft, even light. Setting up our cameras on tripods in advance ensures stability and allows us to capture multiple exposures.
Using a timer or remote control can help eliminate camera shake, resulting in sharper images.
Camera Gear and Settings
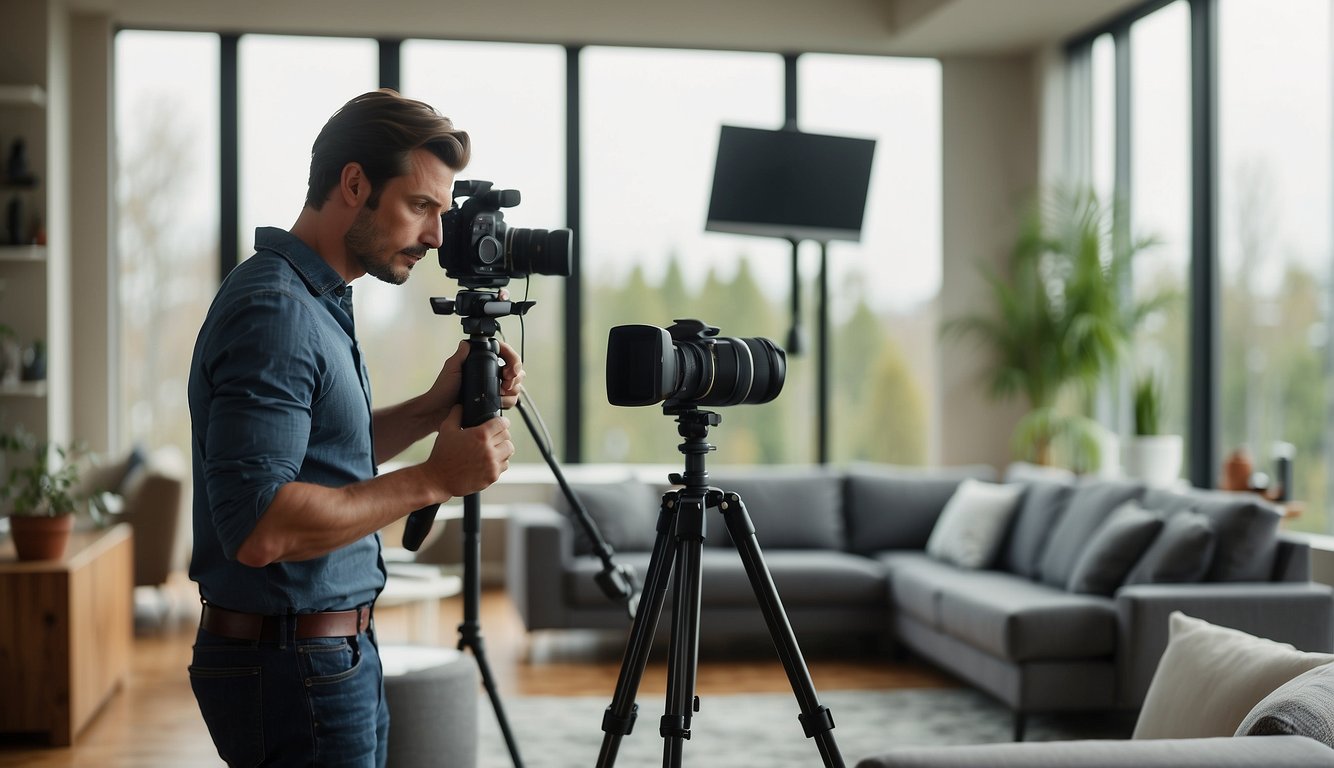
In twilight real estate photography, the right equipment and settings make all the difference. We need to choose the best camera and lens, use appropriate settings, and ensure stability with a tripod.
Choosing the Right Camera and Lens
For twilight shots, a camera with excellent low-light performance is essential. We recommend using a DSLR or mirrorless camera with a full-frame sensor to capture more light and detail.
A wide-angle lens, such as a 16-35mm or 24-70mm, is also ideal.
These lenses allow us to capture more of the property and highlight its features.
A lens with a wide aperture, like f/2.8, is beneficial for letting in more light and reducing noise in low-light conditions.
Important Camera Settings for Twilight Shots
Setting the ISO between 400-1600 helps in capturing clear twilight images without excessive noise.
Adjusting the aperture to a small value like f/13 ensures a broader depth of field, keeping both foreground and background in focus.
The shutter speed should be slow enough to allow proper exposure. Using an HDR technique can help balance the light differences between the twilight sky and the darker areas of the property.
This involves taking multiple shots at different exposures and combining them for the best result.
Using a Tripod to Ensure Stability
A tripod is crucial for shooting in low light. It keeps the camera steady, which is essential when using slow shutter speeds.
We should place the tripod on an even and stable surface to avoid camera shake.
Using a timer or a camera remote can further minimize shake.
This is particularly useful for long exposure shots where the slightest movement can blur the image.
It’s also helpful to use a tripod with adjustable legs to adapt to uneven surfaces often found around properties.
Composition and Shooting Techniques
When we’re composing and shooting for real estate twilight photography, paying attention to framing, lighting, and unique property features is essential.
We must effectively mix natural and artificial light, highlight the property’s best angles, and capture its unique characteristics.
Framing the Perfect Twilight Shot
Good composition in twilight photography helps bring out the best in a property.
We start by choosing angles that emphasize the house’s architecture and landscaping. To create depth, we include elements like trees, pathways, or fences in the foreground.
Using the rule of thirds is helpful. We align the property so it’s off-center, creating a balanced look.
Enhancing the property’s appeal involves capturing reflections on windows and considering symmetry. This makes our photos more interesting and dynamic.
Working with Natural and Artificial Light
Lighting is critical in twilight photography. We typically shoot during the “blue hour” when the sky glows softly. This light adds a dramatic and inviting feel to our photos.
We watch how shadows fall and avoid harsh contrasts by planning the shoot angles.
We also utilize artificial light to enhance the property’s appeal.
Outdoor lighting, like porch lights and landscape lighting, adds warmth and highlights features of the home.
Adjusting our camera settings, such as longer exposures, ensures we capture the warmth and detail in both natural and artificial lights beautifully.
Post-Processing Twilight Photos
Editing twilight photos requires attention to detail to enhance the colors, balance the exposure, and remove any distractions that may detract from the property’s appeal.
Editing for Color Balance and Temperature
Balancing colors and temperature is crucial when working with twilight photos.
We start by using software like Photoshop or Lightroom to adjust the color balance to ensure the sky and property lighting look realistic.
A warm color temperature adds a cozy feel, while cooler tones can enhance the twilight effect.
It’s vital to adjust the white balance to match the lighting conditions, which can range from the blue of the twilight sky to the yellow glow of indoor lights.
Color correction tools help in achieving the right balance between natural and artificial light.
Advanced Techniques: HDR Editing and Layer Masks
For more advanced edits, HDR (High Dynamic Range) editing and layer masks are indispensable tools.
HDR editing combines multiple exposures to create a single image with a higher dynamic range, capturing details in both shadows and highlights.
We typically use Photoshop to merge layers by placing the brightest exposure on top, followed by medium, then dark.
This method allows us to fine-tune different parts of the image separately.
Using layer masks, we can blend different exposures seamlessly, ensuring natural transitions between highlights and shadows.
This technique helps in enhancing the depth and mood of twilight images.
Removing Unwanted Elements and Enhancing Details
To perfect the final image, removing unwanted elements and enhancing essential details is essential.
Tools like the clone stamp and healing brush in Photoshop are effective for removing clutter, glare, and distractions from windows.
We also focus on window masking to ensure interior lights look natural.
Enhancing details involves sharpening edges, correcting lines and angles, and adjusting the overall tone to highlight the property’s best features.
An effective post-processing session can transform an ordinary photo into a captivating twilight scene, making the property stand out. If using a real estate photo editing service, ensure they follow these steps to achieve the best results.
Utilizing Twilight Photos in Real Estate Marketing
Twilight photos can make a property stand out by highlighting its unique charm and creating a luxurious feel. They play an essential role in marketing, enhancing online presence and physical collateral, and driving property sales.
Creating an Impactful Online Presence
We can use twilight photos to elevate our real estate listings, making them more attractive to potential buyers.
These photos offer a unique perspective, showing well-lit exteriors against a darkening sky. This contrast captures attention and makes our listings more memorable.
In our online marketing efforts, such as single property websites and photographer websites, twilight photos can enhance the visual appeal.
When combined with virtual staging and virtual house tours, they create an engaging experience.
High-quality twilight photos help us achieve higher visibility on real estate platforms.
Incorporating Twilight Photography in Collateral
In addition to online use, twilight photos are valuable for physical marketing materials.
We can integrate them into property flyers, brochures, and house portraits. The warm tones and soft lighting of these images make them visually appealing.
When creating physical collateral, the goal is to showcase the property in the best light.
Twilight real estate photography does just that by emphasizing the beauty of both the interior and exterior lighting. By including these photos in printed materials, we create a lasting impression on potential buyers.
The Role of Twilight Photos in Property Sales
Twilight photos are not just about aesthetics; they can also impact property sales.
Listings featuring well-executed twilight photos often attract more interest, leading to higher prices and faster sales. The inviting glow and luxurious feel create a sense of urgency.
For real estate professionals, it is important to collaborate with skilled photographers knowledgeable in twilight photography.
Attention to details like color correction and proper timing ensures the photos are effective.
Video editing can also enhance the presentation, making the property stand out even more in virtual tours.
The strategic use of twilight photos boosts our marketing efforts and ultimately helps close deals faster.
Tips for Real Estate Professionals
Real estate twilight photography can significantly elevate a property listing, making it stand out and attract potential buyers. Let’s explore how to choose the right photographer, manage the shoot schedule, and strategically use twilight photos.
Choosing the Right Photographer
Selecting a skilled photographer is crucial.
We need someone with experience in twilight real estate photography. Look at their portfolio to ensure they can capture properties beautifully during twilight hours, using proper lighting techniques and angles.
It’s also beneficial if they bring the right gear, such as tripods and camera remotes, to avoid shaky images.
We should ask for references from other realtors.
This will help us gauge whether the photographer is reliable and meets deadlines efficiently.
A good photographer will understand how to highlight a property’s best features in twilight, creating an inviting and luxurious feel.
Scheduling Shoots and Managing Timeline
Timing is key in twilight photography.
We should book the shoot when the sun is setting, typically about 20-30 minutes after sunset, to capture the best light.
Align the shoot with clear weather forecasts to avoid rain or heavy clouds that can dull the photos.
Coordinate closely with the photographer to ensure everything is ready on time.
This includes making sure the property is prepped with all indoor and outdoor lights on.
We should also communicate any specific shots we need, allowing the photographer to plan their time efficiently.
Maximizing Impact with Strategic Use of Twilight Photos
Using twilight photos strategically in listings can make a huge difference.
These photos should be placed prominently in marketing materials to immediately catch potential buyers’ eyes.
Highlight shots that showcase the home’s exterior lighting and any standout features like pools or gardens.
We should aim to use a mix of daytime and twilight photos to give a complete picture of the property.
Twilight images add a sense of uniqueness and luxury, setting our listings apart from the competition.
By carefully selecting which images to use and where, we can maximize the appeal and impact of our property listings.
Safety and Legal Aspects

When conducting real estate twilight photography, it’s important that we address both safety and legal considerations. This ensures not only a smooth shoot but also compliance with laws and protection for everyone involved.
Ensuring Safety During Twilight Shoots
Safety is a top priority during twilight photo shoots.
Given that these shoots occur at dusk, visibility can be low. We must ensure we have proper lighting equipment to prevent any accidents or falls.
Using a tripod on a stable surface can help minimize blurry photos due to low light.
Photographers should wear reflective clothing or use safety vests to stay visible. This is especially important if we are shooting near roads or driveways.
Letting the homeowners and potential buyers know about the shoot schedule can also prevent unexpected interruptions or accidents.
Bringing a first aid kit is also a wise precaution. Minor injuries can happen, and it’s always better to be prepared.
These measures ensure that we can take beautiful photos without compromising on safety.
Understanding the Legal Considerations
Legal aspects in twilight real estate photography are equally important.
First, we must obtain permission from property owners before scheduling a shoot. This avoids any legal disputes and ensures a smooth photography session.
We should also be aware of any local regulations regarding photography, particularly if we plan to use drones for aerial shots.
Many regions have strict rules about drone usage, and we must comply with these to avoid fines or other legal issues.
Finally, photographers should be wary of privacy concerns.
We need to ensure that we do not capture neighboring properties or people without their consent.
Clear communication and written agreements with property owners help safeguard both our interests and those of our clients.
Frequently Asked Questions
Real estate twilight photography offers unique benefits for property listings and can greatly impact the visual appeal and attraction of homes. In this section, we’ll discuss the various aspects and techniques of this photography style.
What are the benefits of using twilight photography in real estate listings?
Twilight photography can make a property stand out from the competition. It highlights exterior and indoor lighting, creating a luxurious and exclusive feel.
These photos can make listings more memorable and appealing to potential buyers by showcasing the property in a striking, visually engaging way.
How does twilight photography impact the presentation of a property?
Twilight images enhance the beauty of a home by capturing the soft, diffused light just before sunset.
This can create a warm and inviting atmosphere, encouraging viewers to explore further.
Photographs taken at this time can emphasize architectural details and highlight landscaping features that may not be as noticeable during the day.
What equipment is essential for capturing high-quality twilight photographs for real estate?
Key equipment includes a DSLR or mirrorless camera with manual settings, a sturdy tripod, and a wide-angle lens.
Additional tools such as remote shutter releases and lighting kits can also be beneficial. These help achieve clarity, stability, and proper lighting to produce professional-quality images.
What is the best time of day to schedule a twilight photography session for a property?
The best time is typically 20-30 minutes after sunset. This period, known as the blue hour, provides optimal lighting conditions.
The sky takes on a deep blue hue that contrasts beautifully with warm interior lights, resulting in visually appealing and balanced photographs.
What professional techniques can be used to enhance twilight photos for real estate marketing?
Proper exposure settings and use of supplementary lighting can ensure the right balance between the natural ambient light and the property’s artificial lights.
Post-processing techniques like color correction and blending multiple exposures can further enhance image quality. This creates a polished, professional look that appeals to buyers.
How can virtual twilight photography be differentiated from traditional twilight photography?
Virtual twilight photography involves post-processing daytime images to mimic the appearance of twilight. This method combines multiple exposures of a property to create a realistic, atmospheric image.
Virtual twilight photos can be a convenient and cost-effective alternative, providing similar visual appeal without the need for an actual twilight shoot.


 by Marcella Marcella (https://unsplash.com/@celle_a_belle)
 by Damian Zaleski (https://unsplash.com/@zal3wa)
 by Milad Fakurian (https://unsplash.com/@fakurian)
 by Catherine Avak (https://unsplash.com/@catherine_avak)
 by Kari Shea (https://unsplash.com/@karishea)
 by Sebastian Pichler (https://unsplash.com/@pichler_sebastian)